I have a few brownie recipes bookmarked, and thought I'd start with something simple which I was guaranteed to have all the ingredients in my pantry. So, this recipe won out. I believe it's a Martha Stewart recipe. The brownies are very chocolately without being overwhelming. They're dense and cakey. While not being the classic fudgey, gooey brownies, these would be absolutely amazing cut up into little cubes and mixed with vanilla ice cream. I wish I had some vanilla ice cream.
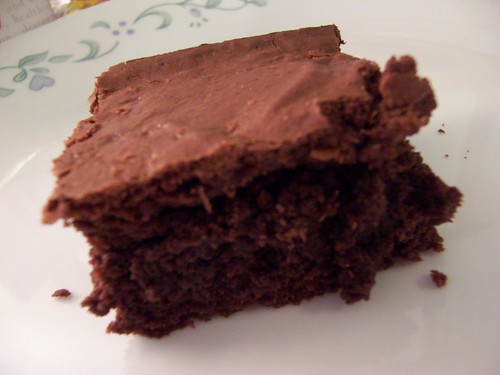
Double Chocolate Brownies
- 6 tbsp butter, coarsely chopped
- 6 oz semi-sweet chocolate, coarsely chopped (I used 4 oz semisweet, 2 oz bittersweet)
- 1/4 cup cocoa powder
- 3/4 cup flour
- 1/4 tsp baking powder
- 1/4 tsp salt
- 1 cup sugar
- 2 large eggs
- 2 tsp vanilla extract
Preheat oven to 350F. Prepare an 8x8 baking dish. The recipe calls for you to butter the pan, line it with parchment paper, then butter the parchment paper. I skipped the paper and just sprayed the dish with a cooking spray. *
Melt together the butter, chocolate, and cocoa powder. You can choose to do this over a double-boiler or in the microwave. I always opt for the microwave. If microwaving, just heat it up in 30 second increments, stirring after each session. Let cook slightly.
In a separate bowl, whisk together flour, baking powder, and salt. Set aside.
Using a mixer if you have one, beat together sugar, eggs, and vanilla until light and fluffy. This will take approximately 4 minutes. Add the chocolate and mix until combined. Lower the speed and beat in the flour mixture.
Pour mixture into prepped pan and spread evenly. Bake approximately 35 minutes. Cool completely.
* A note on prepping the pan: The purpose of the parchment paper is to allow for easy removal of the brownies from the pan. This comes in handy if you'd like to cut up the brownies before serving them. it makes for easier and nicer squares. But I'm bringing these brownies to work, so keeping them in the pan is handy in a couple of ways. First off, my pan has a lid, which makes transportation very easy. Also, everyone's going to make a different size brownie, so I like to let them cut whatever size they want. If I were having a party, I'd go for the easy removal method.