Wednesday, September 29, 2010

White Turkey Chili

I wish I could say I made this chili with this cold front that has come in (lows in the 60s, high in the 80s), but I can't.  I made it a few weeks ago, while it was still blisteringly hot outside.  But everyone has that odd "it's not the right time of year for this!!" craving.  Watermelon on Christmas Eve, chili in the middle of the summer.  It happens to us all.  

Now, my family is very much a tomato-beef chili kind of clan.  I've had turkey chili once before and it was served to me by a healthnut professor of mine.  But I need to expand my regular food repertoire,  so I took a shot at White Turkey Chili.  


White Turkey Chili
  • olive oil
  • 1 lb ground turkey
  •  1 large onion, coarsely chopped
  • 2 cloves garlic, minced
  • 2 cups vegetable stock
  • 1 cup chicken stock
  • 1 tbsp dried marjoram
  • 1 tsp ground cumin
  • 1 tsp ground coriander
  • salt and pepper to taste
  • 1 can cannellini beans, drained and thoroughly rinsed
  • 1 can fava beans, drained and thoroughly rinsed
(I experimented with my herbs/spices and you should too!)

In a large pot, heat enough olive oil to lightly coat the bottom of the pan.  Brown the turkey, stirring frequently to break it up.   Add the onion.  Cover and cook over medium heat, stirring frequently, until onions are tender.  Stir in marjoram, cumin, coriander, salt and pepper.  

Pour in vegetable and chicken stock.  Bring to a boil then reduce to a simmer and cover.  Twenty minutes prior to serving, stir in the beans.  

Serve topped with shredded cheese.  

Monday, September 27, 2010

September 2010 Daring Bakers' Challenge : Decorated Sugar Cookies

The September 2010 Daring Bakers’ challenge was hosted by Mandy of “What the Fruitcake?!” Mandy challenged everyone to make Decorated Sugar Cookies based on recipes from Peggy Porschen and The Joy of Baking.

 This challenge used a specific technique of icing called flooding.  Basically, you use royal icing of a specific consistency (methinks mine was a tad too thick), outline your icing area, and then fill it in with more icing.  The border keeps the icing from going everywhere.  You can do a lot of neat things (I experimented with my last few cookies, but the photographs didn't come out).  You can blend and meld colors or you can layer different designs.

A fun aspect of this challenge was that you needed to choose a theme that represented September for you.  I originally planned to do something focusing on hubby's birthday (September 8), but all this month I've anxiously anticipated autumn, so  I created the color-changing leaves I miss from Iowa.  (In Louisiana, the leaves are green one day and dead on the ground the next.)

I can't wait to play around with this technique some more as the holidays progress!

Friday, September 24, 2010

Luci's Homemade Sloppy Joes

Sorry I didn't post yesterday; I have been very confused about day of the week for the past two weeks.  I spent all of Tuesday thinking it was Wednesday, then all of Wednesday thinking it was Tuesday.  Thankfully, I know today is Thursday and tomorrow is glorious, wonderful, workweek-ending Friday.

The upcoming story speaks volumes of my upbringing, I believe.... Tuesday night, I asked hubby what he wanted for dinner.  He wanted sloppy joes.  I replied that we had no Manwich (with a little glee in my heart) and thus thought the discussion on sloppy joes was over.  But it was not, because, my friends, you can make sloppy joes from scratch! I never even considered the possibility until hubby mentioned his friend, Luci, had recently made homemade sloppy joes.  Growing up, we NEVER had sloppy joes at home (or meatloaf and a few other classic Americana foods) because my mom is weird about meat.   Life story aside; I made sloppy joes (even though hubby said he would, because after putting the meat on, he remembered homework [was I like that as a student? probably worse]).


 Now Luci, I didn't follow the recipe exactly.  Our printer was dreadfully out of ink, so I just got the ingredients printed off and sort of went with my gut.  Please forgive.

Sloppy Joes


(original recipe from Luci's Tasty Adventures)
  • 1 lb Ground beef, broken up into small pieces 
  • 1 celery rib, finely chopped (omitted as we hate celery)
  • 1 yellow onion, finely chopped (I coarsely chopped)
  • ½ green bell pepper, finely chopped (I coarsely chopped)
  • 2 cloves of garlic, minced
  • 3 tbsp brown sugar
  • 1 tbsp worcestershire sauce
  • 1 tbsp cider vinegar
  • 1 15 ounce can of tomato sauce
  • kosher salt
  • freshly ground pepper
  • ¼ cup ketchup (optional) (we opted out)
What I did:

Brown the meat in a medium skillet or pot until thoroughly cooked.  Stir frequently to thoroughly break up/crumble the meat.  Add in onion, bell pepper, and garlic.  Cover and cook over medium-low heat, stirring occasionally, until veggies are tender. 

Stir in tomato sauce, brown sugar, worcestershire sauce, cider vinegar, salt and pepper.  (I added a splash of Chachere's to give it a kick).  Let simmer for 15 minutes.

We had no buns, so we ate it with crackers.  We both thought it was pretty darn tasty, even me, the nonsloppy joe eater.

Sunday, September 19, 2010

Reese's Chewy Chocolate Cookies

My dad has been working a lot lately, and my sister and I, finally deciding it had been absolutely too long since we had seen him, told him he had the choice of either taking us to Cracker Barrel or barbecuing for us this weekend.  Lucky for us, Dad offered to BBQ (his is the best!).  We decided on a day and time kind of late, so I decided I'd just make cookies for dessert.  Rummaging through my tub of chocolate chips, etc, I came across an unopened bag of Reese's peanut butter chips.  Score!!  I flipped the bag over and saw a recipe for chewy, chocolately cookies and thought "double score!" as I'd been thinking of making chocolate cookies.  Everyone loved the cookies, especially hubby.


Reese's Chewy Chocolate Cookies
(from the back of the Reese's Peanut Butter Chips bag)
  • 2 cups all-purpose flour
  • 3/4 cup cocoa powder
  • 1 tsp baking soda
  • 1/2 tsp salt
  • 1 1/4 cup butter, softened
  • 2 cups sugar
  • 2 eggs
  • 2 tsp vanilla extract
  • 1 10-oz bag peanut butter chips 

Preheat oven to 350F.

Whisk together flour, cocoa powder, baking soda, and salt.

In a separate bowl, beat sugar and butter until fluffy.  Add eggs and vanilla and beat until well combined.   Gradually mix in flour until well combined.

Drop rounded tablespoons onto ungreased cookie sheet (I always lay  down parchment paper).  Bake 8-9 minutes.  Do not overbake!  Cool slightly, then remove to a cooling rack.

Tuesday, September 14, 2010

September 2010 Daring Cooks Challenge: Food Preservation, the Apple Butter of Knowledge

The September 2010 Daring Cooks’ challenge was hosted by John of Eat4Fun. John chose to challenge The Daring Cooks to learn about food preservation, mainly in the form of canning and freezing. He challenged everyone to make a recipe and preserve it. John’s source for food preservation information was from The National Center for Home Food Preservation.


 I was beyond thrilled when I saw this month's challenge.  I! LOVE! APPLE BUTTER!! I've been meaning to buy some for ages and this was sooo perfect.  I love apple butter, especially with peanut butter (SO GOOD!!!).  The challenge was doubly awesome because I want to become more proficient at canning.  I plan on starting a garden next summer and I'm sure I'll eventually need to can things.  Making this apple butter was such a rewarding way to spend an afternoon.  It was relaxing and gratifying, and the results were DELICIOUS.  I am strongly considering making apple butter for Christmas gifts.  


I used a combination of Gala, Fuji, and Granny Smith in an attempt to get a full, complex apple experience.  The combination worked well.  

Apple Butter
(adapted from this recipe
  • 6 lbs apples
  • 1 cup apple cider
  • 3/4 cup sugar, or to taste
  • 1 tbsp ground cinnamon
  • 1/2 tsp allspice
  • 1/4 tsp cloves

Peel and core the apples, then cut into eighths.  In a large saucepan, combine the apples and apple cider.  Cook over medium heat, stirring occasionally, until the apples are soft and falling apart.  Using a potato masher or similar implement, mash the apples.

Mix in the sugar, cinnamon, allspice, and cloves into the apple mash.  Use a stick blender (or be messy and use a handheld blender like me) to create a smoother apple butter.  Bring to a simmer and partially cover; you want the moisture to evaporate out of the butter. 

When the butter is done, it should mound on a plate without the liquid separating around the edges, creating a watery ring.  At this point, the apple butter is ready to be frozen or canned.

I'm not quite ready to blog about canning.  Hopefully, I will do so in the near future.  

Sunday, September 12, 2010

Lemon-Champagne Bars with Strawberry Brulee Topping

Man, that's a mouthful!! (Both the name and bars themselves).  Haha, I made a funny... ... excuse me, I'm tired.  I've had the most productive weekend that I've ever had in my life.  I've cooked and cleaned and mowed (first time ever!) and cooked and cleaned and did some electrically wiring (for serious) and cooked and cleaned and planted a tree.  Oh, and I did ALL the laundry in the house.  So I need a weekend to recoup from my weekend, but alas, off to work tomorrow I go.  Good thing I have a small cache of recipes I can update in times like this. 

Tonight I offer you Rebecca Rather the Pastry Queen's Lemon-Champagne Bars with Strawberry Brulee Topping.  You might remember (though you probably don't) that I received this cookbook as a gift and have tried a few recipes with disappointing results.  Well, this try was mixed.  Overall, the bars taste great.  They have this wonderfully creamy, perfectly balanced tart and sweet lemon cream.  The sweet strawberries really complement the lemon.  The crust is pretty awesome,  not crisp or chewy.  BUT the brulee topping was a pain in the hiney.  Yet another recipe with instructions that just don't work.  So, I would use this recipe again (the bars were hit) but I'd do it a little differently.


Lemon-Champagne Bars with Strawberry Brulee Topping
(from Rebecca Rather, The Pastry Queen, pg 147-148)

CRUST
  • 1 cup unsalted butter, room temperature
  • 1 cup sugar
  • 2 cups all purpose flour
  • 1/4 tsp salt
  • zest of 2 lemons, preferably organic
  • 1/2 cup raspberry or strawberry jam (I used strawberry)
LEMON FILLING
  • 6 large egg yolks
  • 6 large eggs
  • 1 3/4 cups sugar
  • 1 cup freshly squeezed lemon juice
  • 1/2 cup champagne or brut sparkling wine
  • 3/4 cup chilled, unsalted butter
STRAWBERRY BRULEE TOPPING
  • 1 pint fresh strawberries, hulled
  • 1/2 cup sugar
 To make the crust: 
Preheat the oven to 375F.  Coat a 9x13 baking pan with cooping spray.  Using a mixer fitted with a paddle attachment, beat the butter and sugar in a large bowl on medium speed about 3 minutes, until creamy.  Add the flour, salt, and zest.  Beat on medium-low speed just until incorporated.  Press the dough evenly into the bottom of the prepared pan.  Bake for 12 to 15 minutes, until the crust is golden brown.  Let cool about 10 minutes.  Spread the jam evenly over the cooled crust.  Turn the oven down to 350F.

To make the lemon filling:
Whisk the egg yolks, eggs, sugar, lemon juice, and champagne in a large bowl set over a saucepan with 2 inches  of simmering water.  Cook about 15 minutes, whisking occasionally, until the mixture thickens.  Cut the cold butter into tablespoon-size pieces.  Whisk the butter, one piece at a time, into the lemon mixture.  Cook about 10 minutes longer, whisking occasionally.  The mixture will be thick and puddinglike.

Pour the filling over the crust and bake for 10 to 12 minutes.  Cool the bars, then refrigerate at least 2 hours or overnight.  (if you are in a hurry, they'll get sufficiently cold after 1 hour in the freezer.)

To make the topping:
Slice the strawberries thinly and arrange them in a single layer on top of the lemon filling.  Sprinkle the sugar evenly over the strawberries.  Use a kitchen torch to melt the sugar until it is brown and crackly; or put the bars under a hot broiler for about 1 minute, until the sugar melts and browns.  (My strawberries created too much liquid, preventing the sugar from browning, and then charred around the edges.  Next time, I would do the sugar on top of the lemon mixture, torch it to get it crisp and brown, and then lay the strawberries on top.)

Serve immediately. 

Wednesday, September 8, 2010

Shrimp Pasta with a Tomato Cream Sauce

Today is hubby's birthday; happy birthday hubby!! Of course, for his birthday he got to decide what we had for dinner.  He requested the "orange shrimp".  After a dumbfounded look, he continued to explain that it looks, but does not taste, orange.  Then I knew what he was talking about.  It's the first recipe I tried from the Pioneer Woman; she calls it Penne a la Betsy after her sister.  As I looked through my blog for the recipe - and I was absolutely sure I blogged it - I could not find it.  I searched "pasta"and "shrimp" to no avail.  I even looked through all my blog entry titles.  I have no idea how this one slipped through the cracks! It is a wonderfully, amazingly, sinfully delicious dish that is pretty simple to prepare.  It is definitely one of my go-to dishes if I want to impress. 


Hubby and I have experimented with different pasta varieties (I don't think we've used the same one twice).  So far, our favorite has been rigatoni.  Tonight, I used bowtie because it's what we had in the pantry. 

 Shrimp Pasta with a Tomato Cream Sauce

  • 1 pound extra large, peeled, deveined shrimp
  • 1 tbsp butter
  • 1 tbsp olive oil
  • 1 pound pasta
  • 1 onion
  • 2 cloves garlic
  • 2 tbsp butter
  • 2 tbsp olive oil
  • 1/2 – 1 cup white wine (chardonnay)
  • 8 oz tomato sauce
  • 1 cup heavy whipping cream
  • 1 tbsp parsley
  • basil

Start the pasta water boiling. Rinse the shrimp under cool water. Heat 1 tbsp butter and 1 tbsp olive oil in a skillet. Sauté shrimp, then remove them to a plate to cool. Boil the pasta.
 Finely dice the onion and garlic. Heat 2 tbsp butter, then add 2 tbsp olive oil. Add the onions and garlic; stir occasionally. Pull tails off the shrimp, then cut them into bite size pieces. Pour wine over onions and garlic. Cook for a few minutes to let the alcohol evaporate. Add tomato sauce; stir. Stir in cream. Simmer for a few minutes. Add shrimp; salt and pepper. Chop parsley and basil. Add to sauce. Pour 3/4 over the pasta to the sauce; salt and pepper as needed.

Sunday, September 5, 2010

Dry Okra

One food that I have consistently loved throughout my whole life is fried okra.  Once I got older, I also developed a fondness for smothered okra.  .. and those are about the only two  ways I've had okra.  So when I came  across this recipe for dry okra, I just had to try it.   It's an Indian dish, but I think anyone would like it.  


Dry Okra
(Recipe adapted from Madhur Jaffrey's Indian Cooking)
  • 1 lb fresh okra (I used the frozen, chopped kind)
  • 8 tbsp vegetable oil
  • 1/2 tsp cumin seeds
  • 1 onion, coarsely chopped
  • 1/2 tsp salt
  • 1/4 tsp ground cumin
  • 1/4 tsp ground coriander
  • 1 tsp ground amchoor or lemon juice
  • 1/8-1/4 tsp cayenne pepper

Wipe the okra pods with dampened kitchen paper. Pat dry. Cut off the conical top and the very tip or each okra pod and then cut the pods, crosswise, into 7mm-1 cm (1/3 - 1/2 inch) segments.

Put the oil in a large, preferably non-stick, frying pan and set over medium-high heat. When hot, put in the cumin seeds. Let the seeds sizzle for 10 seconds. Put in the onions and okra, spreading the okra out evenly in the pan. Fry, stirring every now and then, for 10 minutes, spreading the okra out evenly in the pan each time you stir. The onions should begin to brown by this time. Turn the heat to medium and continue to stir and fry the same way for another 5 minutes. Be gentle as you stir. Put in the salt, ground cumin, ground coriander, amchoor or lemon juice and cayenne pepper.

Cook for another 5 minutes, stirring or tossing gently as you do so.

Wednesday, September 1, 2010

Crawfish Tart

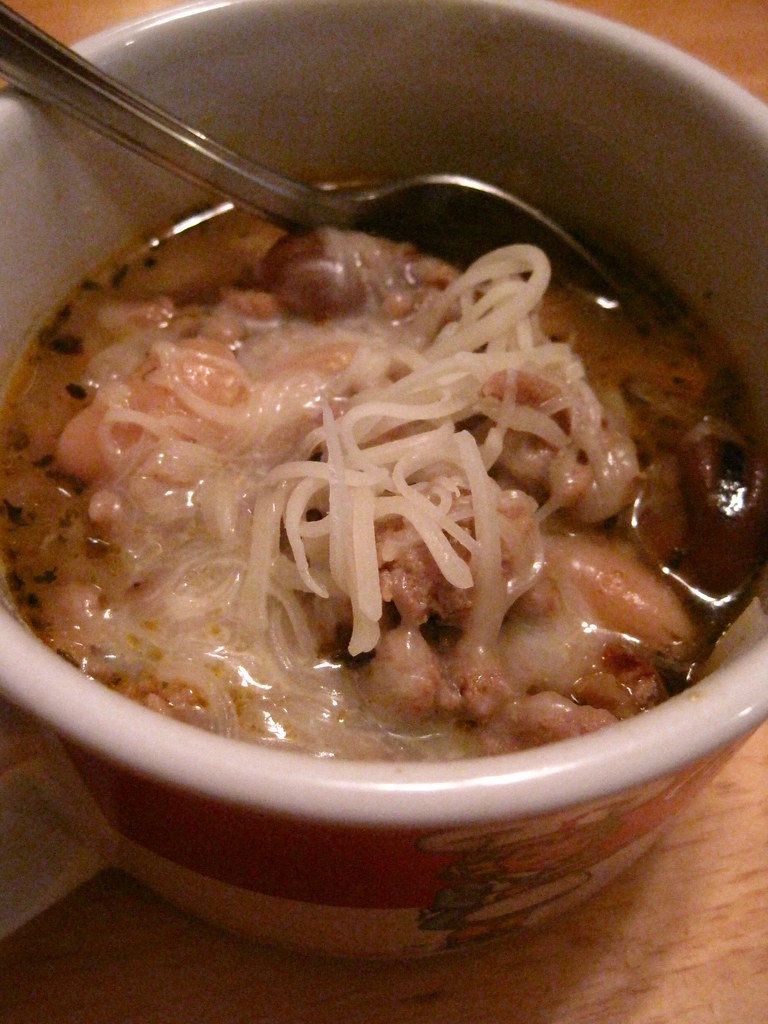
Craving seem to be marvelous things for me lately.  One night, not too long ago, I was dying for some crawfish.  Luckily, I had some in the freezer (care of my brother-in-law's dad who rocks).  Until recently, the only way crawfish was prepared at my house was in etouffee, and always with the same recipe.  I was being so unfair to crawfish!  Luckily, this day that I was craving it, I did not want our etouffee, no sirree!  I still had some puff pastry left in the fridge from our housewarming party and quickly hit on the idea of a crawfish/puff pastry tart.  I still had some mushrooms left over as well and what goes better with crawfish and mushrooms than onions?  So into the pot (well, saute pan) they all went.  But I was worried my little creation might be dry so I simply melted some butter in with it all then whisked flour into the liquids.  After explaining what I had done to hubby as we ate, he quickly pointed out that I basically made etouffee.  He's right and I'm okay with it for two reasons.  First, I just sort of made the etouffee without planning it and not at all going by the usual recipe.  Second, I put it on puff pastry, not rice.


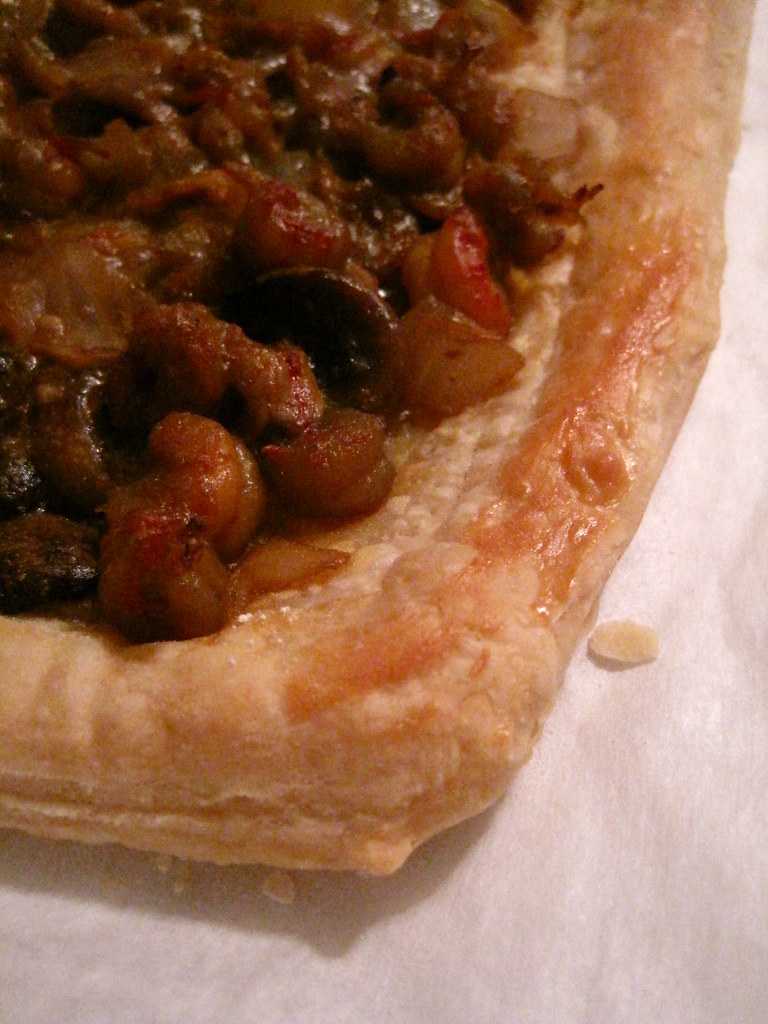
Hubby and I both thought this was absolutely divine; he thought it would make a wonderful appetizer or party food.  We both agreed though that the long rectangular shape would have to change; the pastry is not stable enough to support the toppings so it was a bit floppy.  Doing smaller, bite-size rectangles (or other shapes) would solve this problem quite easily. 

Crawfish Tart
  • 1 sheet of puff pastry
  • 1 egg, slightly beaten
  • 1 tbsp olive oil
  • 1 lb crawfish tails, thawed
  • 1 large onion, chopped
  • 1 package mushrooms (you know, the little blue cartons)
  • 2 cloves garlic, minced
  • 3 tbsp butter
  • 3 tbsp flour
  • salt and pepper  to taste

Preheat oven to 400F.  On a well-floured surface, roll puff pastry to an approximate 8 by 16 inch rectangle.  Using a sharp knife/pastry cutter/pizza cutter, score a border 1 inch in from the edges of the pastry (making a "crust") taking care not to cut all the way through the dough.  Using a fork, poke many holes in the inner rectangle (to prevent it from rising as much as the outer crust).  Brush with beaten egg. 

Bake for 10-15 minutes, until lightly golden and beginning to puff up.  The middle might puff a bit as well, and if it looks too inflated, just give it a few more stabs with Mr. Fork.  I advise keeping an eye on the pastry as it bakes.

While the pastry is baking (and you're keeping an eye on it) heat the olive oil in a large skillet and saute the onions, mushrooms, and garlic until they are tender.  Stir in the crawfish and let cook over medium heat for five minutes.  There will be a fair amount of liquid and this is okay.

Push the crawfish, onions, and mushrooms to the edges of the skillet, leaving the juices room to accumulate in the center.  Add the butter and let it melt.  Whisking constantly, slowly add the flour into the liquids, taking care to leave the crawfish and veggies on the sides undisturbed.  Add flour until you have a fairly thick sauce.  Now stir together everything you've taken such care to keep separate.  

Salt and pepper to taste.

Spoon the crawfish mixture into the inner rectangle of the puff pastry, taking care to create an even layer.  Try to get as close to the "crust" as possible.  

Bake an additional 10 minutes, or until the puff pastry has risen and is golden.