Monday, November 29, 2010

November 2010 Daring Bakers Challenge: Crostata

The 2010 November Daring Bakers’ challenge was hosted by Simona of briciole. She chose to challenge Daring Bakers’ to make pasta frolla for a crostata. She used her own experience as a source, as well as information from Pellegrino Artusi’s Science in the Kitchen and the Art of Eating Well.

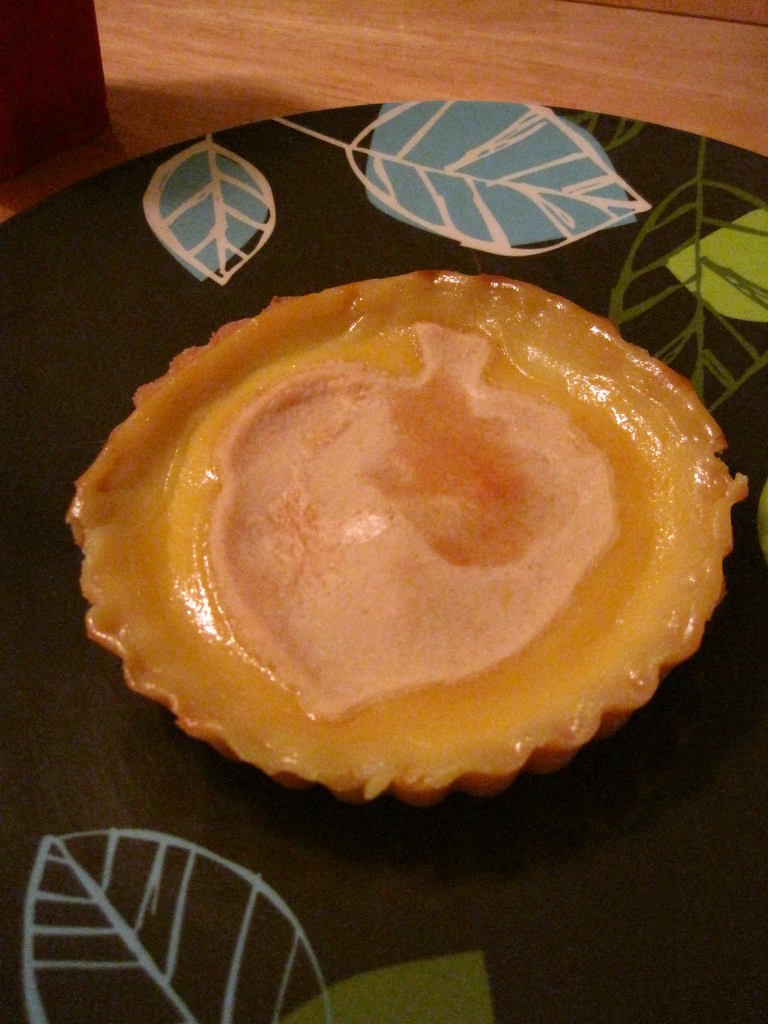
Guys, this might be my favorite challenge thus  far.  A crostata is sweet short crust pastry (reminiscent of a sugar cookie) that can be filled with fruit preserves, pastry cream, or other marvelous things.  I decided to go with a simple pastry cream/custardy filling.  Since hubby told me I could only make one pie for Thanksgiving (he's so mean!) I thwarted him by preparing this for Thanksgiving dessert as well.  I did not have regular size tart pan (8 or 9 inches) but I did have a bunch of smaller ones, so I decided to make mini crostatas with end up being the perfect dessert size, in my opinion.

The reason I loved this challenge so much is because this crostata is nearly identical to my absolute favorite pastry at Croissant du Jour in Cedar Rapids, Iowa (where hubby and I lived while I was in college).  The only thing missing was a handful of raspberries baked into the cream.  

Crostata Con la Crema
Pastry
  • 1/2 c. minus 1 tablespoon [105 ml, 100 g, 3 ½ oz] superfine sugar (see Note 1) or a scant 3/4 cup [180ml, 90g, 3 oz] of powdered sugar 1 and 3/4 cup [420 ml, 235 g, 8 1/4 oz.] unbleached all-purpose flour a pinch of salt
  • 1 stick [8 tablespoons / 4 oz. / 115 g] cold unsalted butter, cut into small pieces
  • grated0 zest of half a lemon (you could also use vanilla sugar as an option
  • 1 large egg and 1 large egg yolk, lightly beaten in a small bowl
Crema
  • 500 ml whole milk
  • 1 tsp vanilla extract (optional)
  • 1 tsp hazelnut extract (optional)
  • 4 egg yolks
  • ½ cup sugar

Whisk together sugar, flour and salt in a bowl.

Rub or cut the butter into the flour until the mixture has the consistency of coarse crumbs. You can do this in the bowl or on your work surface, using your fingertips or an implement of choice.

Make a well in the center of the mounded flour and butter mixture and pour the beaten eggs into it (reserve about a teaspoon of the egg mixture for glazing purposes later on – place in the refrigerator, covered, until ready to use).

Add the lemon zest to your flour/butter/egg mixture.

Use a fork to incorporate the liquid into the solid ingredients, and then use your fingertip. Knead lightly just until the dough comes together into a ball.

Shape the dough into a flat disk and wrap in plastic wrap. Place the dough in the refrigerator and chill for at least two hours. You can refrigerate the dough overnight.
 
For the Crema :

In a medium saucepan, heat the milk and extracts, but keep well below boiling.

In a large heatproof bowl, whisk yolks and sugar until pale yellow and frothy.  Temper the yolks by whisking in 1/4 cup of the heated milk.  Whisk in another 1/4 cup, then pour it all back into the saucepan.

Over medium heat, bring to a boil, stirring  constantly.  Cook until mixture has thickened considerably, and can coat the back of the spoon.

Fill the sink with a couple inches of cold/ice water.  Place the saucepan in the water and let cool to room temperature, stirring occasionally. 

Assembling and baking the crostata con la crema:

Heat the oven to 350ºF [180ºC/gas mark 4].

Take the pasta frolla out of the fridge, unwrap it and cut away ¼ of the dough. Reserve this dough to make the lattice top of the crostata. Refrigerate this dough while you work on the tart base.

To help roll the crostata dough, keep the dough on top of the plastic wrap that you had it wrapped in. This can help rolling the dough and can also help when transferring the dough to your pan. You can also use parchment paper for this. However, you can also roll the dough directly on a work surface if you prefer.

Lightly dust the top of the dough and your work surface (if you’re rolling directly on a work surface) with flour. Keep some flour handy to dust the dough as you go along.

If the dough is very firm, start by pressing the dough with the rolling pin from the middle to each end, moving the rolling pin by a pin's width each time; turn the dough 180 degrees and repeat; when it softens, start rolling.

Roll the dough into a circle about 1/8th inch (3 mm) thick.

If you used the plastic wrap or parchment paper as rolling surface, flip dough over the pan, centering it, and delicately press it all around so the corners are well covered. Peel away the plastic wrap.

Trim the excess dough hanging over the edges of the pan. Press the remaining dough around the border into the sides of the pan making sure the border is an even thickness all the way around.

Prick the bottom of the dough with a fork in several places.

Take out of the fridge the reserved pasta frolla you had cut away earlier. Roll it with your pin and cut into strips or use cookie cutters to make small shapes (this is not traditional, but it looks cute); or roll with your hands into ropes.

Cover the bottom of the crostata crust evenly with the pastry cream.

Use the prepared strips or rolls of dough to make a lattice over the surface, or decorate with the cut shapes. (Note: You can use dough scraps to make cookies: see the Additional Information section for some pointers)

Brush the border and strips of dough with the reserved beaten eggs. You can add a drop or two of water to the beaten eggs if you don’t have enough liquid.

Put the tart in the oven and bake for 30 minutes.

After 35 minutes, check the tart, and continue baking until the tart is of a nice golden hue.

When done, remove the tart from the oven and let cool. If you have used a tart pan with a removable bottom, then release the tart base from the fluted tart ring. Make sure the tart is completely cool before slicing and serving.

(I felt this tart was MUCH better after it had been refrigerated overnight)
Sunday, November 28, 2010

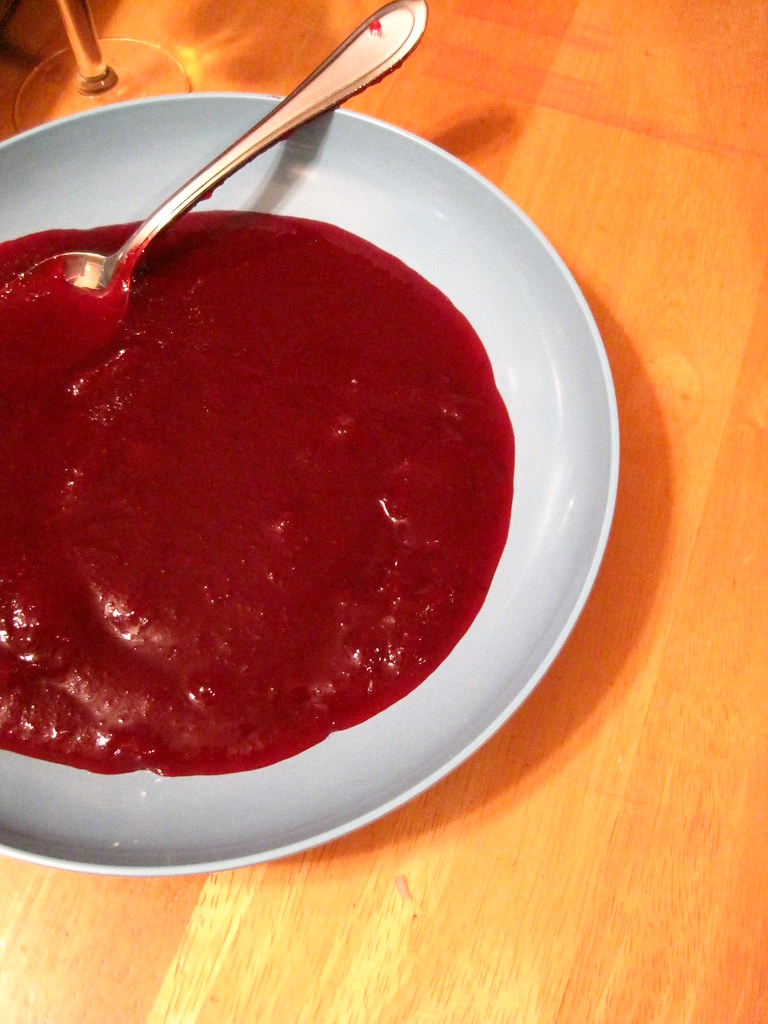
Thanksgiving, Part II: Homemade Cranberry Sauce

As a kid, I never really liked cranberry sauce.  This was most likely due to the gelatinous nature, but also partly due to the fact that my mom hated it and my dad loved it.  As a kid, I aligned with my mom's food preferences and readily abhorred my dad's (vienna sausages, need I say more?)

I can't exactly remember why I decided to make cranberry sauce from scratch a few years back, but it was most likely because I'm a food snob and like to make it all from scratch.  Also, the gelatinous stuff in the can just really gives me the heebie-geebies.  Anyhoo, it is ridiculously easy to make and MUCH better homemade (I find the canned stuff granular).  And most people seem impressed when they find out your cranberry sauce is homemade, though some will roll their eyes.  I just prefer the texture and hint of citrus.

Cranberry Sauce
  • 1 - 12 oz package fresh cranberries
  • 1 cup orange juice (I prefer pulp free)
  • 1 cup white granulated sugar
In a medium sized  saucepan, combine orange juice and sugar.  Bring to a boil.  Add cranberries. (I usually go through the package of cranberries and pull out any that are not firm or are discolored.)  Reduce heat and let the cranberries boil gently for approximately 10 minutes.  The cranberries will begin to pop and the mixture will thicken considerably.

Let the mixture cool to room temperature then refrigerate until ready to serve OR, if you do not want the remnants of the berry skin, you can pour the sauce through a mesh sieve, pushing firmly against the mesh to extract the most sauce and then refrigerate.

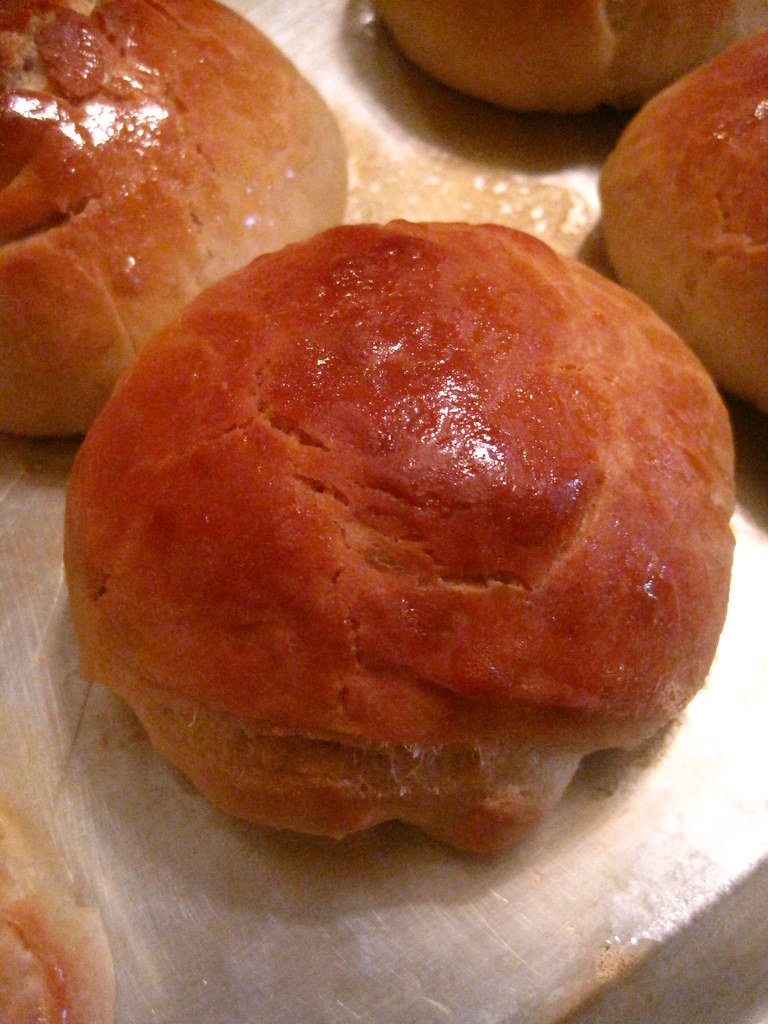
Thanksgiving, Part I: Tender Honey Rolls

As I was preparing for Thanksgiving, I got on my blog to print out some recipes I used in previous years (I'm horribly unorganized and don't have all of my recipes saved on my computer! Shameful!!)  To my horror, I realized I have twice posted photographs of a Thanksgiving meal with a promise to quickly update recipes, but never did. SHAME ON ME! Well, I'm going to remedy this situation, though it will take a few posts over a few different days.  For Thanksgiving we had:

Apple Scented Roast Turkey
Tender Honey Rolls
Rice Dressing (no cornbread mush in my house!)
Squash Casserole (traditional family recipe prepared by my sister)
Candied Sweet Potato Casserole (traditional family recipe prepared by my dad)
Green Bean Casserole (oy, so many casseroles! this one prepared by hubby's mother)
Macaroni and Cheese (at hubby's insistence) 
Homemade Cranberry Sauce
Honey Pumpkin Crumble Pie
And this month's Daring Bakers' Challenge which I will reveal tomorrow

The turkey recipe is all ajumble and will take some time to mesh out into a real, directional recipe, so I'm starting with the easy stuff already typed up on my computer.  And hey, who's going to be roasting a turkey any time soon?


Tender Honey Rolls
(recipe found here)
  • 4 cups bread flour (Start with 3 if you are hand kneading)
  • 1 cup warm water (105° to 115°F)
  • 1/4 cup honey
  • 3 tablespoons canola oil
  • 1 1/4 teaspoons salt
  • 1 egg, lightly beaten
  • 1 package dry yeast (1/4-ounce)
  • Vegetable cooking spray
  • 1 tbsp butter
  • 1 tbsp hone
Hand kneading instructions:
In a large bowl, dissolve the yeast in the warm water and let stand until foamy, about 5 minutes. Using a wooden spoon, stir in the honey, egg and oil. Add roughly 3 cups of the flour and the salt until the dough comes together in a sticky mass. Turn the dough out onto a lightly floured surface and knead, working in the remaining flour as necessary to keep the dough from being too sticky, until the dough is smooth and elastic, 8 minutes. Do not be tempted to add too much flour. The dough should stay soft and will become less sticky with kneading.
Form the dough into a ball and transfer it to a lightly oiled bowl. Cover the bowl with a damp kitchen towel and let the dough rise in a warm, draft-free spot until it doubles in bulk, about 2 hours.

Bread Machine Instructions:
Follow manufacturer’s instructions for placing first 7 ingredients into bread pan; select dough cycle, and start bread machine. Remove dough from machine (do not bake).


Turn dough out onto a lightly floured surface, and knead 30 seconds. Cover dough, and let rest 10 minutes.

Punch dough down, and divide into 12-18 equal portions. Shape each portion into a ball, and place on baking sheets coated with cooking spray. Cover and let rise in a warm place (85°), free from drafts, 20 minutes. Uncover and bake at 400° for 13 minutes or until browned. Remove rolls from pans, and serve warm or at room temperature.

About 5 minutes into baking , top rolls with 1 tbsp melted butter and 1 tbsp honey to give it that golden brown shiny coat.

(This year, I used a bit too much flour so they weren't as light as soft as the year before, but regardless, these rolls are a HUGE hit. )

Sunday, November 21, 2010

Alligator

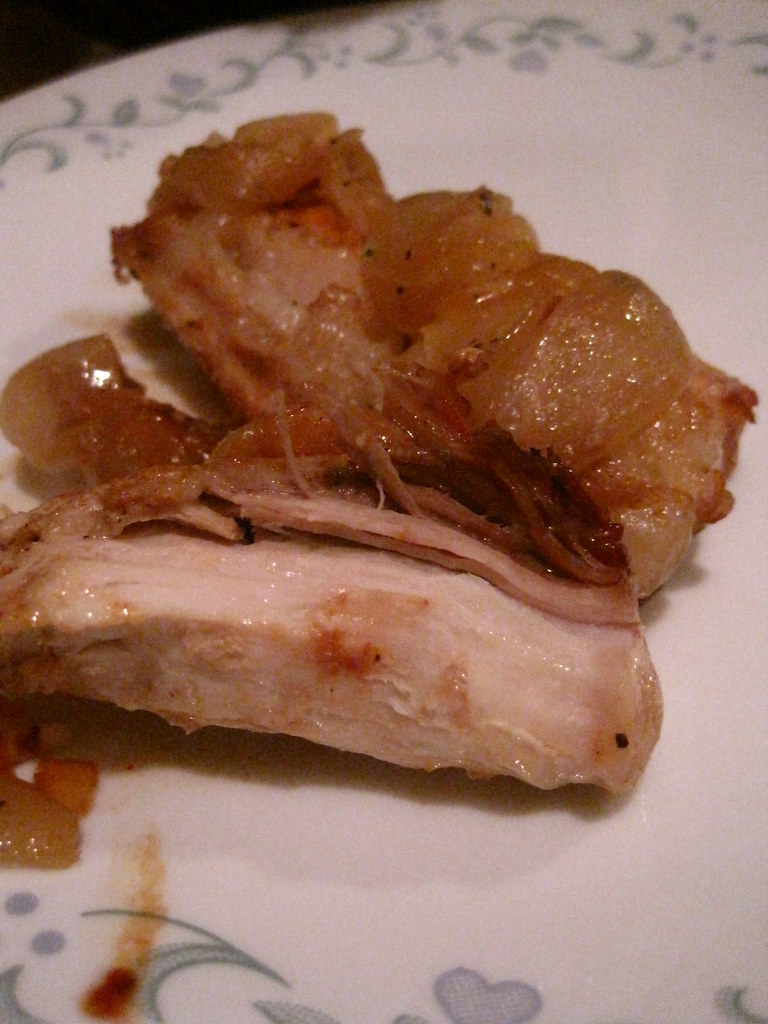
Living in south-central Louisiana presents some quite interesting food opportunities.  Of course, there's crawfish.   Less common is alligator.  While it shows up on some restaurant menus (mainly fried as an appetizer), I have never known anyone who ate it home.  Needless to say, I was thrilled when I learned that one of hubby's friend's dad is a bona fide alligator hunter/fisherman.  Cool beans, right?  Well, she went home this weekend and offered to bring us back some goodies, and boy did she deliver!  Not only did she bring us multiple pieces alligator tail, she also got us some soft shell crabs, frog legs, and ground deer meat (chili anyone?).  As I was attempting (and mostly succeeded) to clean/organize our garage, I figured gator would be easiest to do.  


Hubby's friend told us to handle the gator like pork, so I decided to sear it in a cast iron skillet, then let it cook, covered, over low heat for about an hour.  I threw in a couple onions and garlic cloves, thinly sliced, and about a cup of water. 

After an hour, hubby and I were a bit confused as there were still some quite soft pieces, like uncooked fish.  It turns out that alligator tail can be quite fatty, especially at the base, as that is where an alligator stores all of its extra fat.  So the lesson learned is that next time, we will need to trim the meat prior to cooking.. (Now, I realize some of you might be thinking "how could they mistake fat for meat?" but when you're cooking with a new ingredient, it is often difficult to tell or be sure of yourself.  Also, alligator fat is a veeery weird texture.  And once we found the meat proper, we immediately knew our error.  Have no fear, we did not consume copious amounts of fat first! One tiny nibble and we were done!)

Wednesday, November 17, 2010

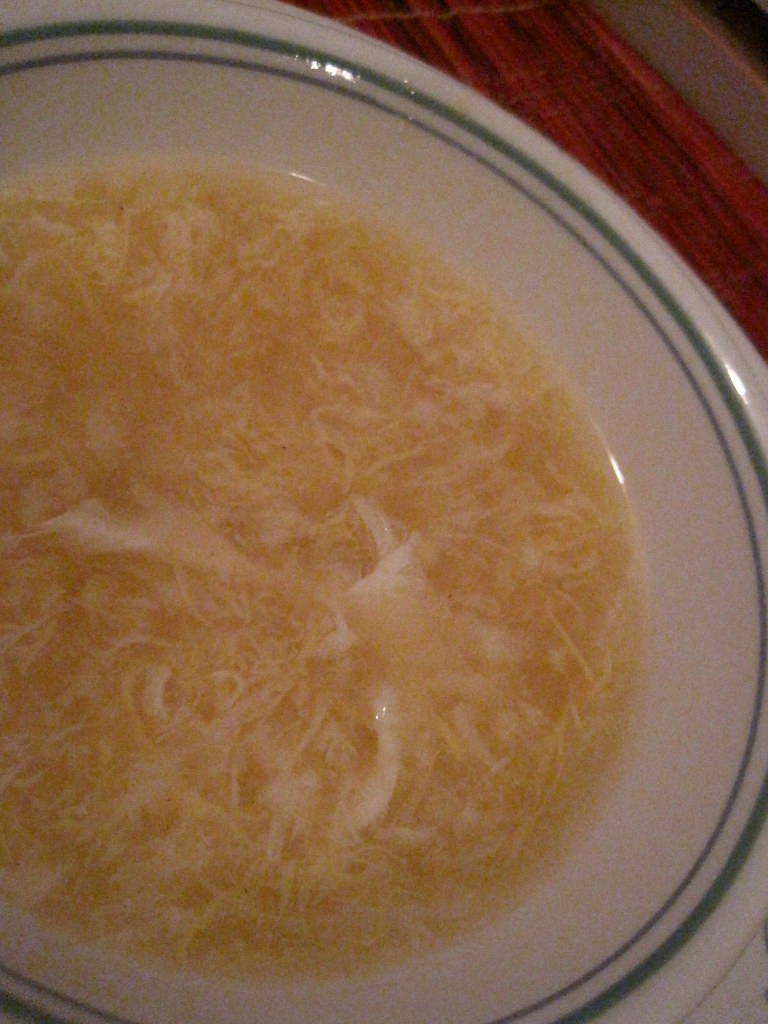
Egg Drop Soup

Sorry I missed a couple of posts; hubby and I were both sick, so we pretty much didn't cook for a week and a half.  For most of my  life, I never understood why soup was considered the perfect food for sick people; I certainly never craved it when I was ill.  But something has changed.  While I was lying miserably on the couch, watching movie after endless movie, all I wanted to eat was gumbo.  While sick, hubby wanted egg drop soup (though he never got it).  After we mended, I was talking to my mom and she asked if I knew how to make egg drop soup.  It seemed like fate.  It was even more fated because the next day was chilly and wet and perfect for soup.  

 Now, I've always wanted to like egg drop soup, but every time I try it, I feel like I'm just drinking an egg yolk.  Ick! So I knew off the bat that I wanted our soup to be less thick than you get at a restaurant, but I had to balance that with the fact that hubby likes the thickness.  So, we worked together to find a consistency that worked for us.  That's what is so great about making such dishes for yourself!

I did a quick google search for recipes and chose this one because it was simple.  I then did a bit more searching on technique and found this site quite helpful! The egg drops turned out perfectly, both silky and wispy.  If possible, two people do this quite nicely. 

Egg Drop Soup
  • 4 cups chicken broth/stock
  • 1/4 tsp white pepper
  • salt to taste
  • optional : a few drops of sesame oil
  • 2 tbsp cornstarch
  • 1/ cup water
  • 2 eggs, beaten
  • 1-2 green onions, minced (omitted because I had none)


In a wok or saucepan, bring the 4 cups chicken broth to a boil.  Add white pepper and salt, plus sesame oil, if you're using it.  Cook for another minute.  If you'd like to thicken the soup, dissolve the cornstarch into the water.  Slowly pour it into the broth, stirring as you go, until you reach your desired consistency.  I probably used 2/3 of the mixture for ours.  Right before you add the egg, turn off the heat.  

This is where having a second person comes in handy.   One person holds a fork about 8 inches from the broth.   Slowly pour the egg through the fork tines.  While this is going on, the second person stirs the broth at a leisurely pace (hubby says "definitely not fast.... definitely not slow).  After a moment (it really takes no time at all), the egg drops are ready and the soup is finished.   (If you don't have a second set of hands handy, the author at the site I visited balanced the fork on a box of crackers and poured the eggs with one hand and stirred with the other.  Talent!)

Of course, you can garnish it with those minced green onions if you're fancy enough to have them.  =)

Sunday, November 14, 2010

November 2010 Daring Cooks Challenge: Souffle

Dave and Linda from Monkeyshines in the Kitchen chose Soufflés as our November 2010 Daring Cooks’ Challenge! Dave and Linda provided two of their own delicious recipes plus a sinfully decadent chocolate soufflé recipe adapted from Gordon Ramsay’s recipe found at the BBC Good Food website.

Wow,  souffle! When I think of souffles, I think of super-difficult, hush the house, no-one-better-dare-sneeze-while-this-is-baking! difficulty.  It is one of those dishes that that, if you can make a souffle, you are a successful, talented cook in my book.  Before tonight, I'd never had souffle, which only elevated its status in my mind.  I can't even say I've been wanting to try making a souffle just because it seems that daunting.  Yet, I was excited when I read the challenge.  I finally had to attempt souffle, and you know what? It really isn't that bad.  Yet another mythic dish slayed. Allriiiight.  (I am SUPER thrilled with myself right now, guys. I made souffle! Two kinds!!)

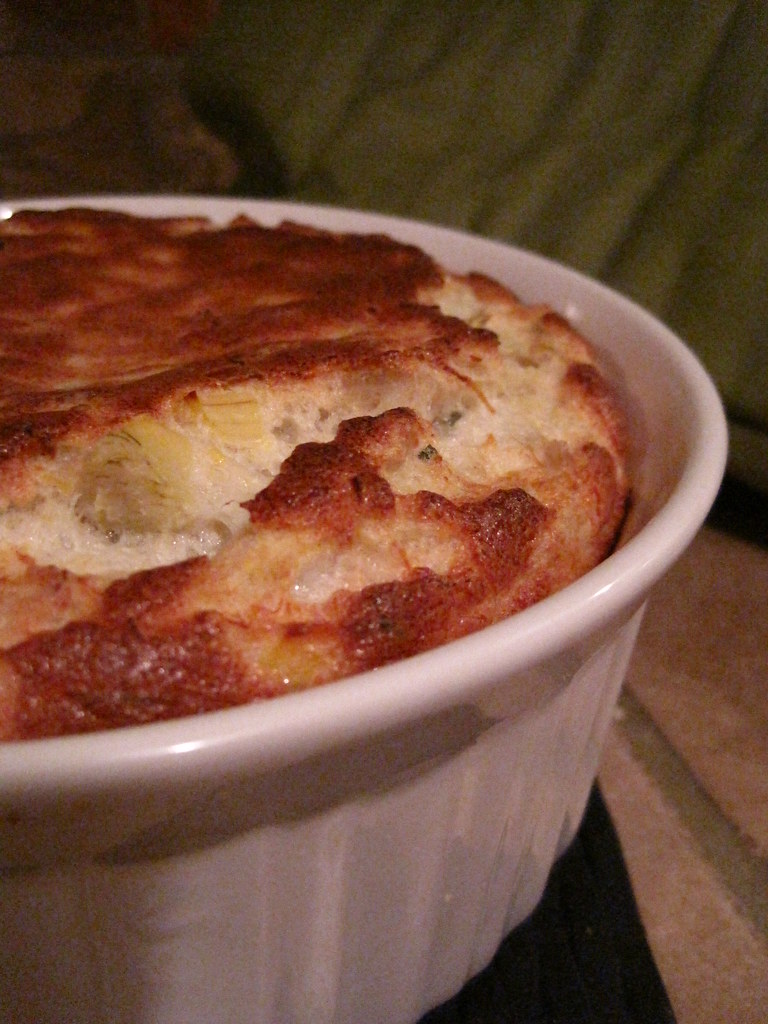
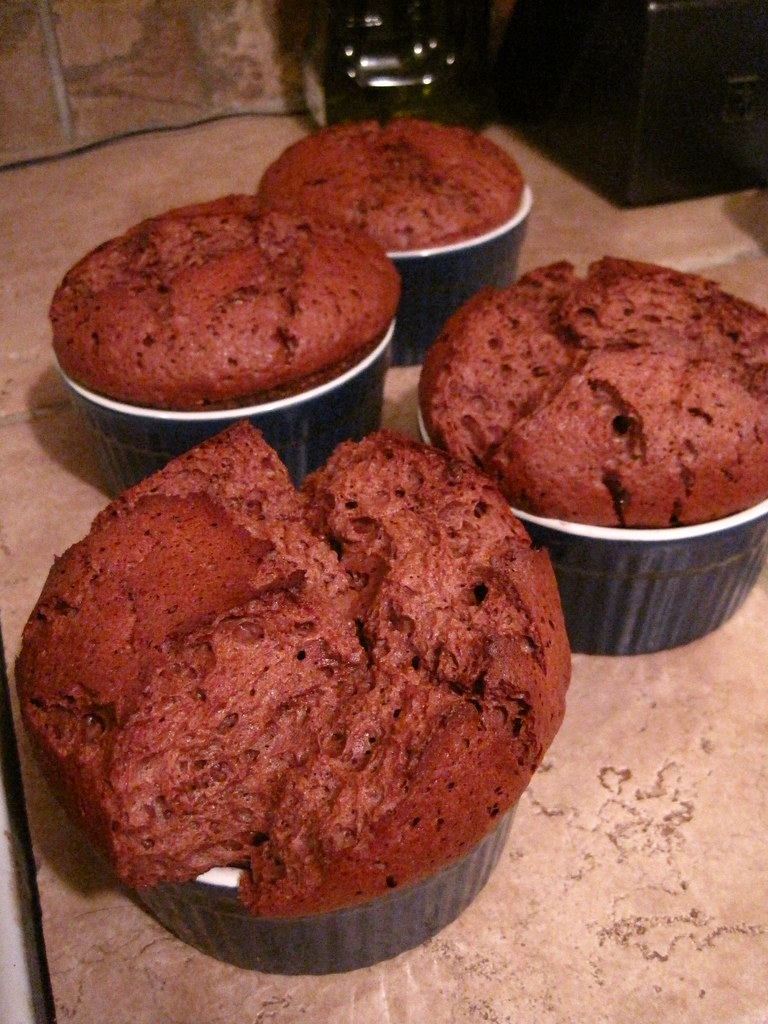
Generally, I like to stick with savory dishes for my Daring Cooks challenges and leave the sweets for the Daring Bakers challenge. BUT, this one time, I decided to do one of each.  Since I have no souffle repertoire, I used two of the recipes so generously provided.  For dinner, we had a crab and artichoke souffle (delicious!) and for dessert, chocolate souffle (scrumptious!).

Crab and Artichoke Souffle
(A Monkeyshines in the Kitchen recipe)

  • 1 cup crab meat, flaked and lightly-packed
  • ½ cup finely chopped cooked artichoke hearts (frozen, fresh or from a jar is OK, but please don’t use the marinated-in-oil style)
  • 2 large egg yolks
  • 3 large egg whites
  • ½ tsp salt
  • ¼ tsp cream of tartar
  • 1 cup Gruyere cheese, shredded
  • ½ tsp white pepper
  • 1 Tbsp butter
  • 1 Tbsp flour
  • 1 tsp dried chives or tarragon
  • 1 cup milk
  • Salt and pepper to taste
  • Additional butter and bread crumbs for preparing the dishes

1. Preheat oven to moderate 375 ˚F/190 ˚C/gas mark 5.
2. Prepare dishes – you can use one 2-quart (US)/1.9 litre or six 1-cup/240 ml soufflé dishes – by buttering the dish, then coating with bread crumbs. (You may have some left over soufflé mixture if you go with the smaller soufflé dishes.)
3. Chop the artichoke hearts into ¼”/0.5cm dice. If you use frozen or from a jar, then there’s no need to cook them. If you are using fresh, then steam gently until just softened, about 5 minutes or sauté over low heat until just ever so lightly browned.
4. In a medium saucepan, melt the butter, then stir in the flour to make a roux. – you just want to get the flour evenly blended to a paste, not cook the roux for any length of time. Gradually stir in the milk, mixing all the time. Add herbs, then the cheese. Stir until the cheese is melted and you have a thick sauce. Remove from heat.
5. Beat the egg yolks well and gently warm them by whisking them in a bowl over simmering water for six minutes.  Gradually stir the egg yolks into the cheese sauce until well blended.
6. Add the artichoke and flaked crab meat to the cheese sauce.
7. Beat the egg whites until at the stiff peak stage.
8. Fold the whites in thirds into the sauce.
9. Spoon the mixture into your baking dish and level the tops using a spatula. Be sure to wipe up any spills and make sure the edge is clean.
10. Bake for 40 min if you’re using a large soufflé dish or 25 min if using smaller dishes – the soufflé should be richly browned.


Gordon Ramsay's Chocolate Souffle
(Adapted From BBC Good Food Recipe by Gordon Ramsay)

  • 2 Tbsp unsalted butter, for greasing
    Cocoa powder or finely grated chocolate
  • 2 tbsp plain (all-purpose) flour
  • 2 tsp caster (superfine) sugar (regular sugar is OK)
  • ½ tsp corn starch
  • 1 medium egg yolk
  • 1 medium whole egg
  • 4 Tbsp milk
  • 5 Tbsp heavy cream 
  • 3 oz good-quality dark chocolate preferably 70+% cocoa solids, broken in pieces
  • 2 Tbsp unsweetened cocoa powder
  • Optional: 2 tsp orange zest or 2 tsp minced chipotle chile en adobo or 1 tsp chipotle chile powder.
  • Optional: powdered sugar for dusting
  • 6 medium egg whites
  • 6½ Tbsp superfine/caster sugar (if you don’t have it, regular sugar is OK)
1. Heat oven to moderate 375 ˚F/190 ˚C/gas mark 5. 2. Take four 1 cup/~240ml soufflé dishes and brush them completely with softened butter. Tip a little cocoa powder or grated chocolate into each dish, roll the dish around tilting it as you do so it is evenly lined all round.

3. For the crème patisserie, mix the flour, sugar and corn starch into a small bowl. Put egg yolk and whole egg into a medium sized bowl, beat lightly, then beat in half of the flour mixture to give a smooth paste. Tip in the rest of the flour mixture and cocoa powder and mix well.

4. To make the ganache, pour the milk and cream into a pan and bring just to the boil. Remove from the heat. Add the chocolate and beat until it is melted and smooth with no lumps.

5. Gradually stir hot chocolate ganache into the paste from step 3, and add the orange zest or chile if using. This is your crème patisserie.

6. Whisk the egg whites to soft peaks with an electric whisk. Sprinkle in the sugar as you are mixing. Keep whisking to give stiff, firm peaks to give volume to the soufflés.

7. Stir about 2 tbsp (30 ml) of the beaten egg whites into the crème patisserie. Carefully fold in a third of the rest, cutting through the mixture. Fold in another third (take care not to lose the volume), then fold in the rest.

8. Spoon the mixture into the dishes. Run a spoon across the top of each dish so the mixture is completely flat. Take a little time to wipe any splashes off the outside of each dish, or they will burn on while cooking.

9. Bake the soufflés for 15-17 minutes.

10. The soufflés should have risen by about two thirds of their original height and jiggle when moved, but be set on top.

Wednesday, November 3, 2010

Roasted Okra

Okay, I know it sounds weird. Roasted. Okra.  If you like okra, you'll like this.  If you don't like okra, well then, come back Sunday.   


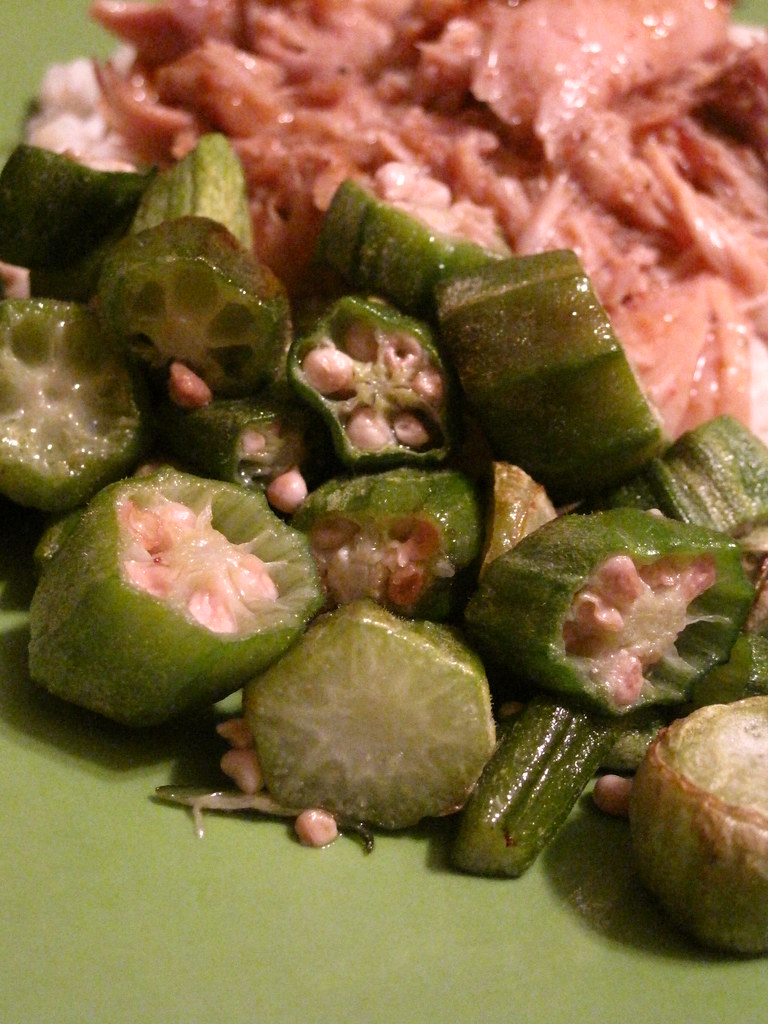
So, roasted okra.  In trying to eat healthy, I've had to rethink how I eat most of my vegetables.  Some vegetables can easily be delicious and healthy.  Others have to be worked with.  The deal with okra is that I know so few uses for it: fried (favorite.food.ever), smothered (butter), and in gumbo (not quite a side dish).  I recently made the dry okra, which was tasty, but I was trying to avoid using so much oil.   Then I thought of sticking it in the oven, a la blasted broccoli, and figured "what the hell".  If it was horrible, we just wouldn't eat it.  Lucky for us, it was quite tasty.  Very okra-y, but that's okay with me. 

Roasted Okra
  • 1 lb okra, chopped (again, I used the precut frozen variety)
  • 1 tbsp olive oil 
  • salt and pepper to taste

Preheat oven to 400F.  Lightly spray a baking sheet with cooking spray.

If there is a lot of excess moisture on your okra (say it recently thawed...), cover a plate with paper towels and then lay the okra down in a single layer to draw out some moisture.  Place okra in a medium sized bowl.  Pour olive oil over the okra, the stir gently to coat.  

 Pour the okra onto the baking sheet, making sure it is spread in a single layer.  Bake 20-25 minutes, or until the okra is dry (i.e., no longer slimy), turning the okra and moving it around occasionally.  Salt and pepper to taste.