Showing posts with label Daring Bakers. Show all posts

Monday, June 27, 2011

June 2011 Daring Bakers Challenge : Baklava

Erica of Erica’s Edibles was our host for the Daring Baker’s June challenge. Erica challenged us to be truly DARING by making homemade phyllo dough and then to use that homemade dough to make Baklava.
 
When I saw this month's challenge, I was terrified.  Absolutely, positively terrified.  I've worked with phyllo once; it was the storebought kind and it was disastrous.  I considered not even doing this month's challenge, but then I wouldn't be a Daring Baker, would I?  (Please note, last month I just completely missed the challenge.  My days got all jumbled.)  Also, I love baklava.  It's so fragrant and delicious.  


Now I'm not going to post the recipe tonight.  I've had one of those days where things just keep going wrong and I haven't gotten the recipe formatted to go nicely in my blog.  And all I can think of is cuddling up and bed and falling asleep.  I promise to try to get the recipe up tomorrow.  It's a great recipe and I really want to share it!

****
Okay, it's been more than a few days, but here's the recipe as provided by The Daring Kitchen:


Phyllo Dough:

*Note 1: To have enough to fill my 9” x 9” baking dish with 18 layers of phyllo I doubled this recipe.
*Note 2: Single recipe will fill a 8” x 5” baking dish.
*Note 3: Dough can be made a head of time and froze. Just remove from freezer and allow to thaw and continue making your baklava

Ingredients:
1 1/3 cups unbleached all purpose (plain) flour
1/8 teaspoon salt
1/2 cup less 1 tablespoon (105 ml) water, plus more if needed
2 tablespoons vegetable oil, plus additional for coating the dough
1/2 teaspoon cider vinegar, (could substitute white wine vinegar or red wine vinegar, but could affect the taste)

1. In the bowl of your stand mixer combine flour and salt

2. Mix with paddle attachment

3. Combine water, oil and vinegar in a small bowl.

4. Add water & oil mixture with mixer on low speed, mix until you get a soft dough, if it appears dry add a little more water (I had to add a tablespoon more)

5. Change to the dough hook and let knead approximately 10 minutes. You will end up with beautiful smooth dough. If you are kneading by hand, knead approx. 20 minutes.

6. Remove the dough from mixer and continue to knead for 2 more minutes. Pick up the dough and through it down hard on the counter a few times during the kneading process.

7. Shape the dough into a ball and lightly cover with oil

8. Wrap tightly in plastic wrap and let rest 30-90 minutes, longer is best ( I let mine rest 2 hours and it was perfect)

Rolling your Phyllo


** Remove all rings and jewelry so it does not snag the dough**
Use whatever means you have to get the dough as thin as you can. I have included a fantastic video at the end of the post on how to roll out your phyllo dough, using a wooden dowel, which worked perfectly for me. You may also use a pasta machine if you have one, or a normal rolling pin whatever works for you.

1. Unwrap your dough and cut off a chunk slightly larger then a golf ball. While you are rolling be sure to keep the other dough covered so it doesn’t dry out.

2. Be sure to flour your hands, rolling pin and counter. As you roll you will need to keep adding, don’t worry, you can’t over-flour.

3. Roll out the dough a bit to flatten it out.

4. Wrap the dough around your rolling pin/dowel

5. Roll back and forth quickly with the dough remaining on the dowel
(see attached video for a visual, its much easier then it sounds)

6. Remove; notice how much bigger it is!

7. Rotate and repeat until it is as thin as you can it. Don’t worry if you get rips in the dough, as long as you have one perfect one for the top you will never notice.

8. When you get it as thin as you can with the rolling pin, carefully pick it up with well floured hands and stretch it on the backs of your hands as you would a pizza dough, just helps make it that much thinner. Roll out your dough until it is transparent. NOTE: you will not get it as thin as the frozen phyllo dough you purchase at the store, it is made by machine

9. Set aside on a well-floured surface. Repeat the process until your dough is used up. Between each sheet again flower well. You will not need to cover your dough with a wet cloth, as you do with boxed dough, it is moist enough that it will not try out.

Baklava Recipe

Adapted from Alton Brown, The Food Network
30 servings
Ingredients
For the syrup:
· 1 1/4 cups (300 ml) honey
· 1 1/4 cups (300ml) water
· 1 1/4 cups (300 ml) (280 gm/10 oz) sugar
· 1 cinnamon stick
· 1 (2-inch/50 mm) piece fresh citrus peel (lemon or orange work best)
· a few cloves or a pinch or ground clove
When you put your baklava in the oven start making your syrup. When you combine the two, one of them needs to be hot, I find it better when the baklava is hot and the syrup has cooled

Directions

1. Combine all ingredients in a medium pot over medium high heat. Stir occasionally until sugar has dissolved

2. Boil for 10 minutes, stir occasionally.

3. Once boiled for 10 minutes remove from heat and strain cinnamon stick and lemon, allow to cool as baklava cooks

Ingredients for the Filling:

1 (5-inch/125 mm piece) cinnamon stick, broken into 2 to 3 pieces or 2 teaspoons ground cinnamon
15 to 20 whole allspice berries ( I just used a few pinches)
3/4 cup blanched almonds
3/4 cup raw or roasted walnuts
3/4 cup raw or roasted pistachios
2/3 cup sugar
phyllo dough (see recipe above)
1 cup melted butter

Directions:
1. Preheat oven to moderate 350°F/180°C/gas mark 4.

2. Combine nuts, sugar and spices in a food processor and pulse on high until finely chopped. If you do not have a food processor chop with a sharp knife as fine as you can. Set aside

3. Trim your phyllo sheets to fit in your pan

4. Brush bottom of pan with butter and place first phyllo sheet

5. Brush the first phyllo sheet with butter and repeat approximately 5 times ending with butter. (Most recipes say more, but homemade phyllo is thicker so it's not needed)

6. Sprinkle 1/3 of the nut mixture on top

7. Continue layering phyllo and buttering repeating 4 times

8. Sprinkle 1/3 of the nut mixture on top

9. Continue layering phyllo and buttering repeating 4 times

10. Sprinkle 1/3 of the nut mixture on top

11. Continue layering and buttering phyllo 5 more times. On the top layer, make sure you have a piece of phyllo with no holes if possible, just looks better.

12. Once you have applied the top layer tuck in all the edges to give a nice appearance.

13. With a Sharp knife cut your baklava in desired shapes and number of pieces. If you can't cut all the ways through don’t worry you will cut again later. A 9x9 pan cuts nicely into 30 pieces. Then brush with a generous layer of butter making sure to cover every area and edge

14. Bake for approximately 30 minutes; remove from oven and cut again this time all the way through. Continue baking for another 30 minutes. (Oven temperatures will vary, you are looking for the top to be a golden brown, take close watch yours may need more or less time in the oven)

15. When baklava is cooked remove from oven and pour the cooled (will still be warmish) syrup evenly over the top, taking care to cover all surfaces when pouring. It looks like it is a lot but over night the syrup will soak into the baklava creating a beautifully sweet and wonderfully textured baklava!

16. Allow to cool to room temperature. Once cooled cover and store at room temperature. Allow the baklava to sit overnight to absorb the syrup.

17. Serve at room temperature.

Sunday, March 27, 2011

March 2011 Daring Baker's Challenge: Yeasted Meringue Coffee Cake

The March 2011 Daring Baker’s Challenge was hosted by Ria of Ria’s Collection and Jamie of Life’s a Feast. Ria and Jamie challenged The Daring Bakers to bake a yeasted Meringue Coffee Cake. 


Okay.  Yeasted Meringue Coffee Cake sounds weird.  Why would you put meringue in a coffee cake?  Shouldn't a coffee cake be all crumbly cinnamon deliciousness? No and not necessarily.  I had some reservations about this challenge; it just seemed like an odd mix of two things.  BUT, those reservations were absolutely unnecessary because this stuff is DELICIOUS.  I honestly can't stop myself from eating it.  For the past two days, I keep finding myself in the kitchen cutting off little slivers (okay maybe wedges).   Basically, this is a similar to a king cake or danish.. sweet bread rolled out, spread with meringue, with filling sprinkled on top, then rolled up, shaped into a ring, and baked.  Two different filling options were provided, but I decided to try my own thing and used cinnamon chips and almonds.  DELICIOUS.  I'm so proud of myself. 


FILLED MERINGUE COFFEE CAKE
(Makes 2 round coffee cakes, each approximately 10 inches in diameter. The recipe can easily be halved to make one round coffee cake.)

For the yeast coffee cake dough:
  • 4 cups flour
  • ¼ cup sugar
  • ¾ teaspoon salt
  • 1 package active dried yeast
  • ¾ cup whole milk
  • ¼ cup water (doesn’t matter what temperature)
  • ½ cup unsalted butter at room temperature
  • 2 large eggs at room temperature
For the meringue:
  • 3 large egg whites at room temperature
  • ¼ teaspoon salt
  • ½ teaspoon vanilla
  • ½ cup sugar
For the filling:
  • 1 cup coarsely chopped blanched almonds
  • 2 Tablespoons granulated sugar
  • 1 cup cinnamon chips
  • Egg wash: 1 beaten egg
  • confectioner’s sugar (powdered/icing sugar) for dusting cakes
Prepare the dough:

In a large mixing bowl, combine 1 ½ cups of the flour, the sugar, salt and yeast.

In a saucepan, combine the milk, water and butter and heat over medium heat until warm and the butter is just melted.  

With an electric mixer on low speed, gradually add the warm liquid to the flour/yeast mixture, beating until well blended. Increase mixer speed to medium and beat 2 minutes. Add the eggs and 1 cup (150 g) flour and beat for 2 more minutes.

Using a wooden spoon, stir in enough of the remaining flour to make a dough that holds together. Turn out onto a floured surface (use any of the 1 ½ cups of flour remaining) and knead the dough for 8 to 10 minutes until the dough is soft, smooth, sexy and elastic, keeping the work surface floured and adding extra flour as needed.

Place the dough in a lightly greased (I use vegetable oil) bowl, turning to coat all sides. Cover the bowl with plastic wrap and a kitchen towel and let rise until double in bulk, 45 – 60 minutes. The rising time will depend on the type of yeast you use.

Once the dough has doubled, make the meringue:

In a clean mixing bowl – ideally a plastic or metal bowl so the egg whites adhere to the side (they slip on glass) and you don’t end up with liquid remaining in the bottom – beat the egg whites with the salt, first on low speed for 30 seconds, then increase to high and continue beating until foamy and opaque. Add the vanilla then start adding the ½ cup sugar, a tablespoon at a time as you beat, until very stiff, glossy peaks form.

Assemble the Coffee Cakes:

Line 2 baking/cookie sheets with parchment paper.

Punch down the dough and divide in half. On a lightly floured surface, working one piece of 
the dough at a time (keep the other half of the dough wrapped in plastic), roll out the dough into a 20 x 10-inch (about 51 x 25 ½ cm) rectangle. Spread half of the meringue evenly over the rectangle up to about 1/2-inch (3/4 cm) from the edges. Sprinkle 1 tbsp sugar, then half a cup of chopped almonds, and half a cup of cinnamon chips over the meringue.

Now, roll up the dough jellyroll style, from the long side. Pinch the seam closed to seal. Very carefully transfer the filled log to one of the lined cookie sheets, seam side down. Bring the ends of the log around and seal the ends together, forming a ring, tucking one end into the other and pinching to seal.

Using kitchen scissors or a sharp knife (although scissors are easier), make cuts along the outside edge at 1-inch (2 ½ cm) intervals. Make them as shallow or as deep as desired but don’t be afraid to cut deep into the ring.

Repeat with the remaining dough, meringue and fillings.

Cover the 2 coffee cakes with plastic wrap and allow them to rise again for 45 to 60 minutes.
Preheat the oven to 350°F (180°C).

Brush the tops of the coffee cakes with the egg wash. Bake in the preheated oven for 25 to 30 minutes until risen and golden brown. The dough should sound hollow when tapped.

Remove from the oven and slide the parchment paper off the cookie sheets onto the table. Very gently loosen the coffee cakes from the paper with a large spatula and carefully slide the cakes off onto cooling racks. Allow to cool.

Just before serving, dust the tops of the coffee cakes with confectioner’s sugar as well as cocoa powder if using chocolate in the filling. These are best eaten fresh, the same day or the next day.

Sunday, February 27, 2011

February 2011 Daring Bakers' Challenge: Panna Cotta and Florentine Cookies

The February 2011 Daring Bakers’ challenge was hosted by Mallory from A Sofa in the Kitchen. She chose to challenge everyone to make Panna Cotta from a Giada De Laurentiis recipe and Nestle Florentine Cookies.


I have been curious about panna cotta for quite some time (since I started obsessing over tastespotting.com), but I've never really planned to make it.  Lucky for me, it was this month's challenge! 


 The texture of panna cotta was interesting, somewhere between jello and pudding.  It requires the use of gelatin, which I haven't used much before, so I had fun with that.


Mmmm cookies.

Vanilla Panna Cotta
(from Giada De Laurentiis)
  • 1 cup (240 ml) whole milk
  • 1 tablespoon (one packet) (15 ml) (7 gm) (¼ oz) unflavored powdered gelatin
  • 3 cups (720 ml) whipping cream (30+% butterfat)
  • 1/3 cup (80 ml) honey
  • 1 tablespoon (15 ml) (15 gm) (½ oz) granulated sugar
  • pinch of salt
Pour the milk into a bowl or pot and sprinkle gelatin evenly and thinly over the milk (make sure the bowl/pot is cold by placing the bowl/pot in the refrigerator for a few minutes before you start making the Panna Cotta). Let stand for 5 minutes to soften the gelatin.

Pour the milk into the saucepan/pot and place over medium heat on the stove. Heat this mixture until it is hot, but not boiling, about five minutes. (I whisk it a few times at this stage).

Next, add the cream, honey, sugar, and pinch of salt. Making sure the mixture doesn't boil, continue to heat and stir occasionally until the sugar and honey have dissolved 5-7 minutes.

Remove from heat, allow it to sit for a few minutes to cool slightly. Then pour into the glass or ramekin.

Strawberry Gelée 

(Recipe by Mallory)

  • 1 cup (240 ml) (230 gm) (8 oz) strawberries 
  • 3 tablespoons (45 ml) water
  • 1/4 cup (60 ml) (60 gm) (2 oz) granulated sugar
  • 1½ teaspoons (7½ ml) (3½ gm) (1/8 oz) unflavored powdered gelatin
Sprinkle gelatin over water.

Place fruit and sugar in a small saucepan and simmer until sugar has dissolved. Now mix the gelatin into the strawberry mixture and stir until gelatin has dissolved.
    Remove from heat and allow to cool (close to room temp, again, if you're planning on layering on pouring on top of your Panna Cotta, a hot mixture will also heat up your chilled Panna Cotta).

    Nestle Florentine Cookies
    (Recipe from the cookbook “Nestle Classic Recipes”, and their website)
    • 2/3 cup (160 ml) (150 gm) (5.3 oz) unsalted butter
      2 cups (480 ml) (160 gm) (5 2/3 oz) quick oats
      1 cup (240 ml) (230 gm) (8 oz) granulated sugar
      2/3 cup (160 ml) (95 gm) (3⅓ oz) plain (all purpose) flour
      1/4 cup (60 ml) dark corn syrup
      1/4 cup (60 ml) whole milk
      1 tsp (5 ml) vanilla extract
      pinch of salt
      1½ cups (360 ml) (250 gm) (9 oz) dark or milk chocolate
    Preheat oven to moderately hot 375°F (190°C) (gas mark 5). Prepare your baking sheet with silpat or parchment paper. 

    Melt butter in a medium saucepan, then remove from the heat.

    To the melted butter add oats, sugar, flour, corn syrup, milk, vanilla, and salt. Mix well. Drop a tablespoon full, three inches (75 mm) apart, onto your prepared baking sheet. Flatten slightly with the back of your tablespoon, or use a spatula. 

    Bake in preheated oven for 6-8 minutes, until cookies are golden brown. Cool completely on the baking sheets.

    While the cookies are cooling melt your chocolate until smooth either in the microwave (1 1/2 minutes), or stovetop (in a double boiler, or a bowl that fits atop a saucepan filled with a bit of water, being sure the water doesn't touch the bottom of the bowl).

    Peel the cookies from the silpat or parchment and place face down on a wire rack set over a sheet of wax/parchment paper (to keep counters clean). 
     
    Spread a tablespoon of chocolate on the bottom/flat side of your cookie, sandwiching another (flat end) cookie atop the chocolate.

    This recipe will make about 2 1/2 - 3 dozen sandwiched Florentine cookies. You can also choose not to sandwich yours, in which case, drizzle the tops with chocolate (over your wax paper).

    Monday, December 27, 2010

    December 2010 Daring Bakers Challenge : Christmas Stollen

    The 2010 December Daring Bakers’ challenge was hosted by Penny of Sweet Sadie’s Baking. She chose to challenge Daring Bakers’ to make Stollen. She adapted a friend’s family recipe and combined it with information from friends, techniques from Peter Reinhart’s book.........and Martha Stewart’s demonstration.


    Stollen is similar to fruitcake, but it is more a sweet bread than cake.  It has a combination of candied citron, cherries, and raisins along with slivered almonds. I wasn't sure if I would like it (I generally do not eat raisins due to a traumatizing childhood experience) but I found this both delightful and addicting.  It is pleasantly sweet (I find some sweet breads are a tease) and the spices and fruits add a complexity of flavors.    


    Stollen Wreath

    Makes one large wreath or two traditional shaped Stollen loaves. Serves 10-12 people

    Ingredients

    • ¼ cup (60ml) lukewarm water (110º F / 43º C)
    • 2 packages (4 1/2 teaspoons) (22 ml) (14 grams) (1/2 oz) active dry yeast
    • 1 cup (240 ml) milk
    • 10 tablespoons (150 ml) (140 grams) unsalted butter (can use salted butter)
    • 5½ cups (1320 ml) (27 ozs) (770 grams) all-purpose (plain) flour (Measure flour first - then sift- plus extra for dusting)
    • ½ cup (120 ml) (115 gms) sugar
    • ¾ teaspoon (3 ¾ ml) (4 ½ grams) salt (if using salted butter there is no need to alter this salt measurement)
    • 1 teaspoon (5 ml) (6 grams) cinnamon
    • 3 large eggs, lightly beaten
    • Grated zest of 1 lemon and 1 orange
    • 2 teaspoons (10 ml) (very good) vanilla extract
    • 1 teaspoon (5 ml) lemon extract or orange extract
    • ¾ cup (180 ml) (4 ¾ ozs) (135 grams) mixed peel (link below to make your own)
    • 1 cup (240 ml) (6 ozs) (170 gms) firmly packed raisins
    • 3 tablespoons (45ml) rum
    • 12 red glacé cherries (roughly chopped) for the color and the taste. (optional)
    • 1 cup (240 ml) (3 ½ ozs) (100 grams) flaked almonds
    • Melted unsalted butter for coating the wreath
    • Confectioners’ (icing) (powdered) sugar for dusting wreath

    Directions:

    Soak the raisins: in a small bowl, soak the raisins in the rum (or in the orange juice from the zested orange) and set aside. 

    To make the dough
    Pour ¼ cup (60 ml) warm water into a small bowl, sprinkle with yeast and let stand 5 minutes. Stir to dissolve yeast completely.

    In a small saucepan, combine 1 cup (240 ml) milk and 10 tablespoons (150 ml) butter over medium - low heat until butter is melted. Let stand until lukewarm, about 5 minutes.

    Lightly beat eggs in a small bowl and add lemon and vanilla extracts.

    In a large mixing bowl (4 qt) (4 liters) (or in the bowl of an electric mixer with paddle attachment), stir together the flour, sugar, salt, cinnamon, orange and lemon zests.

    Then stir in (or mix on low speed with the paddle attachment) the yeast/water mixture, eggs and the lukewarm milk/butter mixture. This should take about 2 minutes. It should be a soft, but not sticky ball. When the dough comes together, cover the bowl with either plastic or a tea cloth and let rest for 10 minutes.

    Add in the mixed peel, soaked fruit and almonds and mix with your hands or on low speed to incorporate. Here is where you can add the cherries if you would like. Be delicate with the cherries or all your dough will turn red!

    Sprinkle flour on the counter, transfer the dough to the counter, and begin kneading (or mixing with the dough hook) to distribute the fruit evenly, adding additional flour if needed. The dough should be soft and satiny, tacky but not sticky. Knead for approximately 8 minutes (6 minutes by machine). The full six minutes of kneading is needed to distribute the dried fruit and other ingredients and to make the dough have a reasonable bread-dough consistency. You can tell when the dough is kneaded enough – a few raisins will start to fall off the dough onto the counter because at the beginning of the kneading process the dough is very sticky and the raisins will be held into the dough but when the dough is done it is tacky which isn't enough to bind the outside raisins onto the dough ball.

    Lightly oil a large bowl and transfer the dough to the bowl, rolling around to coat it with the oil. Cover the bowl with plastic wrap.
    Put it in the fridge overnight. The dough becomes very firm in the fridge (since the butter goes firm) but it does rise slowly… the raw dough can be kept in the refrigerator up to a week and then baked on the day you want.

    Shaping the Dough and Baking the Wreath
    Let the dough rest for 2 hours after taking out of the fridge in order to warm slightly.
    Line a sheet pan with parchment paper.
    Preheat oven to moderate 350°F/180°C/gas mark 4 with the oven rack on the middle shelf.
    Punch dough down, roll into a rectangle about 16 x 24 inches (40 x 61 cms) and ¼ inch (6 mm) thick.

    Starting with a long side, roll up tightly, forming a long, thin cylinder.

    Transfer the cylinder roll to the sheet pan. Join the ends together, trying to overlap the layers to make the seam stronger and pinch with your fingers to make it stick, forming a large circle. You can form it around a bowl to keep the shape.

    Using kitchen scissors, make cuts along outside of circle, in 2-inch (5 cm) intervals, cutting 2/3 of the way through the dough.

    Twist each segment outward, forming a wreath shape. Mist the dough with spray oil and cover loosely with plastic wrap.

    Proof for approximately 2 hours at room temperature, or until about 1½ times its original size.
    Bake the stollen for 20 minutes, then rotate the pan 180 degrees for even baking and continue to bake for 20 to 30 minutes. The bread will bake to a dark mahogany color, should register 190°F/88°C in the center of the loaf, and should sound hollow when thumped on the bottom.

    Transfer to a cooling rack and brush the top with melted butter while still hot.  Immediately tap a layer of powdered sugar over the top through a sieve or sifter.  Wait for 1 minute, then tap another layer over the first.  The bread should be coated generously with the powdered sugar.
    Let cool at least an hour before serving. Coat the stollen in butter and icing sugar three times, since this many coatings helps keeps the stollen fresh - especially if you intend on sending it in the mail as Christmas presents! 

    When completely cool, store in a plastic bag. Or leave it out uncovered overnight to dry out slightly, German style.


    Sorry I haven't kept up on posting; I've baked myself into exhaustion.  Also, I suspect I am getting sick again (as I simply cannot stop sneezing).  

    OHGOODNEWS! Hubby got me the food processor of my dreams for Christmas!!

    Wednesday, October 27, 2010

    October 2010 Daring Bakers' Challenge: Donuts!

    The October 2010 Daring Bakers challenge was hosted by Lori of Butter Me Up. Lori chose to challenge DBers to make doughnuts. She used several sources for her recipes including Alton Brown, Nancy Silverton, Kate Neumann and Epicurious.

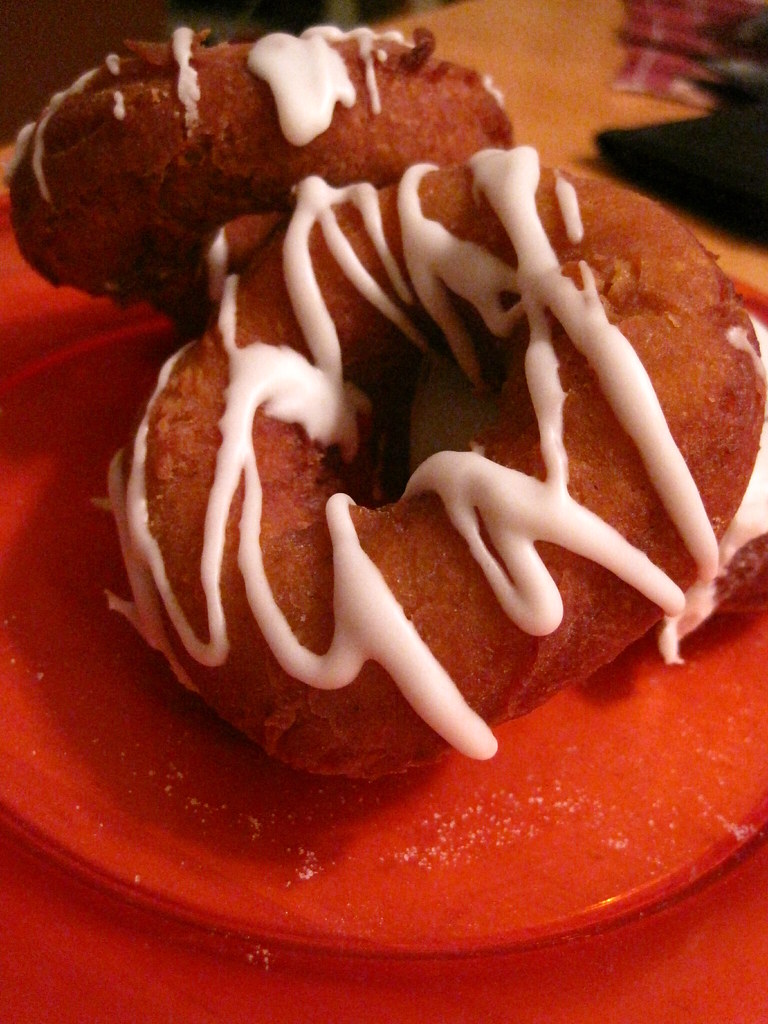
    (mmmm donuty deliciousness)

     Wow, donuts!! I've been excited about this challenge, because, honestly, who hasn't wanted to make their own donuts? It was both easier and way more complicated than I expected.  I thought I'd wake up Sunday morning and spend maybe an hour making us donuts for breakfast, but both of the recipes I was interested in took multiple hours.  So, that's where it was more complicated.  Frying the delicious things was much easier than I expected.  (I'm always so intimidated by frying.)  I planned to make both pumpkin donuts and traditional yeast donuts, but after getting the first recipe ready, I decided I'd take it easy and just make the one.  I can always try the second one another weekend.  

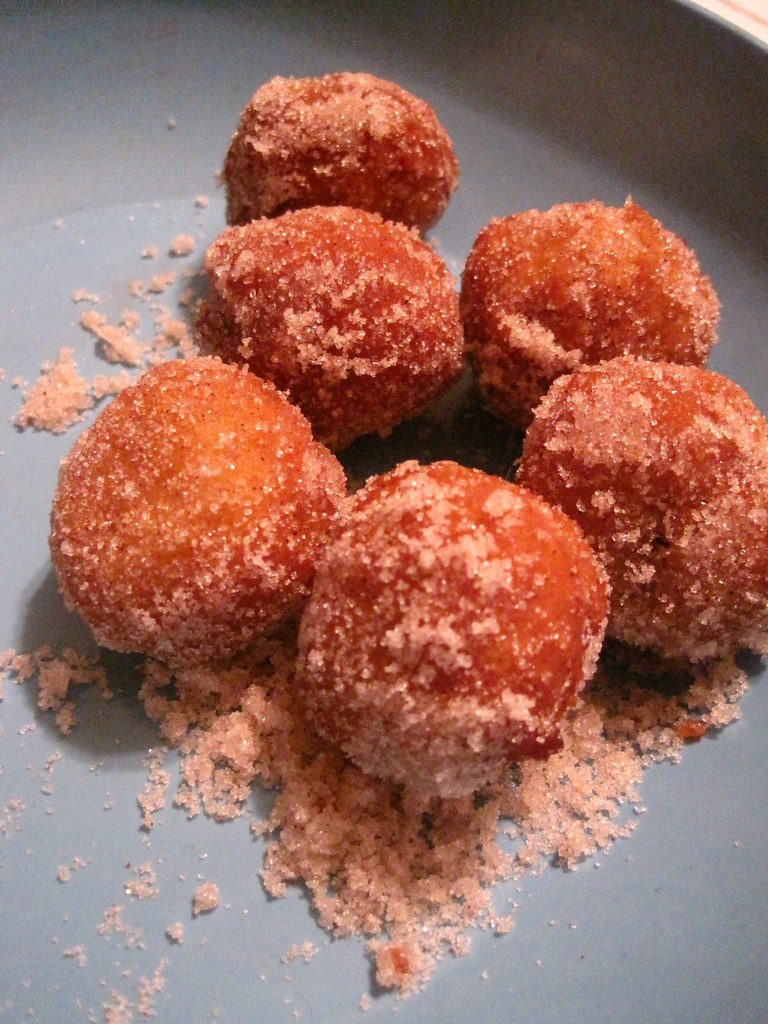
    (best part of donuts: donut holes)


    Hubby, of course, gave  me that "ugh she's going to make me eat the 'creative' ones instead of the good, normal ones!" grimace when I told him I'd be making pumpkin donuts, but he LOVED them.  The ladies at work also enjoyed them.  Me, I love anything pumpkin!

    Pumpkin Donuts
    (original recipe here)
    • 3 1/2 cups all purpose flour 
    • 4 tsp baking powder
    • 1 tsp salt 
    • 1 tsp cinnamon
    • 1/2 tsp ground ginger
    • 1/2 tsp baking soda
    • 1/4 tsp nutmeg
    • 1/8  tsp ground cloves
    • 1 cup white granulated sugar 
    • 3 tbsp butter, unsalted
      1 large egg
    • 2 large egg yolks
      1 tsp vanilla extract 
    • 1/2 cup + 1 tbsp buttermilk 
    • 1 cup pumpkin  (Canned pure pumpkin or fresh cooked and pureed pumpkin – DON’T use pumpkin pie mix!)
    • Canola Oil DEPENDS on size of vessel you are frying in – you want THREE (3) inches of oil (can substitute any flavorless oil used for frying)
    Powdered Sugar Glaze:
    • 2 cups powdered sugar 
    • 4 tbsp whipping cream  

    Whisk together the first 8 ingredients in medium bowl to blend. Using electric mixer, beat sugar and butter in large bowl until blended (the mixture will be grainy and not smooth). Beat in egg, then yolks and vanilla. Gradually beat in buttermilk; beat in pumpkin. Using rubber spatula, fold in dry ingredients in 4 additions, blending gently after each addition. Cover with plastic; chill 3 hours.

    Sprinkle 2 rimmed baking sheets lightly with flour. Press out 1/3 of dough on floured surface to 1/2- to 2/3-inch (12 mm to 15 mm) thickness. Using 2 1/2-inch (65 mm) -diameter round cutter, cut out dough rounds. Arrange on sheets. Repeat with remaining dough in 2 more batches. Gather dough scraps. Press out dough and cut out more dough rounds until all dough is used.

    Using 1-inch (25 mm) diameter round cutter, cut out center of each dough round to make doughnuts and doughnut holes.

    Line 2 baking sheets with several layers of paper towels. Pour oil into large deep skillet to depth of 1 1/2 inches (40 mm). Attach deep-fry thermometer and heat oil to 365°F to 370°F (185°C to 188°C). Fry doughnut holes in 2 batches until golden brown, turning occasionally, about 2 minutes. Using slotted spoon, transfer to paper towels to drain. Fry doughnuts, 3 or 4 at a time, until golden brown, adjusting heat to maintain temperature, about 1 minute per side. Using slotted spoon, transfer doughnuts to paper towels to drain. Cool completely.

    For the glaze:

    Whisk powdered sugar and 4 tablespoons whipping cream to blend. Whisk in additional cream, 1 teaspoon at a time, to form medium thick glaze.

    Add doughnut holes to bowl of spiced sugar and toss to coat.

    Spread doughnuts on 1 side with powdered sugar glaze. (I just drizzled it).

    Arrange doughnuts, glazed side up, on racks. Let stand until glaze sets, at least 30 minutes.

    Monday, September 27, 2010

    September 2010 Daring Bakers' Challenge : Decorated Sugar Cookies

    The September 2010 Daring Bakers’ challenge was hosted by Mandy of “What the Fruitcake?!” Mandy challenged everyone to make Decorated Sugar Cookies based on recipes from Peggy Porschen and The Joy of Baking.

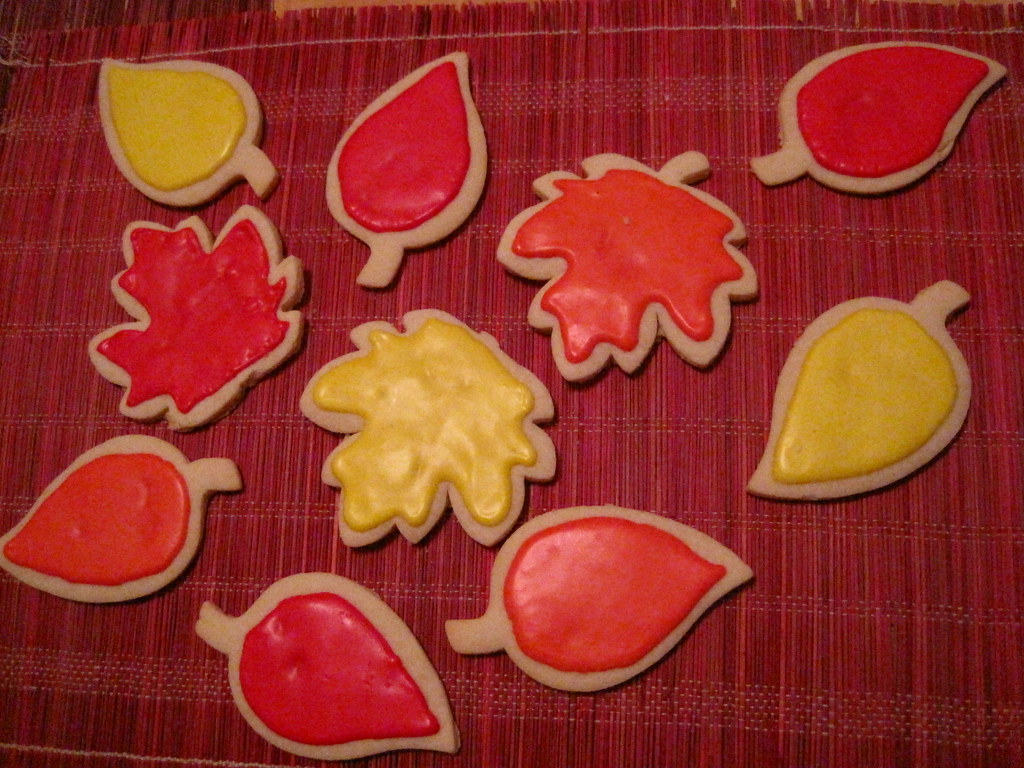
     This challenge used a specific technique of icing called flooding.  Basically, you use royal icing of a specific consistency (methinks mine was a tad too thick), outline your icing area, and then fill it in with more icing.  The border keeps the icing from going everywhere.  You can do a lot of neat things (I experimented with my last few cookies, but the photographs didn't come out).  You can blend and meld colors or you can layer different designs.

    A fun aspect of this challenge was that you needed to choose a theme that represented September for you.  I originally planned to do something focusing on hubby's birthday (September 8), but all this month I've anxiously anticipated autumn, so  I created the color-changing leaves I miss from Iowa.  (In Louisiana, the leaves are green one day and dead on the ground the next.)

    I can't wait to play around with this technique some more as the holidays progress!