Showing posts with label pie. Show all posts

Sunday, December 12, 2010

Mince Pies

Who isn't intrigued by mincemeat?  Anyone?  Everyone has heard of it, and just about everyone has thought "ew gross" as they envisioned meat and raisins in a pie.  And while long ago in lands far away mincemeat did indeed contain beef, venison, or lamb, it has evolved from a savory meal to a mostly meat-free, delicious dessert.  I say mostly because there are some who still put meat in their mincemeat and others who use  beef suet (fat from around the kidneys ::shudder::).  In the past few years as I've really gotten into starting my own yuletide traditions, I always decide it's the year I'll try making mincemeat.  Yet I never did.  But this year, I had the foresight to plan my December weekends and thus I dedicated myself to making mincemeat. 


In looking through my cookbooks for a recipe, I not surprisingly found one in Nigella Lawson's How to Be a Domestic Goddess.  Furthermore, she had multiple recipes for mince pies with various crusts and/or toppings.  I opted for a basic mince pie, just pastry and mincemeat.  


I am thrilled with the results.  It is definitely sweet, but the tartness of the granny smith apples really keep the sweet in balance.  The spices are subtle, which I find refreshing as many holiday dishes are heavy-handed with the clove, cinnamon, and nutmeg. These little pies are really quite addictive and I find myself returning to the kitchen time and time again to pick up another little delight.  That is what is so dangerous about doing bite-size desserts; you really just can't stop!

Hettie Potter's Suet-Free Mincemeat
(from Nigella Lawson's How to Be a Domestic Goddess, pg 264)
  • 1 cup + 2 tbsp dark brown sugar 
  • 1 cup + 2 tbsp medium-dry hard cider
  • 2 1/4 pounds peeled, halved, and quartered tart cooking apples
  • 1/2 tsp mixed spice (I used 1/4 tsp ground cloves, 1/4 tsp allspice)
  • 1/2 tsp ground cinnamon
  • 1 cup + 2 tbsp currants (I used dried cranberries as currants are scarce in Louisiana)
  • 1 cup + 2 tbsp raisins
  • 1/3 cup natural-colored glace cherries, roughly chopped (I used maraschino cherries as I could not find glace)*
  • 1/3 cup blanched almonds, fairly finely chopped
  • ring and juice of 1/2 a lemon
  • 6 tbsp brandy or rum
  • 4 1-pint or 2 1-quart canning jars**
In a large saucepan, dissolve the sugar in the cider over a gentle heat.  Roughly chop the apples and add them to the saucepan.  Then add all the other ingredients except the brandy or rum, and summer for 30 minutes or until everything looks pulpy.  Take off the heat and when it has cooled a little, stir in the brandy or rum.  Spoon into sterilized jars.**

This should make around 4 pounds. 

* Glace cherries are candied cherries and are the type used in fruitcakes.  Usually, they are in all grocery stores around this time of year, packaged in little clear tubs, but for some reason, I couldn't find them.

** I halved the recipe because 1) I wasn't sure I would even like mincemeat, and 2) I didn't want to deal with canning anything.  So halving the recipe, I had enough for my pies and then about 1/2 to 1 cup left over, which I plan to put on top of vanilla ice cream or some other delicious thing. Like pancakes.  Definitely pancakes.   

Star-Topped Mince Pies
(from Nigella Lawson's How to Be a Domestic Goddess, pg 260)
  • 1 2/3 cups cake flour
  • 1/4 cup vegetable shortening
  • 1/4 cup cold unsalted butter, diced small
  • juice of 1 orange
  • pinch of salt
  • approximately 3/4 cup + plus 2 tbsp mincemeat
  • 1 large egg, mixed with a tbsp water to glaze (optional)
  • confectioners' sugar for dusting
  • a tray of miniature tart pans, each indent about 2 inches in diameter*
  • 2 1/2 inch fluted round biscuit cutter**
  • 1 1/2 inch star cutter ***
Measure the flour into a shallow bowl or dish, and, using a teaspoon, dollop in little mounds of shortening.  Add the butter, combine with your hands, and put in the freezer for 20 minutes.  Mix the orange juice and the salt in a small pitcher (I used a measuring cup) and put this in the refrigerator.  

Empty out the flour and fat into the bowl of a food processor and blitz until you've got a pale pile of oatmeal-like crumbs.  Add the salted juice down the funnel, pulsing til it looks as if the dough is about to cohere; you want to stop just before it does (even if some orange juice is left).  If all your juice is used up and you need more liquid, add some ice water.  Turn out of the processor and, in your hands, combine to a dough. **** Then form into three discs.  Wrap each in plastic wrap  and put in the refrigerator to rest for 20 minutes.  Preheat the oven to 425F. 

Roll out the discs one at time as thinly as you can without exaggerating; in other words, you want a light pastry shell, but one sturdy enough to support the dense mincemeat.  Out of each rolled-out disc cut out circles a little wider than the indentations in the trays.  Press these circles gently into the molds and dollop in a scant teaspoon of mincemeat.  then cut out your stars - re-rolling the pastry as necessary - and place them lightly on top of the mincemeat.  

If you want to glaze the  mince pies, then brush the stars with a pastry brush dipped into the egg and water mix.  Sometimes I do, sometimes I don't: the difference really is one of appearance and only you can decide whether you want them pale and matte or gold and shiny.  (Mama Sarah:  I didn't glaze mine.  Next time I might).  

Put in the oven and bake for 10-15 minutes; keep an eye on them, they really don't take long.  Remove from the oven, prising out the little pies right away and letting the empty tin cool down before you start putting in the pastry for the next batch.  Carry on until they're all down.  Dust over some confectioners' sugar by sifting it through a tea strainer before serving them.

makes 36.
*  I do not have a tray of miniature tart pans, but I DO have a mini muffin tray.
** I found a glass that was a bit larger than the muffin cups.
*** I did not have a star cutter, so I printed out a star that would fit within the muffin tray (because I cannot draw) and used it as a stencil, cutting out the stars with a sharp knife.
 **** I have a small 2-cup food processor which does not have a funnel, so things didn't go quite according to plan.  After a few attempts to combine the OJ with the flour, I pulled it all out of the food processor into a bowl and mixed it together with my hands. 

Because I used a mini muffin pan and am not the most efficient roller, I just made 24 pies and one small tart.  

Probably the ONLY thing I would do differently next time is chop my apples smaller.  They did not break down as much as I expected so there are fairly big apple chunks in my mincemeat.  Okay, I'd also either grind the almonds or omit them completely; they were a bit too hard when everything else was so soft.  

Other than that, these are divine  and you should make them so we can educate the world about the awesomeness of mincemeat!  


Saturday, August 21, 2010

Strawberry Pielettes

Last weekend, hubby and I finally hosted a housewarming party after being in our house for approximately two months.  I came up with this monstrously long list of things I wanted to make, which hubby then had to help me cull down.  I stuck mostly with recipes that have been a hit before, but I really wanted to make little bite size fruity pie/tart hybrids.  The coffee shop across from my college - Brewed Awakenings in Cedar Rapids, IA if you're ever in town - made little tarts that were amazing, ESPECIALLY the mulberry one.  The crust was perfectly sweet and tender.  I wanted to do something similar.  I knew what I did not want my crust to be; I didn't want it super flaky (a la apple pie) but I didn't want it to be hard and buttery (a la lemon meringue tarts).  I wanted something almost cookie like, but not quite.  Looking through  my recipes, I came across the hand pies my sister and I made for her husband months ago and TADA we've got a crust.  


These little pielettes (name in progress, not quite a pie, not quite a tartlette) were a smash! Everyone, including me, thought they were great.  I used strawberry preserves for the party ones, and having a few empty shells after the strawberry ran out, used some fig  as well.  Hubby preferred the fig.  I think you could do just about any fruit in these: peach, apple, berries galore. 


 The crust isn't exactly what I wanted; next time, I'll use butter instead of crisco and substitute some brown for white sugar. 

Strawberry Pielettes
(makes 48)
  • 1 cup sugar
  • 1/2 cup shortening
  • 1 egg
  • 1/2 tbsp vinegar
  • 1/2 cup milk
  • 1/2 tsp vanilla extract
  • 1/2 tsp baking powder
  • 1/2 tsp baking soda
  • 1/2 tsp salt
  • 3 1/2 cups all purpose flour
  • approximately 2 cups strawberry preserves (or any other variety)
  • whipped cream
  • sliced fruit/additional berries for topping (optional)
Preheat oven to 350F.  Grease 2 mini-muffin pans (or if you just have 1, bake in two parts).

Cream together sugar, shortening, and egg until fluffy.  Beat in vinegar, milk, and vanilla extract.  

In a separate bowl, whisk together baking powder, baking soda, salt, and 1/2 cup flour.  Add to the wet ingredients.  Add flour in 1/2 cup increments, mixing well after each addition.  Add additional flour, if necessary, to ensure dough is not sticky. 

Roll 1-inch balls of dough and drop into each cup of the muffin pan.  Press the dough to fill the muffin cup, creating an indentation into which you will put the preserves.  You can use your fingers for this; I used the end of my ice cream scoop which had the perfect diameter.  If you use an instrument, make sure you keep it greased or the dough will stick to it and pull up.

Bake for approximately 10 minutes.  The crust will puff up a bit; if it puffs too much, use a spoon to gently remove some from the center.  Spoon a tablespoon or so of preserves into each, filling them almost to the very top.  Try not to drip preserves on the rims of the pielettes.

Bake approximately 10-15 minutes, or until the crust  appears set and slightly golden.  Let cool in pan for a few minutes, then remove to a cooling rack.  A tip for removing them: if you rotate the pielettes in the muffin cup, then should pull out easily.  

Once cool and you're ready to serve, garnish with a plop of whipped cream and slice of strawberry (or whatever fruit you've used). 


Monday, November 30, 2009

Pie Crust

I missed posting yesterday; oops.  After Thanksgiving and the days after, I was just exhausted. I'm still tired, so forgive me.   I'll slowly post my recipes for Thanksgiving since everything was homemade, down to the chicken stock that went into the gravy.  I went insane and it was marvelously fun, but I was oh-so-tired afterwards.

I think I've mentioned before that I am not so fond of pumpkin pie (blegh texture), so for Thanksgiving, I always make my apple custard pie.  On Thanksgiving eve, I was thinking over all the things I was making and realized that everything would be made from scratch, except the pie crust.   I had planned on using a Pilsbury pie crust, but by god, if i was going to make everything else, I was damned well going to make my own pie crust.  Crust fears be damned! I don't know why pie crust intimidated me so; I've made tart crusts and handpies and puff pastry.  How had pie crust become  so difficult to my mind? In an attempt at badassery (really, all of Thanksgiving dinner from scratch), I pushed past those fears.  What did I learn? Pie crust is easy.  Easy as pie. 


I found this recipe ages ago and saved it for the day I would be brave enough..

Pie Crust
(originally found here) 
4 cups all purpose flour
2 tsp salt
1 tbsp sugar
1 3/4 cup shortening, cut into chunks
1/2 cup water
1 egg
1 1/2 tsp white vinegar


In a large bowl, whisk  together flour, salt, and sugar until well combined.  Using a pastry cutter or fork, cut the shortening into the flour until the mixture looks like large, coarse crumbs.


In a small bowl, whisk together water, egg, and vinegar.  Drizzle the liquid over the dry ingredients and mix gently with a fork just until combined.  It might still be crumbly.


Form the dough into a ball and wrap tightly in plastic wrap, taking care to work the dough as little as possible.  Chill for at least an hour.

For a single pie crust, use 1/4 of the dough.  Roll that 1/4 of the dough on a well-floured surface and dust  with flour as needed while rolling to prevent sticking. 

If you are using this crust in a no-bake pie, prick the crust all over with a fork, then bake at 350F for approximately 15 minutes or until it begins to turn golden.  Otherwise, use as directed.

Wednesday, September 9, 2009

Finger Pies, or as others know them, Hand Pies

A while ago, my brother-in-law mentioned in passing the finger pies his grandmother makes and that I should make some. My sister, remembering his comment, enlisted in my help in making some for him as a surprise. We got the recipe from his mom, who copied it down while his grandmother made some of the pies. So today I present some
good ol' Cajun finger pies.


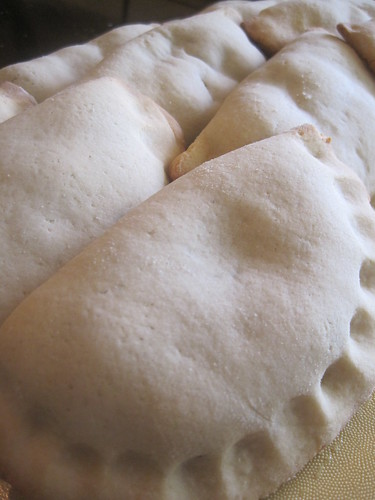
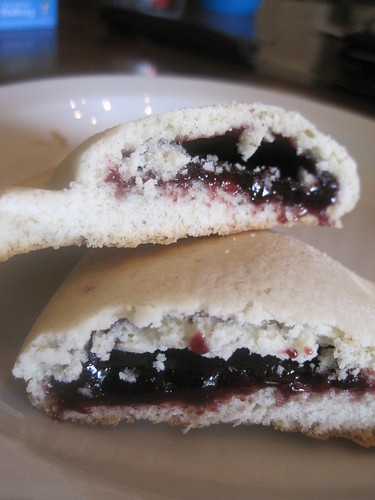
Now, if you're not familiar with these, let me explain. They aren't exactly pies; the dough is more fluffy, moist, and sweet than a standard pie crust. They can be filled with a variety of things: preserves, whole fruit, pudding, etc. We decided to use three different fillings: pumpkin, blackberry preserves, and fig preserves. I think peaches would be absolutely fabulous as a filling, as well as baked apples. Whatever floats your boat. Though, it shouldn't be too moist or you might end up with soggy pies. (After a couple days, our pumpkin pies became soggy in the center.)


Finger Pies
(recipe from Ethel Mire)
  • 2 cups sugar
  • 2 eggs
  • 1 cup shortening
  • 1 cup milk
  • 1 tsp vanilla extract
  • 1 tsp baking powder
  • 1 tsp baking soda
  • 1 tsp salt
  • 1 tbsp vinegar
  • 6 3/4 cups all purpose flour
  • approximately 2 cups of preferred filling

Preheat oven to 350F and line a baking sheet or two with parchment paper. (If you use two pans, the process goes by a little faster.)

Cream together the sugar, eggs, and shortening. Mix in milk, vinegar, and vanilla extract.

Whisk together the baking powder, baking soda, salt, and 1 cup of the flour. Mix into the wet ingredients. Add the remaining (5 3/4 cup) flour a half cup at a time, mixing thoroughly after each addition. Add additional flour if necessary to ensure the dough is not sticky.

Roll approximately 1/4 cup of the dough into a ball. On a lightly floured surface, flatten the ball into a 1/8 inch disc, approximately 6 inches in diameter. Drop a tablespoon of filling on the bottom half of the disc, spreading it out but leaving a 1/4 inch margin clear. Fold the other half of the disc over the filling. Using either your fingers or a fork, press the edges (that 1/4 inch margin) to seal.

Place 4 to a baking sheet and bake for approximately 15 minutes, until the edges are golden brown. Remove to a cooling rack to cool.

This makes approximately 28 finger pies.

Tuesday, November 11, 2008

Apple Pie

Have you figured out that I LOVE apples? Well I do, especially in baked goods. One of the best things about Thanksgiving is that I get to make apple pie. But, I usually find other excuses to make apple pie.. Most recently, I made one for my friend David's birthday. And before that, I made one for my friends at work.
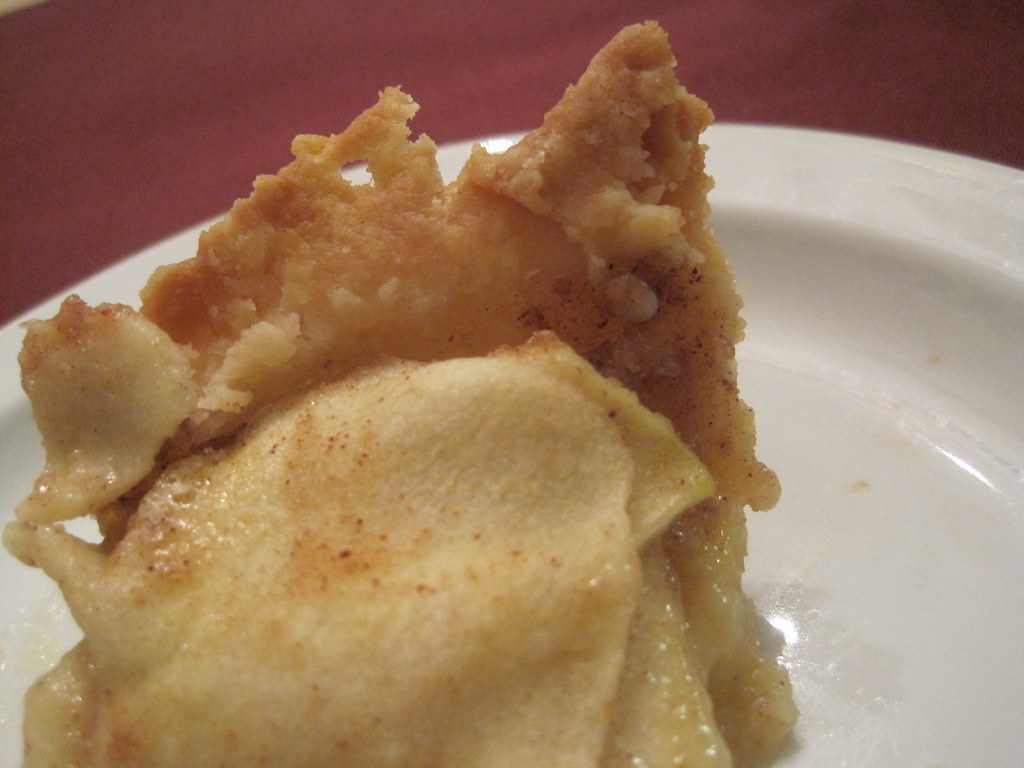
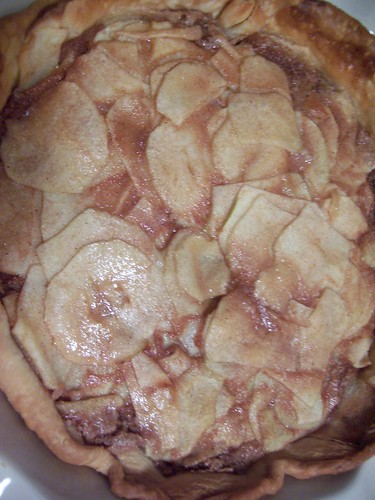
The thing I love about this pie is its custardy base. Everyone is so surprised and delighted when they bite into it and feel the rich smoothness. The custard and the paper-thin apple slices make this pie unique in the world of chunky apples and goo pies. Not to rag on those pies; they're good and have a rightful place in the pie world. But this pie, MY pie, is better. I promise.


Apple Pie
(from Bell's Best, pg 433)
1/2 cup butter, melted
1 cup sugar
1 1/2 tsp flour
2 eggs, beaten
1 tsp cinnamon
2 cups Granny Smith apples, peeled and sliced very thin
1 uncooked pie shell (I use Pillsbury because I'm not that hardcore yet)

Preheat the oven to 350F.

Whisk together the sugar, flour, and cinnamon. Add the melted butter and mix well. Beat in the eggs until well combined.

Toss the apples in the custard mixture until they are well coated.

Pour into the pie crust. Make sure the apples and custard are evenly distributed.

Bake 30-45 minutes, until edges look a bit crisp and the middle doesn't jiggle very much. I usually stick a knife in the middle to make sure it isn't too runny.