Showing posts with label cake. Show all posts

Sunday, March 25, 2012

Cookies and Cream Cake

Yesterday was my nephew's third birthday.  We had a small crawfish boil with my dad, and I of course offered to bake a cake.  Since my nephew had cookie cake on Friday and another cake today at his party with his friends, I decided to try out an idea I'd been brewing for a few days: a cookies and cream cake.  The idea was to have a layer of broken Oreo pieces on the bottom of each cake layer.  Much to my surprise, the cookies pieces floated to the top; perhaps if I'd stuck with my original idea of putting down a layer of whole Oreos, they would have stayed put.  


I wanted to make this cake with a light, whipped frosting; I searched around the web and couldn't find exactly what I wanted.  Most were glorified whipped cream.  I tried one recipe, only to have it end in utter failure, then I tried this recipe for The Best Whipped Frosting over at Can You Stay for Dinner?  It was definitely a winner and it has been marked as a go-to frosting recipe.  So creamy and light.  LOVE IT. 

 For the cake, I adapted the White Cake recipe from my trusty Better Homes and Gardens New Cookbook, using cake flour instead of all-purpose.  This resulted in a denser, spongier cake which hubby really enjoyed.

(My nephew actually didn't like the cake, though I'm fairly certain he didn't even try it.  Oh well! His rejection only broke my heart a little bit =D)

Cookies and Cream Cake

Cake 
  • 1 package Oreo cookies
  • 4 egg whites
  • 2 1/4 cups cake flour
  • 1 tsp baking powder
  • 1/2 tsp baking soda
  • 1/2 tsp salt
  • 1/2 cup butter, softened
  • 1 3/4 cup sugar
  • 1 tsp almond extract
  • 1 1/3 cup buttermilk or sour milk
Frosting
  • 1 cup milk
  • 5 tablespoons flour
  • 2 teaspoons vanilla extract
  • 1 cup butter, at room temperature
  • 1 1/4 cups granulated sugar (not powdered sugar)
  • 1 cup crushed Oreo crumbs
For the Cake:

Allow egg whites to stand at room temperature for 30 minutes.  Meanwhile, grease two 9 inch round cake pans.  Preheat oven to 350F.

Break up half of Oreos, roughly into quarters.  Line them in a single layer, fitted as closely together as possible, in the bottom of each cake pan. 

In a small bowl, whisk together flour, baking powder, and salt. 

In a large mixing bowl, beat butter on high speed for 30 seconds.  Gradually add in sugar and vanilla, beating until well combined.  Beat for an additional 2 minutes, until the mixture is light and fluffy.  Add egg whites one at a time, beating well after each addition.  

Alternately add flour mixture and milk, mixing after each addition just until combined.  Pour into prepared pans.  

Bake for 20-30 minutes, or until a wood toothpick inserted near the center comes out clean.  (Note: the toothpick may come out chocolately, you just don't want it to come out with uncooked batter.)  Cool in pans for 10 minutes, then remove cakes and cool thoroughly on wire racks.  

For the Frosting:

In a medium saucepan, whisk one cup of milk with 5 tablespoons of flour. Heat over medium until the mixture begins to sputter, whisking constantly. Continue to stir as the mixture thickens. You will know it’s done when it reaches the consistency of thick cake batter, after about 7 minutes of heating and whisking. Stir in 2 teaspoons vanilla extract and set aside to cool COMPLETELY.

Now, in the bowl of a stand mixer fitted with a whisk attachment, or using a hand held mixer, beat 2 sticks of softened butter (1 cup) with 1 cup of granulated sugar until light, fluffy, and white in color, about 3 solid minutes of beating on medium-high speed. You want the sugar to be totally incorporated into the butter.

Be sure that the milk/flour mixture has completely cooled, and add it to the butter/sugar mixture. Beat all ingredients for about 1 minute on high speed, scraping down the bowl halfway, until they are smooth and well blended. 

Assembly:

Level the cakes, if necessary.  Pipe a thick border of frosting along the top of the bottom layer to dam the frosting filling.  Spread a layer of frosting evenly within the frosting border.  (You may make this layer as thick or thin as you like, depending on your preference.) Place the second layer of cake on top, and frost it.  Dust with Oreo crumbs.  (I did this by blowing crumbs out of my hand onto the cake, but this was MESSY.  One day I'll figure out how the professionals do it.)

Monday, July 4, 2011

Campfire Delight : Best. Cake. Ever.

In going through chocolate cake recipes this weekend for inspiration, I came across this recipe for a Campfire Delight cake.  It is a a six layer chocolate cake with toasted marshmallow filling and malted chocolate frosting.  It looked so delicious, I just had to make it.  Luckily, I had a family bbq to attend and thus had an immediate reason to bake it!  


I only made four layers as I only have two cake pans and was a bit intimidated by the idea of stacking six layers.  Regardless, this cake was phenomenal, delicious, sinful, delightful.  I am amazed at the willpower I have shown this evening by not devouring a very large slice.

Campfire Delight Cake
(recipe by Sweetapolita)

Rich and Dark Chocolate Cake
  • 1 3/4 cups all-purpose flour
  • 2 cups granulated sugar
  • 3/4 cup Cacao Barry Extra Brute Cocoa Powder (or similar premium brand)
  • 2 tsp baking soda
  • 1 tsp baking powder
  • 1 tsp salt
  • 2 eggs
  • 1 cup strong black coffee, cooled
  • 1 cup buttermilk, room temperature
  • 1/2 cup vegetable oil
  • 1 tbsp pure vanilla extract
Preheat oven to 350 F. Prepare two 9" cake pans with butter and flour or parchment paper. In bowl of electric mixer, sift all dry ingredients. Add all remaning ingredients to bowl with the dry ingredients and with paddle attachment on mixer, mix for 2 minutes on medium speed (you may need the plastic splashguard that comes with mixer) and pour into prepared pans. Batter will be liquidy. 
 
Bake for 20 minutes and rotate pans in oven. Cakes are done when toothpick or skewer comes clean--approximately 35 minutes. Try not to overbake. Cool on wire racks for 20 minutes then gently invert onto racks until completely cool.

Toasted Marshmallow Frosting
  • 16 large white marshmallows
  • 1 cup icing sugar (confectioners' or powdered)
  • 1 cup butter, at room temperature
  • 1/2 tsp pure vanilla extract
  • 8 oz of Kraft Jet-Puffed Marshmallow Cream (or Marshmallow Fluff)
Place marshmallows on cookie sheet lined with parchment paper. Place on lower rack of oven, and broil marshmallows until nice and brown. Be sure to keep an eye on them--they burn very, very quickly. 

Combine butter and icing sugar in electric mixer fitted with paddle attachment, on low until blended (about 1 minute). Add vanilla and mix on high for about 3 minutes. 

Add marshmallow cream and toasted marshmallows, and mix on lowest setting for about 1 minute.

Malted Belgium Chocolate Frosting
  • 2 cups butter, at room temperature
  • 4 cups icing sugar (confectioners' or powdered)
  • 3 teaspoons pure vanilla extract
  • 3/4 cup Ovaltine Classic
  •  8 oz Callebaut (or other premium brand) bittersweet chocolate, melted
  • 1/2 cup heavy cream
In a bowl of stand mixer fitted with paddle attachment, combine the icing sugar and butter and beat on low speed for about 1 minute. Add vanilla and malt powder, and beat on low until well combined. Add the melted chocolate and beat on medium speed until smooth (about 2 minutes). Add whipping cream and beat on med-high speed for another minute. Best used right away.

Assembly:
Level the tops of each cake, then split into two layers with a knife or cake leveler.  Pipe a border of the chocolate frosting around the top edge of your bottom layer, creating a dam to hold in the filling.  Spread a nice, thick layer of marshmallow frosting across the top of the cake.  Carefully place the second layer on top.  Pipe another chocolate frosting dam, then spread a nice thick layer of chocolate frosting.  Carefully place the next cake layer on top and do as you did with the first layer (marshmallow frosting).  Place the final cake layer on top and then ice with the chocolate frosting.  Garnish with mini marshmallows and chocolate chunks, if you please.

Enjoy! 

Chocolate Cake with Raspberry Filling and Caramel Icing

This past weekend, I made a cake for a co-worker's husband's birthday.  (Interesting, her husband is also distantly related to hubby.)  This cake was somewhat of a practice run as she's asked me to make a cake for his coworker's birthday as well.  I cobbled together a few different recipes.  I wasn't able to taste the cake, but my coworker said it was delicious!


 Best-Ever Chocolate Cake 
(Better Homes and Gardens, Our Best Recipes, pg 280)
  • 3/4 cup butter
  • 3 eggs
  • 2 cups all-purpose flour
  • 3/4 cup unsweetened cocoa powder
  • 1 tsp. baking soda
  • 3/4 tsp baking powder
  • 1/2 tsp salt
  • 2 cups sugar
  • 2 tsp vanilla
  • 1 1/2 cups milk
  • 1/3 cup seedless raspberry preserves or raspberry jam (for filling)
  • 1 oz bittersweet chocolate, melted (for drizzle) 
Allow butter and eggs to stand at room temperature for 30 minutes.  Lightly grease bottoms of three 8" round cake pans, two 9" round pans, or two 8x8" square pans.  Line bottoms of pans with waxed paper.  Grease and lightly flour waxed paper and sides of pans.  Set pans aside.

Preheat oven to 350F.  In a medium bowl, stir together the flour, cocoa powder, baking soda, baking powder, and salt; set aside.
In a large mixing bowl, beat butter on medium to high speed for 30 seconds.  Gradually add sugar, about 1/4 cup at a time, beating on medium speed for 3 to 4 minutes or until well mixed.  Scrape side of bowl; continue beating on medium speed for 2 minutes.  Add eggs, one at a time, beating after each addition (about 1 minute total).  Beat in vanilla.  

Alternately add flour mixture and milk to beaten mixture, beating on low speed just until combined after each addition.  Beat on medium to high speed for 20 seconds more.  Spread evenly into the prepared pans. 

Bake for 30 to 35 minutes for round cake pans, 35 to 40 minutes for square pans, or until a wooden toothpick inserted in the centers comes out clean.  Cool cake layers in pan for 10 minutes.  Remove from pans.  Peel off waxed paper.  Cool completely on wire racks. 

Caramel Frosting
(recipe found here)
  • 1 cup (2 sticks) unsalted butter
  • 1/2 tsp salt
  • 2 cups brown sugar
  • 1/2 cup milk
  • 2 tsp vanilla extract
  • 4 cups powdered sugar
Melt butter in a saucepan over medium heat.  Stir in salt and brown sugar.  Bring to a boil, stirring constantly.  Cook over low heat for 2 minutes, until sugar dissolves.  Stir in milk and return to a boil, stirring constantly.  Remove from heat and stir in vanilla extract.  Cool to lukewarm, about 30 to 40 minutes, stirring occasionally.  

Once lukewarm, transfer to a stand mixer.  Sift powdered sugar over it, and beat on medium-high speed until light and fluffy, about 3 to 4 minutes.

Assembly:
Using a bread knife or cake leveler, level the tops of each cake.  Pipe a border of caramel frosting around the top edge of one cake, creating a border or dam.  Spread a thin layer of frosting on top, within the dam, then spread the raspberry preserves on top.  Carefully place the second cake on top of the first.  Frost the cake and garnish with raspberries and drizzle with melted chocolate.

Sunday, May 15, 2011

German Chocolate Cake

Yesterday, my coworker's son graduated from college.  She threw a great little party and requested a German Chocolate cake for the occasion.  Now, at that point I'd never had German chocolate cake, much less made one, but I do have my evertrue Better Homes and Garden cookbook which has yet to steer me wrong.

Kitchen Lesson No. 1:  Always carefully and completely read a recipe before you begin.  You never want to get to the end of your baking adventure and realize that the recipe only calls for frosting the top of the cake layers and not the side when you had anticipated total icing.  That leaves you scrambling for a solution.  That being said, it did lead me to do something I hadn't originally planned but which worked great!  After doing some googling, I saw a few cakes that had the coconut frosting on the top with chocolate on the sides.  It looked classy and delicious and I'm very happy with the end result.  


German Chocolate Cake
(BH&G New Cookbook, pg 166)
 
Chocolate Cake
  • 1 4-oz package sweet baking chocolate, chopped
  • 1 1/2 cups whole milk
  • 3/4 cup unsalted butter
  • 3 eggs
  • 2 cups all-purpose flour
  • 1 tsp baking soda
  • 3/4 tsp baking powder
  • 1/2 tsp salt
  • 1 3/4 cups sugar
  • 2 tsp vanilla
Coconut-Pecan Frosting
  • 1 egg
  • 1 5-oz can evaporated milk
  • 2/3 cup sugar
  • 1/4 cup butter
  • 1 1/3  cup sweetened flaked coconut
  • 1/2 cup chopped pecans
Chocolate Frosting
  • 8 oz bittersweet or semisweet chocolate, chopped
  • 2 tbsp light corn syrup
  • 3 tbsp unsalted butter
  • 1  cup heavy cream
  • 1/2 cup cornstarch
For the cake:

In a small saucepan, combine chocolate and milk.  Cook adn stir  over low heat until melted; set aside to cool.  

Allow butter and eggs to stand at room temperature for 30 minutes.  Meanwhile, grease the bottom of two 8x8" square pans or 9" round cake pans.  Line the bottoms with wax paper; then, grease and lightly flour the pans.  Alternatively, you can just grease a 13x9 inch baking pan.  Set the pans aside.  In a medium bowl, stir together flour, baking soda, baking powder, and salt; set aside.
Preheat oven to 350F.  In a large mixing bowl, beat butter with an electric mixer on medium to high speed for 30 seconds.  Gradually add the sugar, about 1/4 cup at a time, beating on medium speed after each addition until well combined (about 3 minutes).  Scrape the sides of the bowl; continue beating on medium speed for 2 minutes more.  Add eggs one at a time, beating after each addition (about 1 minute total).  Beat in vanilla.  Alternately add flour and chocolate mixtures to the butter mixture, beating on low speed after each additional just until combined.  beat on medium to high speed for 20 seconds more.  Spread batter evenly into the prepared pans.

Bake 35 to 40 minutes for the 8" pans,  30 to 35 minutes for the 9" pans, or 40 to 45 minutes for the 13x9" pan, or until a toothpick inserted near the center comes out clean.  Cool cake layers in pans on wire racks for  10 minutes.  Remove cake layers from pans.  Peel off waxed paper.  Cool thoroughly on racks.  Or place 13x9 cake in pan on wire rack and cool completely.

For the Coconut-Pecan Filling:

In a medium saucepan, slightly beat the egg.  Stir in the evaporated milk, sugar, and butter.  Cook and stir over medium heat for 6 to 8 minutes, until thickened and bubbly.  Remove from heat; stir in coconut flakes and pecans.  Cover and cool thoroughly before using.  

For the Chocolate Frosting:

Combine chocolate, corn syrup, and butter in a medium bowl.  Heat cream until just boiling.  Remove from heat and pour over chocolate.  Let stand for one minute, then stir.  Let sit til room temperature.  Sift cornstarch over frosting, a tablespoon at a time, and mix in until you get a thick enough consistency to frost with.  (When I made this frosting, it wasn't thick enough to stay on the cake (it dripped a bit), so I added cornstarch as a quick fix to get it thick enough.) Classy, I know.

Assembly:

Set the first cake layer on cake plate/round/whatever you desire.  Pipe a 1/4 inch thick border of chocolate frosting around the very edge; this will act as a dam to keep your coconut filling from oozing out the sides.  Spread half of the coconut filling within your chocolate border.  Set the next cake layer on top.  Again, pipe a chocolate frosting border along the edge of the cake.  Spread the other half of the coconut filling on top, trying to get it as level as possible.  Pipe a decorative border on top of the coconut filling dam.  Frost the sides of the cake.   

Slice and enjoy! 

Wednesday, October 20, 2010

Vermont (Pumpkin) Spice Cake with Cream Cheese Frosting

Hello, Autumn! I have pumpkin on my mind lately, so when I stumbled upon this recipe for a pumpkin cake layered with cream cheese frosting, I knew it would be a wonderful idea. 


Vermont Spice Cake with Maple Cream Cheese Frosting
  • 3 cups all-purpose flour
  • 3 1/2 teaspoons baking powder
  • 2 teaspoons pumpkin pie spice (I used a mixture of 1 1/2 tsp. cinnamon, 1 tsp. cloves and 3/4 tsp. nutmeg)
  • 1 teaspoon baking soda
  • 1/2 teaspoon salt
  • 1 1/2 cups sugar
  • 3/4 cup (1 1/2 sticks) butter, softened
  • 3 large eggs
  • 1 1/2 cup canned pumpkin
  • 1/2 cup evaporated milk
  • 1/4 cup water
  • 1 1/2 teaspoons vanilla extract
Maple Cream Cheese Frosting:
  • 11 ounces cream cheese, softened
  • 1/3 cup butter, softened
  • 3 1/2 cups powdered sugar
  • 2-3 teaspoons maple extract (I used 1 tsp vanilla extract as I did not have any maple)
  • squeeze of lemon juice
Preheat oven to 325 degrees. Grease 2 9-inch round cake pans. 

Combine flour, baking powder, spices, baking soda and salt in a small bowl. 

Beat sugar and butter in a large mixer bowl fitted with a paddle attachment until creamy. Add eggs one at a time; beat for 2 minutes. Beat in pumpkin, evaporated milk, water and vanilla extract.  Gradually add the flour mixture. 

Spread evenly into prepared cake pans. Bake for 35-40 minutes until a toothpick inserted comes out clean. Cool in the pans on wire racks for 15 minutes; remove to wire racks to cool completely.

For the frosting:  Beat cream cheese and butter until smooth. Gradually add in the powdered sugar and beat until fluffy. Add in the maple extract and lemon juice. Mix well. Refrigerate until needed.

Cut each cake layer in half horizontally with a long, serrated knife. Frost between layers and on top of cake, leaving sides unfrosted. Garnish as desired.

Saturday, August 1, 2009

Chocolate Angel Food Cake

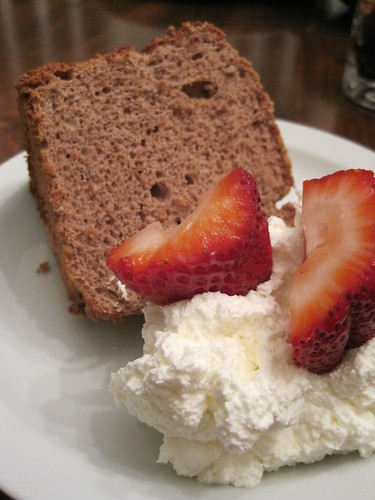
A couple weeks ago, my sister texted me that she was craving something sweet. A few days later, she came over for dinner, still with that craving. Texting back and forth (like we always do) before she came over, I discovered she likes chocolate cake and decided to make her a chocolate angel food cake. Partly because I simply love angel food cake. Partly because angel food cake is one of the healthier cakes out there. Mostly because I love angel food cake.

After preparing the batter, I didn't expect it to be all that chocolatey; I anticipated a hint of chocolate. Oh, but I was so deliciously incorrect. Especially for being an angel food cake, this has a robust chocolatiness perfectly complemented by the sweetness and stickiness of angel food. SO. FREAKIN'. DELICIOUS. The cake did not lost long. I sent my sister home with a chunk of it, which she then ate the next morning for breakfast. But then again, I had some for breakfast that morning too.


I served this cake with homemade whipped cream and sliced strawberries, because what goes together better than chocolate, strawberries, and cream?

Chocolate Angel Food Cake
(Better Homes and Gardens New Cook Book, pg 182)
  • 1 1/2 cups egg whites (10-12 large eggs)
  • 1 1/2 cup sifted powdered sugar
  • 1 cup sifted flour
  • 1/4 cup unsweetened coca powder
  • 1 1/2 tsp cream of tartar
  • 1 tsp vanilla extract
  • 1 cup granulated sugar

In a large bowl, allow the egg whites to sit at room temperature for 30 minutes. Meanwhile, sift together powdered sugar, flour, and cocoa three times; set aside.

Place baking rack in lowest position in the oven. Preheat to 350F.

Add cream of tartar and vanilla to egg whiles. Beat (with electric mixer) on medium until soft peaks form. Gradually add granulated sugar 2 tbsps at a time, beating until stiff peaks form.

Sift 1/4 of the flour mixture over the egg whites and fold in gently. (You may need to transfer to a larger bowl.) Repeat, folding in the remaining flour mixture by fourths.

Pour into an ungreased 10 inch tube pan. Gently cut through the batter with a butter knife or small spatule to remove any large air pockets.

Bake on the lowest rack for 40-45 mintues, or until the top springs back when lightly touched. Immediately invert the cake; cool thoroughly in the inverted pan. Using a small spatula or knife (a clean one!), loosen the sides of the cake from the pan; remove it from the pan.


To make whipped cream, simply beat heavy cream in a bowl until it thickens and stiffens. If you'd like it sweetened, add powdered sugar to taste. You may also add cocoa powder or vanilla extract or any other flavorings you'd like.

Tuesday, July 28, 2009

Cookie Cake

Well now. Sorry for the absence; last week, my sister's baby had to return to the hospital (quite suddenly) for his second heart surgery. So I've spent the last week and a half going back and forth between home and New Orleans, where he's hospitalized. He is doing amazingly well and should be home soon. I can't wait!!

My latest trip to New Orleans was to celebrate my sister's birthday. She really wanted a cookie cake (she had been scheduled to get one at work before we knew about the surgery) so a cookie cake she would have!! First, I thought I would use my white and milk chocolate chip cookie recipe, but I was worried about it baking correctly. I googled cookie cake recipes and came across this one from Emeril. What better recipe to use while my sister is holed in up New Orleans? In fact, the hospital isn't very far from one of his restaurants. Anyhoo. The recipe called for bittersweet chocolate chips, white chocolate chips, walnuts, and macadamia nuts. I generally try to avoid baking with nuts, since so many people have allergies or just don't like them. Now, my sister LOVES these new Hershey nuggets that are milk chocolate with toffee and almonds. When I say she loves them, I mean it. And they deserve the love. They are amazingly delicious. Sadly they are difficult to find. No worries though; Mama Sarah is dedicated to her baking! Once I found a bag (and then bought two), I chopped those up and used those instead of all the mix-ins Emeril used.


Since this cookie cake was for a birthday, it had to be decorated, right? Right. Unfortunately, I have horrible handwriting (which I *unfairly* blame completely on being a lefty) so I just used icing tips to decorate the edge and then create a heart in the center. Not too bad for a first time.


Everyone LOVED the cake. It was a great recipe, but the chocolate with bits of toffee seemed to make it. Everyone ate twice as much as they initially planned. Which, after gorging ourselves at the casino lunch buffet, means a lot. You should definitely make this recipe; cake form or cookie form doesn't matter.

Cookie Cake
  • 1 cup unsalted butter, softened
  • 1 cup light brown sugar, packed
  • 1/2 cup granulated sugar
  • 2 large eggs
  • 2 cups + 2 tbsp flour
  • 1 tsp baking soda
  • 1/2 tsp salt
  • 1 1/2 tsp vanilla extract
  • 1 package Hershey's Creamy Milk Chocolate with Toffee and Almonds Nuggets, chopped into chips

Preheat oven to 375F. Line a baking stone or pizza pan with parchment paper, then grease the paper. Alternatively, you can use a disposable tin pizza pan (that's what I did).

In a large bowl, cream together the butter and sugars. Add the eggs one at time, beating thoroughly after each addition.

In a separate bowl, whisk together the flour, baking soda, and salt. Add to the wet ingredients and mix until thoroughly incorporated. Mix in the vanilla. Stir or fold in the chocolate pieces.

Spoon on to/ into prepared surface/pan. Evenly distribute the batter and smooth the surface. Don't forget the cookie dough will rise; mine filled up a 13 inch pizza pan and hung a tiny bit over the side.

Bake approximately 20-25 minutes, until the edges are golden and the cookie is set, but soft. Let cool ten minutes before removing from the pan and placing on a cooling rack. If using a disposable pan, you can leave it in the pan and just place it on the rack.

Cool completely before decorating.

Icing
  • 4 cups powdered sugar
  • 1 cup shortening
  • 1/3 cup milk
  • 1 tsp vanilla extract
  • food coloring, optional
Using a mixer (if you don't have a mixer, buy icing. It isn't worth stirring by hand), cream together the sugar and shortening until light and fluffy. Slowly add milk and vanilla extract. Beat until stiff. Mix in food coloring.

Monday, June 1, 2009

Rosemary Apple Cake

Today was crummy. For some reason, I was super irritated my entire work day. Of course, I cheered myself up with some good ol' baking. First, I took the dry left-over pound cake and made a bread pudding of sorts with it. I'm still not sure how I feel about it and if I'll post it. We'll see.


Over the weekend, I bought some rosemary for supper. I've seen many recipes utilizing rosemary in desserts (cakes, cookies, etc) and happened across an apple cake with a rosemary syrup which I thought would take great advantage of the apples that have been hanging out in the fridge for quite awhile as well as the left-over rosemary.

The taste of rosemary is very low-key, barely there. The cake is so very, very moist, and the apples add a cloying touch to the simple sweetness.


Rosemary Apple Cake
(Rustic Apple Cake with Rosemary Syrup, by Deborah Mele)
  • 2 medium-large apples, peeled and chopped into 1/2 inch pieces
  • 3 tbsp sugar
  • 2 tbsp butter
  • 1 tsp cinnamon
  • 1 cup butter, softened
  • 1 cup sugar
  • 1 tsp vanilla
  • 4 large eggs
  • 1 cup flour
  • 1 1/2 tsp baking powder
  • 1/2 tsp salt
  • 1/2 cup sugar
  • 3/4 cup water
  • 2 sprigs rosemary
In a heavy skillet, melt 2 tbsp butter. Add apples, cinnamon, and 3 tbsp sugar, stirring to coat the apples in the spices. Cook until the apples begin to become brown and tender. Set aside.

Preheat the oven to 350F. Lightly grease and flour an 8 inch springform pan.

In a large bowl, cream together 1 cup butter (softened), 1 cup sugar, and vanilla until light and fluffy. Beat in eggs, one at a time, mixing thoroughly after each one.

In a separate bowl, whisk together flour, baking powder, and salt. Fold into batter, just until incorporated. Fold in the apple mixture. Pour the batter into the prepared pan.

Bake for 45 minutes or until a skewer (or knife) comes out clean. The top of my cake started to brown really quickly, so after about 20 minutes I threw some foil over the top which helped.

15 minutes after you've put the cake in the oven, bring the 1/2 cup sugar, water, and rosemary to a boil in a small saucepan. Reduce the heat and simmer for 15 minutes, stirring occasionally. Remove from heat and let sit 15 minutes. Strain the syrup and discard the rosemary.

While the cake is baking, combine the sugar, rosemary, and 3/4 cup of water into a small pan and bring to a boil. Reduce the heat, and simmer for 15 minutes. Remove from the heat and let sit for an additional 15 minutes. Strain the syrup, discarding the rosemary.

Using a skewer, poke holes in the cake approximately 1 inch apart. Pour half of the rosemary syrup over the cake. Allow it to sit and absorb for 15 minutes, then pour the rest of the syrup over it.

Cool completely and remove from pan.

Sunday, May 17, 2009

Hot Milk Sponge Cake

Well, I am just on a roll today, aren't I? First, the puffed pancake, then the NoLa shrimp, now this cake. Man, it was a good day! I just felt the need to end it with something sweet, and of course homemade. And it's Sunday, so I've got to have something for my coworkers (some of whom have been completely whiney about the lack of baked goods, others of whom were completely understanding). Now, I have a slight problem. My company is doing a fitness challenge, and my shift as grouped together and decided to lose weight. (I'm not participating because I'll only be around for half of the competition). They've said they'll eat baked goods if they're "healthy", to which I scoff. I told hubby I'd use double butter and extra heavy cream for everything. Evil? ME?? MUAHAHAHAHAHA. Um..... ..... But I actually found a recipe I marked as "to try" eons ago that is relatively healthy. SO there we go. I'll lure them into a false sense of security before dosing them with butter and cream. MUAHAHAHAHA

...


Hot Milk Sponge Cake
(from Better Homes and Gardens New Cookbook, pg 181)
  • 2 eggs
  • 1 cup flour
  • 1 tsp baking powder
  • 1 cup sugar
  • 1/2 cup milk
  • 2 tbsp butter

Let eggs sit at room temp for 30 minutes. Grease a 9x9 inch baking pan (I used 8x8 which increased my baking time). Preheat oven to 350F.

In a small bowl, whisk together flour and baking powder.

In a medium bowl, beat eggs on high speed for 4 minutes or until thick and lemon colored. Gradually add sugar, beating on medium speed for another 4 minutes or until light and fluffy (mine never got light and fluffy; it was creamy).

Add flour to egg mixture and beat just until combined.

In a small saucepan, combine milk and butter, heating and stirring until the butter melts. Add to the batter and beat until coombined.

Pour batter into the pan and bake for 20-25 minutes, or until a toothpick inserted near the center comes out clean. (Mine took closer to 30 minutes.)

Cool in pan on a cooling rack.

Serve dusted with powdered sugar or with fruit. It's sweet on its own, so tart raspberries complement the cake quite well. I'd also consider using this for some strawberry shortcake. Mmmm. It's tasty. I might have to whip up some cream... But I guess that would make it not so low fat, eh?

Thursday, March 12, 2009

Lavender Teacake

When I was a kid, I got a bottle of stuff from Bath and Body works that supposedly would help me sleep. It was a lavender mist to be sprayed over the sheets before going to bed. After a few days, I realized I was not a fan of lavender. Fast forward many many years (as in a few months ago) and I had the chance to reexperience lavender in a much more positive way. And HEY I thought it was mighty nice.

Sunday, I made a lavender teacake. I bought some lavender quite some time ago, wanting to play around with it in the kitchen, but then I basically forgot about it. Randomly, I remembered it and had to do something with it. After searching TasteSpotting, I found this recipe (Australian, I believe) and thought it sounded nice.

I've taken quite some time posting about it because I'm still not quite sure how I feel about it. For so long, I've viewed lavender as a scent only, not something to be eaten. The cake is nice and soft and sweet, but when I eat it, I feel as if I've accidentally eaten lotion or soap or something else. The lavender does not taste bad; it's just my associations with lavender taint the experience. Four days after making it, I'm still not sure how I feel.


Lavender Teacake
  • 1/4 cup butter, room temp
  • 1/2 cup sugar
  • 1 egg, lightly beaten
  • 1 tsp vanilla
  • 1 cup all-purpose flour
  • 1 1/2 tsp baking powder
  • 1/2 tsp salt
  • 1/3 cup milk
  • 1 tsp lavender

Preheat oven to 350F. Spray pan with nonstick spray (I used a bundt cake pan, but a smaller pan would work as well because this is a little cake).

Cream butter and sugar. Mix in egg and vanilla.

In a separate bowl, whisk together flour, baking powder, and salt. Add to wet ingredients and mix well. Add milk and mix until well combined.

Stir in lavender. Pour batter into prepared pan and bake approximately 25 minutes, until cake is golden and cake tester comes out clean.

Let cool for 5 minutes in the pan before inverting onto cooling wrack to cool completely.

* The original recipe called for 1 cup self-rising flour. I only had all-purpose, so a quick google search landed me at this site which informed me that I could use, per 1 cup self-rising: 1 cup all-purpose;1 1/2 tsp baking powder; 1/2 tsp salt.

** The original recipe also had a slight "icing" but I didn't want to do it. I thought of being clever and trying to come up with my ownn (Earl Gray maybe) but I don't feel the cake even needs one.

I think hubby is scared to try it. I might bring it to work tomorrow to see what the coworkers think.

*******
An update:
I brought this cake to work to see what my coworkers thought of it. I had started to move away from it; I just can't adjust to lavender as a foodstuff. I found that my sentiment was universal. Of the four people who tried it at work, none liked it.

One called it disgusting.

One special coworker told me "I just feel so betrayed by cake right now."

That same coworker had the following conversation with another one.
Coworker 1 - asking if I'd shaved some deodorant into the cake.
Betrayed Coworker - 'tastes like teen spirit'
Coworker 1 - 'tastes like teen angst'

Please note, I have great relationships with these coworkers and they generally greatly enjoy the things I bake for them. While they're comments might seem harsh, I laughingly agree with them all. Lavender cake is not for us. We'll stick with lavender lotion, mist, and soap.

Friday, July 11, 2008

Chocolate Loaf Cake

I am in love, and the object of my adoration is Nigella Lawson. At first, hearing about her in the blogosphere, I scoffed. Who is ever that great? She is. I take back my scoffing. The hearthbread was amazing and this chocolate cake was glorious. It's the Dense Chocolate Loaf Cake (page 166) from How to Be a Domestic Goddess. Mmm domestic goddesshood, here I come!!


Chocolate Loaf Cake:
  • 1 cup unsalted butter, softened
  • 1 2/3 cup dark brown sugar
  • 2 large eggs, beaten
  • 1 tsp vanilla extract
  • 4 oz bittersweet chocolate, melted and slightly cooled
  • 1 1/3 cup flour
  • 1 tsp baking soda
  • 1 cup + 2 tbsp boiling water

Preheat oven to 375F. Place a baking sheet on the bottom rack. Grease a loaf pan, then line it with parchment paper.

Cream the butter and sugar, then add the eggs and vanilla. Beat well. Fold in the chocolate; do not overmix.

Whisk together the flour and baking soda. Alternate adding the flour and water by the spoonful. This will take quite a bit of stirring. The batter should be smooth and liquidy.

Pour into the loaf pan and bake for 30 minutes. Reduce the heat to 325F and cook for an additional 15 minutes. It'll still be a bit damp, so toothpick or skewer won't help.

Place on a rack and let it cool completely. Nigella says letting it sit for a day or so improves the flavor. The cake will sink a bit in the middle.

Tuesday, June 24, 2008

New York Style Cheesecake

I've mentioned before that hubby loves cheesecake. He always gets one for his birthday and usually no other time. But with all my baking craziness lately, I decided I'd make him one just because he's so darn cute. I have many saved recipes; caramel cheesecake, vanilla bean cheesecake, etc. But no, hubby wants a plain old New York style cheesecake. With strawberries. Like always. I did have a new plain cheesecake recipe by The Repressed Pastry Chef, utilizing a water bath, so I decided to try it.


Because hubby and I prefer my old recipe and the owner of this recipe wants me to ask permission before linking to her recipes, I'm just not going to post it. Instead, I'll post the recipe I usually use, because we think it's better.. I've had it for YEARS and I have no idea where it came from. Hubby prefers this cheesecake because it's "so thick and creamy" and he likes his cheesecake dense. What hubby wants, hubby gets (when it comes to homemade cheesecake).

New York Style Cheesecake

2 lbs cream cheese
¾ cup white sugar
2 eggs
1 tsp vanilla extract
2 tbsp cornstarch
1 cup sour cream
1 ½ cup graham cracker crumbs
6 tbsp melted butter
¼ cup white sugar

Preheat oven to 400°.

Mix graham cracker crumbs, melted butter, and ¼ cup sugar together. Press mixture onto the bottom of one 9 or 10 inch springform pan. Place in freezer for 10 minutes.

Cream ¾ cup of sugar and cream cheese until smooth. Beat in eggs, vanilla, and cornstarch until just mixed. Stir in sour cream until blended.

Pour into prepared crust. Bake for 45 minutes. Turn oven off and leave cake in oven with door ajar for 3 hours.


Now, some people like their cheesecake swirled with caramel or chocolate (me). Others like raspberry or strawberry (hubby). I have no problem serving it with strawberry, but i REFUSE to use the gross strawberry goop you find at grocery stores. Instead I made my own (thinner) strawberry sauce.

Strawberry Sauce:
1 carton strawberries
sugar
(it's that easy)

Slice your strawberries as thin or thick as you'd like them. Place them in a tupperware container and sprinkle them with a few tablespoons of sugar. Give it a good stir, then cover and place in the fridge. As the strawberries break down in the sugar, they'll get a bit softer and a little less tart while a nice little sauce forms. You can add more sugar if to create a slightly thicker goop.

Tuesday, May 20, 2008

Spiced Chai Cake

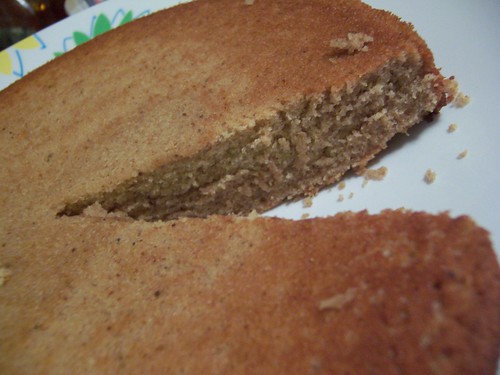
Today, sitting in my little work cubicle, I decided to bake something tasty once I got home. I decided I wanted to work with spices I don't normally use to kind of break away from the same-old. I went a step further and decided to create something all by myself; just come up with it in my head (maybe check the standard measurements for whatever I decided to bake) and go. Jessica from Pictures of Cake and her Rainy Day Golden Apple Cake gave me courage.

I wanted to use cardamom and ginger and cinnamon...CHAI! I love spiced chai and have made some before. It's not an original idea; I've seen recipes for such a thing before. But this was Sarah-specific chai cake. (Can you tell I'm really proud of myself?) I worked out my starting measurements and gave it go.

It's delicious. I love it. I love myself for creating it. It doesn't look like much, but I love it.


Spiced Chai Cake:
  • 1 cup flour
  • 1/4 tsp baking powder
  • pinch salt
  • 1/4 cup butter
  • 1/2 cup granulated sugar
  • 1/2 cup brown sugar - this is NOT packed, just measured out like everything else
  • 2 eggs
  • 1/4 cup honey
  • 1/2 tsp vanilla extract
  • 1/2 heaping tsp cinnamon
  • 1/2 heaping tsp ground cardamom
  • 1/4 heaping tsp ground ginger
  • 1/4 heaping tsp ground cloves
  • 1/4 cup prepared black tea (I steeped a bag of Tazo's Awake for awhile to get a strong cup of tea)

Preheat oven to 350F. Grease a 9 inch cake pan (or any other smaller pan) very well.
Sift together flour, baking powder, salt, cinnamon, cardamom, gloves, and ginger. Mix well. Smell the mixture to get a sense for the balance of spices and to make sure there's enough.
Cream butter and sugars together. Beat in eggs. Add honey and vanilla and mix well.
Add 1/2 of the dry mix and mix well. Add 1/2 of the tea. Mix well. Add the rest of the flour. Mix well. Add the rest of the tea. Mix well. My tea measurement isn't exact; I added approximately 1/4-1/3 a cup. The mixture should have the consistency of .. a cake mixture.
Pour batter into pan. Again, I failed you. I forgot to check the clock when I put the cake in. I'm estimating the bake time at about 20 minutes. Watch it though. It's done when an inserted toothpick comes out clean.

The cake has a strong spiced flavor, which is what I wanted. I can't decide if I should ice it in any way. I can imagine possibly doing a light honey-flavored whipped icing or maybe a slight vanilla. It shouldn't be too sweet or strong or the whole thing will be too much..

I think this would make great cupcakes.

Wednesday, May 7, 2008

Rainy Day Golden Apple Cake

By now I hope you assume most recipes I find are through TasteSpotting. This time it brought me to Pictures of Cake and her self-concocted Rainy Day Golden Apple Cake. I'm not cool, so I don't have 5 inch cake pans, but other than that I stuck with recipe. It was very simple.


  • 1 medium Golden Delicious apple
  • 1 tbsp diced unsalted butter
  • 1/2 tsp brown sugar
  • 2 tbsp softened unsalted butter
  • 1/4 cup + 1 tbsp packed brown sugar
  • 2 eggs
  • 1/8 cup heavy cream
  • 1/2 tsp vanilla
  • zest of 1 lemon
  • 1/2 cup + 1 tbsp flour
  • 1/4 tsp baking powder
  • pinch of salt

Preheat oven to 350F. Butter a 5 (or 9) inch cake pan. Line the bottom with parchment paper. Butter that as well.
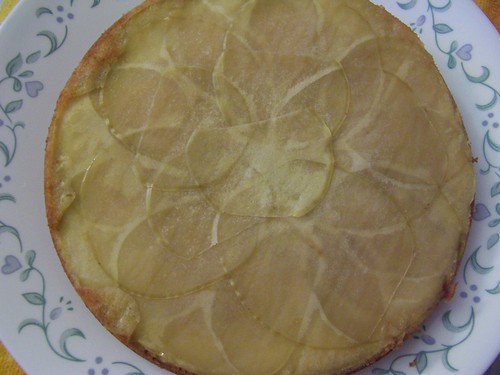
Thinly slice the apple. I did so using the mandolin slicer. Line the pan with apples, overlapping slices. Make it pretty because this will be the top of your cake.
Spread the butter bits and 1/4 tsp brown sugar over the apples.
Cream the rest of the butter and brown sugar. In a separate bowl, whisk together the eggs, cream, and vanilla extract.
Stir egg mixture into butter/sugar mixture. Mix well.
In another bowl, sift together flour, baking powder, and salt. Mix into sugar mixture. Mix until no dry spots remain.
Pour batter on top of apples. Bake for 30 minutes. Let cool 5 minutes before running a knife along the edges and turning the cake out of the pan to cool completely.
It is advised to serve this with cream. Good either warm or cool.

This is a simple, pretty cake. If I made this again, I don't think I'd add the lemon zest, and I'd spice up the batter some more.

Also, the cake had a bunch of weird air pockets. Perhaps I did not mix well enough?

Saturday, April 19, 2008

Lemon Yogurt Cake


So, as usual, TasteSpotting brought me to yet another recipe; this time, it was Kid Diva's "Lemon Vanilla Yoghurt Cake." Now, for all but the last year of my life, I never really liked anything lemon-flavored. Slowly, I started to move into the lemon zone... And then, this past weekend, I discovered lemon poppy seed muffins. OH GOD why was I not given these before?! Anyhoo, since then I've been craving lemony goodness. And thus enters the lemon cake.

So, if you clicked on the link to the original recipe, you'd notice it was written for someone in Europe (i.e. more sensical modes of measurement). And some ingredients have slightly different names or forms.. so I americanized it a bit. I had to, as I can't hop in my jet and zip on over to a grocery in London. .. So here goes..

Lemon Yogurt Cake:

  • 1/3 cup vanilla yogurt
  • 1 cup sugar
  • 1 cup butter, melted
  • 2 medium eggs
  • the zest of 1 lemon (make sure it isn't waxy or chemical-y)
  • 2 cups flour
  • 2 tbsp half & half
  • Icing:
  • a few tsps half & half
  • 1/2 cup (more or less) powdered sugar
  • 1-2 tsp vanilla

- Preheat oven to 350F.
- Whisk together the yogurt, sugar, butter, eggs, and zest. Beat in flour. Add cream.
- Grease loaf tin and fill with batter. Cook 55 minutes to 1 hour.
- Once the cake has cooled, slowly add the half & half to the powdered sugar. Stir briskly, slowly working in the powdered sugar. Be careful or lumps might form. Drizzle over cake.

The cake has this almost creamy texture that it is amazing. The lemon is just the right amount.

Okay. Confession. I screwed up majorly the first time I made the cake. I am ubersensitive to my oven's bake time, so I obsessively checked the cake. Once it was a light golden and a toothpick came out clean, I removed it from the oven. A few hours later when I went to slice it, it was gooey. And gross. And heartbreaking. BUT I did learn that the original lemon juice/powdered sugar icing was WAAAY too much lemon. Yes, that much too much. WAAAY. Instead, I opted for the vanilla, which works well I think.

Alright. I am finished posting for the day. We'll see what happens tomorrow.

Thursday, March 13, 2008

Failure, Meatloaf, and Perfect Chocolate Cake

I'm feeling lazy; it's been a long day with lots of cooking. Two thirds of my attempts were scrumptious.. the third, not so much. BUT I did buy my first vanilla bean today; I shall hopefully use it tomorrow. I've decided not to retype any of the recipes as I followed them exactly.

So I was super excited to make these garlic rolls; I love garlic and I love bread so HELLO awesome recipe to try right? Well, mine DID not look like the photo. I knew something was up when my dough did not rise at all during the set rising time. But, I soldiered on and continued.. They didn't rise at all during the baking. I talked to my mom, and she said she's never seen a recipe that didn't call for dissolving the yeast in liquid before adding it to everything else (disregarding bread machines). Also, there could have been a slight issue with the conversions.. but oh well. Perhaps I'll tweak the recipe and try again. However, mine were edible (though hard) and really didn't taste phenomenally garlicky. I'll tweak that as well. Good idea though. These are my sad results; most of the rolls fell apart, having never joined spheres... Sadness..


Okay. So, I was raised with the whole "meatloaf is disgusting and a horrible idea" mantra. My mom NEVER made meatloaf that I can remember. I avoided it at school... I just never ate it until about a year ago. I was curious and hubby likes it. It really wasn't that bad, though nothing I think I would ever write home about. There are much more fun things to make than a loaf of meat. BUT then I came across this meatloaf recipe. It's turkey (I've discovered I really enjoy cooking with turkey!) I might not have double-glazed it, but that's just me being picky about sauces. Pretty tasty; like it says with the original recipe, this can turn a lover to a hater. (Of course, I served it with mashed potatoes and peas...which should be mixed together!)


Now the fun part of the evening came when my friend let me know she was craving warm, chocolate cake. Me, being the crazy that I am, immediately offered to make her one. And who in their right mind would turn away fresh, warm, homemade chocolate cake, especially when craving it? It took awhile to narrow down the recipe choices. I had two that I flitted between for awhile, but one mandated being served warm. Since she didn't get off work til 1 am, I figured I should go with the second cake. It's someone's grandma's Hershey Chocolate Cake. It's a lighter, cakier cake than some chocolate cakes can be, but the icing on top makes it super-sweet and chocolatey. The recipe calls for pouring the hot icing over the hot cake, which resulted in sizzling bubbles around the edges. See?


Anyway. This cake is like crack. I'm going to have to bring it to work tomorrow so I don't eat it all myself and gain 500 pounds in a night. So simple and so good.


Also, I had the tastiest hot cross bun today from Panera. I always imagined hot cross buns had raisins in them.. These did not; instead they had candied oranges and strawberries. AMAZING. I have never had strawberries baked into anything. The bun itself was sweet and slightly cinnamony. I actually pulled off the little cross of icing; it really didn't need it. So good though. I'll have to somehow make these myself. People will think I am a goddess.

Tuesday, March 11, 2008

Condensed Milk (Vanilla) Pound Cake


Cake on the Brain had this tasty little pound cake on TasteSpotting, and I being the condensed milk and vanilla lover that I am decided to try this out tonight once I realized that hazelnut extract does not exist within this city. (To look forward to: Ferrero Rocher cupcakes) I had just bought some strawberries from the grocery store and thought they would pair well together. Genius! Strawberries and pound cake; no one's thought of that before!

It is simple and tasty. The edges are a bit dry, but the middle is perfect. Again, I blame uneven cooking on my oven. I have NEVER in many years of baking experienced the issues I have with the oven in this apartment. I pine for the day that I own good appliances.

Condensed Milk Pound Cake:
(originally from Pichet Ong)

1 cup butter at room temperature
1 1/3 cup flour
3/4 tsp baking powder
1/2 cup sugar
2 tsp vanilla (I used 3 tsp)
1/2 tsp salt
3/4 cup sweetened condensed milk
3 eggs

Preheat the oven to 325F. Generously grease/butter a loaf pan.
Sift together the flour and baking powder. I usually don't actually use a sift; I'll whisk them together really well with a whisk (dur) or fork.
Beat sugar, butter, and salt until fluffy - about 2 minutes. Add condensed milk; mix well.
Add dry ingredients, and mix thoroughly. Add eggs. Beat well. Mix in vanilla extract.
Pour into prepared pan. Bake until dark golden brown and a knife inserted in the middle comes out clean. This can take anywhere from an hour to an hour and twenty minutes. I just watched mine very carefully.

Alternative method: If you're lucky enough to have vanilla beans, the first step should be processing the vanilla bean and the sugar. Some people say to then sift the sugar to get the vanilla bean bits out, and some recommend leaving them in. Do what makes you happy. Then proceed as usual from there; beating in the butter, yadda yadda.

As mentioned previously, I served it with strawberries. I picked up a trick the last time I made hubby a cheesecake; I slice the strawberries and sprinkle a bit of plain, white sugar on top. Then I let them sit (in a sealed container) in the fridge until they make their own thick strawberry juicey goodness. I find it is MUCH better than the pre-made goop you get in the tub at the grocery.

Hubby REALLY liked this.

Wednesday, February 27, 2008

Chez Belaire

A month or two ago, hubby won an award at work for being kick-ass. Part of the award was dinner at a nice restaurant with other coworkers who kick ass. Sadly, that dinner has been postponed FOUR times now, the most recent being Monday. I decided it was about damn time my man had himself dinner at a nice restaurant, so I made one.. Chez Belaire, open 1 night with a very limited menu. I tried these mushroom-potato muffin appetizers and had some ready when he got home. Dinner consisted of steaks (marinated in Stubbs Beef Marinade.. sooo good) and brussels sprouts. For dessert, I made a raspberry angel food cake.


The recipe, as is, makes 48 mini-muffins. This is quite a few for just two people; adjust the recipe accordingly. Here's the recipe as I did it.. I apologize to the creator because I am not vegan, so it follows that my version won't be either.

Mushroom Potato Mini Muffins :
5 cups potatoes - about 6 medium potatoes, mashed
2 cups chopped mushrooms - I just used one of the packs of portabello mushrooms from Target
4 tbsp butter
1/2 onion, chopped
3/4 cup flour
4 eggs
4 tsp baking powder
salt
pepper
garlic powder

Okay. Obviously, you're first going to have to boil and mash the potatoes. Add 2 tbsp butter to the potatoes. Put into a large bowl.
Saute mushrooms and onions in 2 tbsp butter. Let them cook down a bit. (At this point, I would season the mushrooms and onions with salt and perhaps Chachere's. I would also add minced garlic to the saute mix - it's much better than adding garlic powder at the end.)
Add the mushrooms and onion mix as well as the rest of the ingredients to the mashed potatoes. Mix well.
Spoon the mixture into a greased mini muffin pan. They won't rise, so you don't need to follow the whole 2/3 of the cup full rule. Keep in mind that how they look at this point is how they'll look baked, except a bit more golden.
Bake for 40 minutes or until golden

Hubby and I both enjoyed these. We love potatoes, and we love mushrooms; it's the perfect marriage. They could have used a bit more seasoning, as I mentioned above; the stark potato flavor dominated; perhaps my potato-mushroom ratio was off. Hubby suggested adding bacon, as he is, well, himself. I can see that working. As stated at the original recipe, you could try basically any veggie in these.

Side note: these could also be tasty dipped in a light sauce, perhaps something sour cream based. Hubby dipped some of his in ranch, but he'll dip anything he can in ranch. They're good by themselves and easy to make; if we ever throw a party, these will probably be in circulation.

P.S. Amanda liked them, too! I always appreciate her seal of approval.


We'll skip over the steak and brussels sprouts (which you've heard plenty about) and go straight to dessert. I used a recipe from a Taste of Home cookbook my momma gave me recently. My grandmother has given her a few of their cookbooks over the years, and I've always lusted after them. Finally, I have my own!


So, I didn't have a tube pan and used a bundt pan instead. That, along with the raspberries, made the cake not entirely pretty when it came out of the pan. {sigh} Oh well.

Raspberry Angel Food Cake:
1-1/2 cups egg whites (10-12 eggs)
1 cup flour
1-1/2 cups sugar, plus 2 tbsps
1-1/2 tsp cream of tartar
1-1/2 tsp vanilla extract
1-1/2 tsp almond extract
1/4 tsp salt
the recipe calls for 2 cups raspberries. I would advise NO raspberries. I'll explain later.

After separating the egg whites, let them sit at room temp for 30 minutes. Meanwhile, thoroughly combine the cup of flour and 2 tbsps of sugar. The recipe says to sift; I say, if you mix well enough, you don't need to. Just do a damn fine job.
In a LARGE bowl, beat the egg whites with the cream of tartar, extracts, and salt. Beat on medium speed until soft peaks form. Next, add the remaining 3/4 cup sugar in 2 tbsp increments. Beat on high until stiff peaks form and the sugar is dissolved. If stiff peaks have formed, you should be fine. This will take a while, but it is well worth it. Next, fold the flour mixture in a fourth at a time. This will be difficult if your bowl isn't sufficiently large. Mine was not.
*If you want to add the raspberries, fold them in at this point.
Gently spoon the mixture into an "ungreased 10-in tube pan." I put that in quote marks because I disagree with a part of that. Lightly grease the pan. Cut through the batter with a knife.
Bake at 375F on the lowest rack in the oven for 30-35 minutes. If your oven is like mine, I would start checking the cake after 20-25 minutes. The cake is done if it springs back when touched and the cracks look dry.
Invert the cake, using a bottom or funnel or something. Let it cool completely, then run a knife around the edges to release. Invert onto serving dish.

I wish I had not baked the raspberries in the cake; instead, I should have made a light sauce. As the raspberries cook, they release liquid which kind of screws with the surrounding cake. Soggy areas occurred. It didn't taste wrong, but the sogginess was unappealing. So no more fruit in angel food cakes.

P.S. I think angel food cakes are my favorite.