Hello my lovely readers. Again, an absence of posts. I've decided, that for this (my final) semester, I'm going to set a specific day for baking. So for now on, I'll be posting something every Sunday, barring unforeseen circumstances. This way, I can plan for baking time, instead of waiting for it to appear. Also, with my new schedule, alot of the dinner cooking will fall to hubby, so I'm not sure how many savory recipes I'll get up here.
I do have a recipe for ropa vieja I made Monday (superduperawesometasty), but I did not get a picture. Sad times. Luckily, I had about half of it leftover, which I froze and will probably do something with later this week. So I'll post it soon.
Sunday, January 25, 2009

Friday, January 2, 2009
Black-eyed Peas
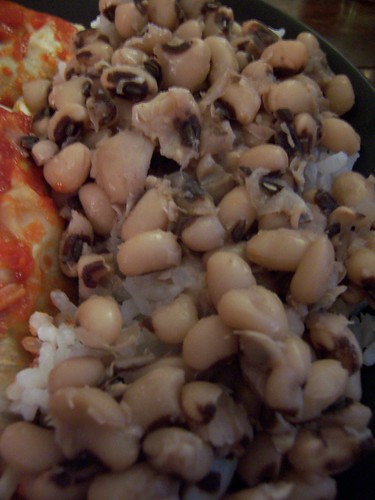
Mmmm black-eyed peas. So simple. So tasty. A great meal can be made solely with black-eyed peas and rice. Aaah, heaven. It's what I had for lunch today. I always make these from dry beans; canned ones seem icky to me. It's really simple to prepare any dry bean, but it does require some time... but not active time. Just letting the beans boil or simmer for a long time, adding water when necessary. So little effort, so delicious.

Black-eyed Peas
First, sort through the beans, pulling out any rocks, dirt clods, or bad beans. Wash the beans by placing them in a bowl, running water over it, and swishing them around. Pour out the water. Fill the bowl again, making sure the beans are covered completely, and let soak for 30 minutes. After 30 minutes, swish the water around again, then pour it out.
Transfer the beans to a big pot and fill it with water. Throw in the onion and garlic (and if you'd like, the bacon or ham) and bring to a boil. Depending on the time you have, you can boil them the entire time, or reduce the heat to a simmer and let them cook for much, much longer.
I let the beans boil most of the time, and it took probably 30-45 minutes. You need to be very careful about making sure there is always enough water in the pot to more than cover the beans.
During the cooking process, season to taste, checking every so often.
Serve once the beans are soft and delicious.
Black-eyed Peas
- 1 lb dry beans
- 1 onion, chopped
- 3 cloves garlic, chopped
- salt
- bacon or ham, optional
First, sort through the beans, pulling out any rocks, dirt clods, or bad beans. Wash the beans by placing them in a bowl, running water over it, and swishing them around. Pour out the water. Fill the bowl again, making sure the beans are covered completely, and let soak for 30 minutes. After 30 minutes, swish the water around again, then pour it out.
Transfer the beans to a big pot and fill it with water. Throw in the onion and garlic (and if you'd like, the bacon or ham) and bring to a boil. Depending on the time you have, you can boil them the entire time, or reduce the heat to a simmer and let them cook for much, much longer.
I let the beans boil most of the time, and it took probably 30-45 minutes. You need to be very careful about making sure there is always enough water in the pot to more than cover the beans.
During the cooking process, season to taste, checking every so often.
Serve once the beans are soft and delicious.
Cabbage Rolls
Here's the cabbage roll recipe from yesterday,

Cabbage Rolls:
The most difficult thing about this recipe was getting the the cabbage leaves without tearing them to pieces. After much frustration on my part - and the biggest leaves torn to ruins - hubby suggested blanching the whole head of cabbage before removing the leafs, instead of blanching the leaves afterwards (as all the recipes I'd seen had indicated).
Once you've got your leaves blanched and separated, cut the very thick part of the stem out. You can do so by cutting a little slit a few inches up each side of the stem, forming a very skinny triangle. Otherwise, if you don't remove the stem, the cabbage won't roll.
Preheat the oven to 350F.
While your cabbage cools, brown the ground beef. Once it's fully ground, season to taste. I used Chachere's. You can use season salt, salt and pepper, or whatever floats your boat. Add the veggies and cook until they have softened. My bell pepper bits were a bit too firm. You aren't going to bake the rolls long in the oven, so keep that in mind when deciding the doneness of your veggies. Once it's cooked to your satisfaction, stir in the rice until well combined.
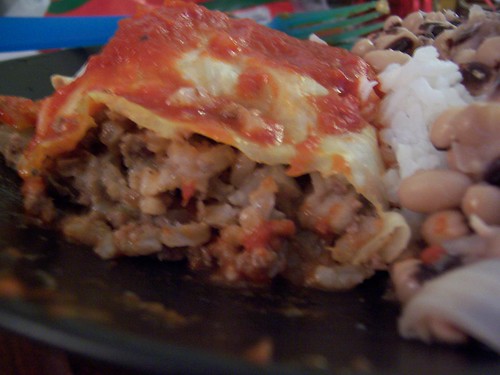
Lay a cabbage leaf down. Spoon some of the mixture into the center, and fold the edges up around it. You'll make a triangle of sorts. Repeat.
You can place these on a baking dish or a baking sheet. Spread tomato sauce over the top of the rolls. Bake about 10 minutes.
Cabbage Rolls:
- 1 head cabbage
- 1 lb lean gound beef
- 1 cup cooked rice
- 1 green bell pepper, chopped
- 1 onion, chopped
- 1/2 cup mushrooms, chopped
- 1/2 cup chopped tomatoes
- tomato sauce (I used Ragu)
The most difficult thing about this recipe was getting the the cabbage leaves without tearing them to pieces. After much frustration on my part - and the biggest leaves torn to ruins - hubby suggested blanching the whole head of cabbage before removing the leafs, instead of blanching the leaves afterwards (as all the recipes I'd seen had indicated).
Once you've got your leaves blanched and separated, cut the very thick part of the stem out. You can do so by cutting a little slit a few inches up each side of the stem, forming a very skinny triangle. Otherwise, if you don't remove the stem, the cabbage won't roll.
Preheat the oven to 350F.
While your cabbage cools, brown the ground beef. Once it's fully ground, season to taste. I used Chachere's. You can use season salt, salt and pepper, or whatever floats your boat. Add the veggies and cook until they have softened. My bell pepper bits were a bit too firm. You aren't going to bake the rolls long in the oven, so keep that in mind when deciding the doneness of your veggies. Once it's cooked to your satisfaction, stir in the rice until well combined.
Lay a cabbage leaf down. Spoon some of the mixture into the center, and fold the edges up around it. You'll make a triangle of sorts. Repeat.
You can place these on a baking dish or a baking sheet. Spread tomato sauce over the top of the rolls. Bake about 10 minutes.
Thursday, January 1, 2009
Happy New Year!
Happy 2009, y'all! The new year came in quietly for hubby and I - we were sleeping. I woke up with a migraine and sore throat, but I won't take that as an omen. 2009 will be a good year.
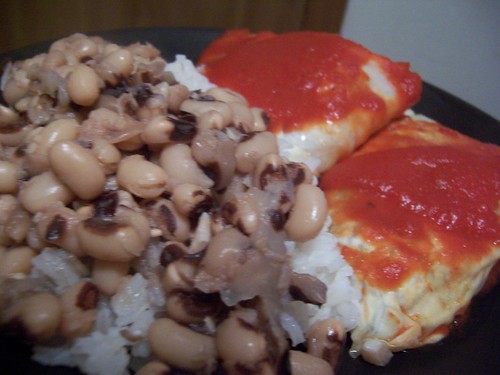
As with every New Year, we had the traditional black-eyed peas and cabbage. Now, I emphasize traditional because that doesn't seem to be the tradition here in Iowa. Very few people here seem to be aware of the whole eating them for health and wealth, an. d even fewer know of black-eyed peas. Unimaginable! I grew up black-eyed peas often, though cabbage not so much.
More on that cabbage. Mom always boiled it, and what kid is going to think "yum, boiled cabbage, I think I'll have some of that!" So, I never ate it until a few years, when I discovered it wasn't that bad. But, who wants to celebrate the New Year with not that bad. This year, I decided to try my hand at cabbage rolls. I looked at a bunch of recipes, then just sort of winged it.

End result? I liked it much more than I expected. Rolls are waaay better than plain ol' boiled cabbage.
I'll try to post the recipe tomorrow. I need to get to bed and sleep so I feel better for work.
Happy New Year!
As with every New Year, we had the traditional black-eyed peas and cabbage. Now, I emphasize traditional because that doesn't seem to be the tradition here in Iowa. Very few people here seem to be aware of the whole eating them for health and wealth, an. d even fewer know of black-eyed peas. Unimaginable! I grew up black-eyed peas often, though cabbage not so much.
More on that cabbage. Mom always boiled it, and what kid is going to think "yum, boiled cabbage, I think I'll have some of that!" So, I never ate it until a few years, when I discovered it wasn't that bad. But, who wants to celebrate the New Year with not that bad. This year, I decided to try my hand at cabbage rolls. I looked at a bunch of recipes, then just sort of winged it.
End result? I liked it much more than I expected. Rolls are waaay better than plain ol' boiled cabbage.
I'll try to post the recipe tomorrow. I need to get to bed and sleep so I feel better for work.
Happy New Year!
Wednesday, December 31, 2008
Apple Chips
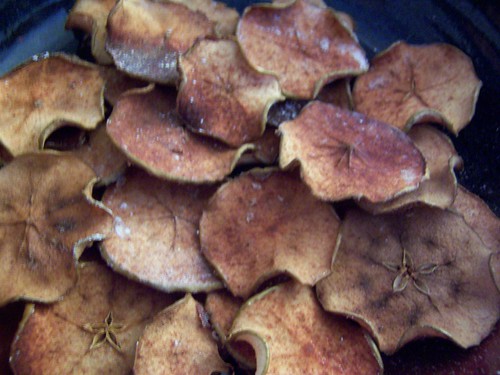
Alrighty. Here's my final Christmas goodies post. I love love LOVE apples. And someone on tastespotting had made homemade apple chips. The idea of slowly baking apples in the oven, letting the crisp, cinnamony sweet aroma waft through my apartment, was irresistable.

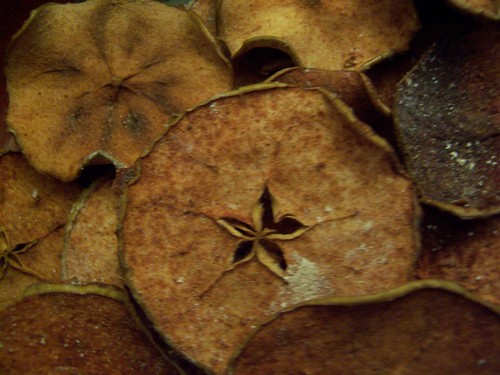
Making these apple chips is really easy. Slice an apple or two really really thinly (more proof that everyone needs a mandolin slicer). Line a baking pan with parchment paper. Sprinkle some powdered sugar and cinnamon on the parchment paper, then lay the apple slices in a single layer on top of it. Sprinkle again with powdered sugar and cinnamon. Bake at 200F for 1 1/2 hours. Delicious.

Making these apple chips is really easy. Slice an apple or two really really thinly (more proof that everyone needs a mandolin slicer). Line a baking pan with parchment paper. Sprinkle some powdered sugar and cinnamon on the parchment paper, then lay the apple slices in a single layer on top of it. Sprinkle again with powdered sugar and cinnamon. Bake at 200F for 1 1/2 hours. Delicious.
Tart Fun
At some point this summer, I bought some mini tart pans. I figured I'd need some sooner or later. I've been flirting with the idea of making tarts, especially when I have blackberries around. Well, finally, I had blackberries. And left-over pie crust. So, I decided it was time to play.
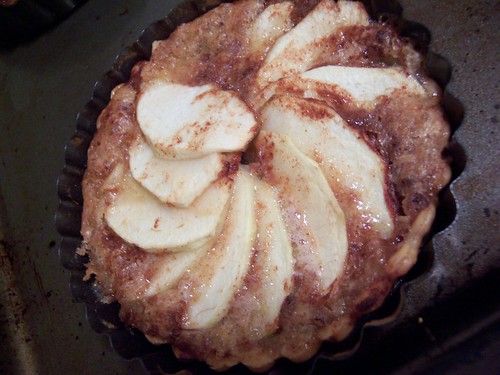
A week or so before, hubby had asked for an apple pie, which I never got around to baking, so I decided to make him a little apple tart. He enjoyed it.

Then, I got around to playing with the blackberries. I decided (for both tarts) to mix of a sort of cream based off the custard in my apple pie. It's a mix of sugar, eggs, and butter with a bit of flour. It worked well (even all by itself in my last little tart - no picture).

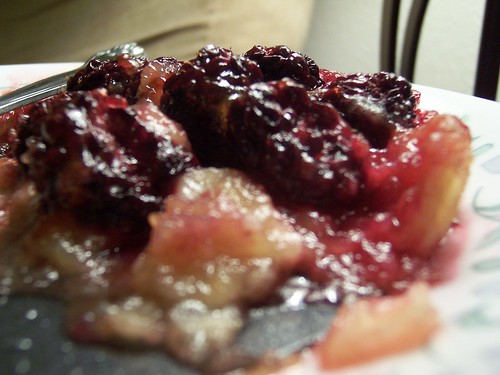
The blackberry tart has peach preserves brushed/dolloped on top. I figured it would add a nice sweetness with the peach complimenting the blackberry. It was supersweet, but in a delicious way.

One day, I'll be cool enough to make my own pastry. And I'll have a better, actual custard. But, this endeavor was an enjoyable way to spend a bit of the Christmas holiday.
A week or so before, hubby had asked for an apple pie, which I never got around to baking, so I decided to make him a little apple tart. He enjoyed it.
Then, I got around to playing with the blackberries. I decided (for both tarts) to mix of a sort of cream based off the custard in my apple pie. It's a mix of sugar, eggs, and butter with a bit of flour. It worked well (even all by itself in my last little tart - no picture).

The blackberry tart has peach preserves brushed/dolloped on top. I figured it would add a nice sweetness with the peach complimenting the blackberry. It was supersweet, but in a delicious way.
One day, I'll be cool enough to make my own pastry. And I'll have a better, actual custard. But, this endeavor was an enjoyable way to spend a bit of the Christmas holiday.
Monday, December 29, 2008
Spanish Tortilla
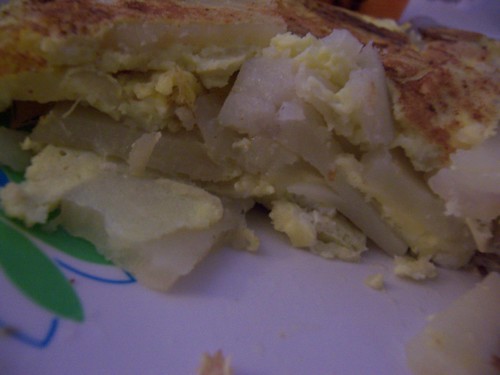
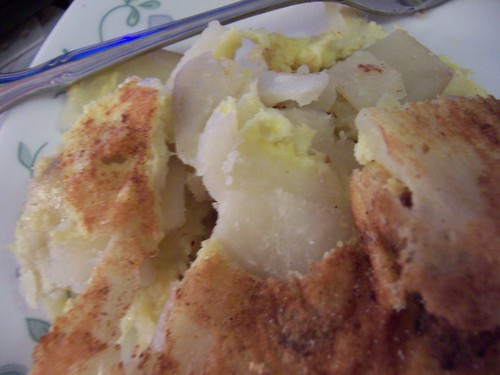
Time for something savory, my friends. This past semester, I had a professor from Barcelona. One of the last days of class, she made a few traditional dishes for us. One was the tortilla, a delicious combination of eggs, potatoes, and onions. It's like a really potato-intense omelet. Oh so delicious.

Spanish Tortilla
In a very large, very non-stick skillet, heat a few teaspoons of olive oil. Saute the potatoes and onions until they are thoroughly cooked and beginning to brown/golden. Salt and pepper to taste. Keep in mind that you'll be adding alot of eggs, so if your potatoes seem perfectly salted, the eggs will dilute that.
Pour the eggs into the pan and make sure it's all mixed together, with everything evenly distributed. You'll want to cook on a medium low heat so that the eggs are cooked mostly through without burning the bottom. Once the eggs seem set, you'll need to get a large plate and use this to flip the tortilla over. Cook a bit longer until the eggs are to your liking.
The Barcelonans frequently eat this as a tapas, and as such, cut it into a bunch of small squares. Hubby and I cut it up like a pizza, because we're uncultured Americans. Haha. This made a great Christmas Eve day meal.

Spanish Tortilla
- 5 baking potatoes, peeled and thinly sliced
- 1 large onion, thinly sliced
- 9-10 eggs, well beaten
- salt and pepper
- olive oil
In a very large, very non-stick skillet, heat a few teaspoons of olive oil. Saute the potatoes and onions until they are thoroughly cooked and beginning to brown/golden. Salt and pepper to taste. Keep in mind that you'll be adding alot of eggs, so if your potatoes seem perfectly salted, the eggs will dilute that.
Pour the eggs into the pan and make sure it's all mixed together, with everything evenly distributed. You'll want to cook on a medium low heat so that the eggs are cooked mostly through without burning the bottom. Once the eggs seem set, you'll need to get a large plate and use this to flip the tortilla over. Cook a bit longer until the eggs are to your liking.
The Barcelonans frequently eat this as a tapas, and as such, cut it into a bunch of small squares. Hubby and I cut it up like a pizza, because we're uncultured Americans. Haha. This made a great Christmas Eve day meal.
Cardamom Cookies
I recently had a conversation with a friend about my love for the word "cardamom". It's a great word, enormously fun to say. Perhaps that's not the best reason to try out a recipe. It wasn't the only one though. Cardamom features into a few of my favorite things (namely, chai) and I'd like to work more with it. These cookies were a great start. The recipe comes from Dinner with Kirsten.

Cardamom Butter Cookies

Cardamom Butter Cookies
- 3 cups all-purpose flour
- 1 teaspoon baking powder
- 3/4 teaspoon salt
- 1 1/2 teaspoons ground cardamom
- 1/2 teaspoon ground cinnamon
- 1/4 teaspoon ground allspice
- 2 sticks (1 cup) unsalted butter, softened
- 1 1/4 cups granulated sugar
- 2 large eggs
- 1 teaspoon vanilla
- 3 oz fine-quality bittersweet or semi-sweet chocolate, melted (for drizzling)
Mix flour, baking powder, salt, cardamom, cinnamon and allspice in a bowl.
Beat together butter and sugar in a large bowl with an electric mixer at medium-high speed until pale and fluffy, about 2 to 4 minutes. Beat in eggs and vanilla. Reduce speed to low, then mix in flour mixture until just combined.
Form dough into 2 (12-inch) logs (1 1/2 inches in diameter), each on its own sheet of plastic wrap. Use plastic wrap and your hands to roll, press, and square off sides of logs. The dough will be very soft at this point, so let the logs chill on a baking sheet until they’re somewhat firm, about one hour. Then smooth out the edges of the logs through the plastic wrap and try to flatten the sides. Once shaped, continue to chill the logs on the baking sheet until firm, about 1 more hour.
Put oven racks in upper and lower thirds of oven and preheat oven to 350°F.
Cut enough scant 1/4-inch-thick slices from a log with a knife to fill 2 large ungreased baking sheets, arranging slices about 1 inch apart (chill remaining dough, wrapped in plastic wrap).
Bake cookies, switching position of sheets halfway through baking, until edges are golden, 10 to 12 minutes total. Cool on sheets 3 minutes, then transfer to racks to cool completely. Make more cookies with remaining dough on cooled baking sheets.
Once cookies are cooled, melt chocolate over a pan of simmering water in the stove or in the microwave (carefully!!). Spoon the chocolate into a plastic bag and snip off one of the tips. Drizzle the chocolate over the cookies and let set up for a few hours before stacking them.
Dough logs can be chilled 5 days or frozen, wrapped in a double layer of plastic wrap, 1 month (thaw in refrigerator just until they can be sliced). · Cookies (with or without icing) keep, layered between sheets of wax paper or parchment, in an airtight container at room temperature 1 week.
Cranberry-Orange Pinwheels
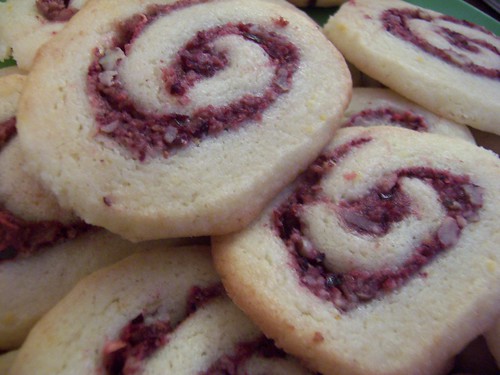
This is another cookie I've made two years in a row. I love the combination of the cranberry, orange, and pecan that goes into this gorgeous swirls. They also stay firm, yet soft, which is great because I hate cookies that harden.

Cranberry-Orange Pinwheels
(Better Homes and Gardens, pg 256)
1 cup cranberries
1 cup pecans
1/4 cup brown sugar, packed
1 cup butter, softened
1 1/2 cup sugar
1/2 tsp baking powder
1/2 tsp salt
2 eggs
2 tsp finely shredded orange peel
3 1/4 cup flour
Cranberry-Orange Pinwheels
(Better Homes and Gardens, pg 256)
1 cup cranberries
1 cup pecans
1/4 cup brown sugar, packed
1 cup butter, softened
1 1/2 cup sugar
1/2 tsp baking powder
1/2 tsp salt
2 eggs
2 tsp finely shredded orange peel
3 1/4 cup flour
For filling, in a food processor combine cranberries, pecans, and brown sugar. Cover and process until cranberries and pecans are finely chopped. Set filling aside.
In a large mixing bowl beat butter with a mixer on medium to high speed for 30 seconds. Add granulated sugar, baking powder, and salt. Beat until combined, scraping sides of bowl occasionally. Add eggs and orange peel; beat until combined. Beat in as much of the flour as you can with the mixer. Stir in the remaining flour. Divide dough in half; cover and chill about 1 hour or until easy to handle.
Between waxed paper, roll half of the dough into a 10 inch square. Spread half of the filling over dough to within ½ inch of edges; roll up dough. Moisten edges; pinch to seal. Wrap in plastic wrap. Repeat with remaining dough and filling. Chill for 4 to 24 hours.
Preheat oven to 375F. Cut rolls into ¼ inch slices. Place slices 2 inches apart on an ungreased cookie sheet. Bake for 10-12 minutes or until edges are firm and bottoms are light brown. Cool on cookie sheet for 1 minute. Transfer to a wire rack and let cook.
Fudge Drops
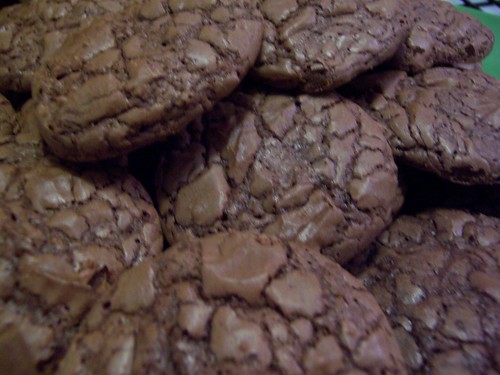
Oh. My. Goodness. These cookies are uh-maze-zing! AMAZING! And of course, this recipe made the fewest batches. Sadness for me. But oh so good in my tummy. They were tasty tasty like brownie heaven.
This recipe comes from the King Arthur flour site, so sshhh don't tell them I didn't use their flour. It just wasn't what I had around the house. I made the recipe plain - no chocolate chips or chunks or ganache - and they were amazing, but any of those additions would work well.

Fudge Drops
8 oz bittersweet chocolate
3 tbsp butter
1 cup sugar
3 large eggs
1 tsp espresso powder (I omitted this)
1 tsp vanilla extract
1 cup flour
1/4 tsp baking powder
1/4 tsp salt
1 cup (6 oz) chocolate chips, optional (I opted out)
In a double boiler, or in the microwave, gently melt together the chocolate and butter. To avoid heating the chocolate too much and possibly burning it, the best method is to heat till the butter is melted and the chocolate has partially melted, then remove from the heat. Stir till all the chocolate melts.
In a separate bowl, beat together the sugar and eggs till they're thoroughly combined. Add the hot melted chocolate, then stir in the remaining ingredients, including the chocolate chips, if you're using them. Refrigerate the batter-like dough for 1 hour, to make it easier to handle.
Preheat the oven to 325°F. Lightly grease (or line with parchment) two baking sheets, three if you have them.
Drop the cookie dough by tablespoonfuls (about the size of a small ping pong ball) onto the prepared baking sheets. A tablespoon cookie scoop makes this task extremely simple. Leave about 2" between the dough balls, as they'll spread as they bake.
Bake the cookies for 11 to 12 minutes, until their tops are shiny and cracked. They won't crack until the very end, so keep a close eye on them; when they're cracked all the way across the top surface, they're just about done. The point is, you want these baked all the way through, but just barely; additional baking will make them crisp rather than chewy. Remove the cookies from the oven, and top each with a kiss-shaped chocolate, a nonpareil, or a bittersweet chocolate wafer, if desired. Wait 5 minutes, then transfer them to a rack to cool.
This recipe comes from the King Arthur flour site, so sshhh don't tell them I didn't use their flour. It just wasn't what I had around the house. I made the recipe plain - no chocolate chips or chunks or ganache - and they were amazing, but any of those additions would work well.
Fudge Drops
8 oz bittersweet chocolate
3 tbsp butter
1 cup sugar
3 large eggs
1 tsp espresso powder (I omitted this)
1 tsp vanilla extract
1 cup flour
1/4 tsp baking powder
1/4 tsp salt
1 cup (6 oz) chocolate chips, optional (I opted out)
In a double boiler, or in the microwave, gently melt together the chocolate and butter. To avoid heating the chocolate too much and possibly burning it, the best method is to heat till the butter is melted and the chocolate has partially melted, then remove from the heat. Stir till all the chocolate melts.
In a separate bowl, beat together the sugar and eggs till they're thoroughly combined. Add the hot melted chocolate, then stir in the remaining ingredients, including the chocolate chips, if you're using them. Refrigerate the batter-like dough for 1 hour, to make it easier to handle.
Preheat the oven to 325°F. Lightly grease (or line with parchment) two baking sheets, three if you have them.
Drop the cookie dough by tablespoonfuls (about the size of a small ping pong ball) onto the prepared baking sheets. A tablespoon cookie scoop makes this task extremely simple. Leave about 2" between the dough balls, as they'll spread as they bake.
Bake the cookies for 11 to 12 minutes, until their tops are shiny and cracked. They won't crack until the very end, so keep a close eye on them; when they're cracked all the way across the top surface, they're just about done. The point is, you want these baked all the way through, but just barely; additional baking will make them crisp rather than chewy. Remove the cookies from the oven, and top each with a kiss-shaped chocolate, a nonpareil, or a bittersweet chocolate wafer, if desired. Wait 5 minutes, then transfer them to a rack to cool.
Subscribe to:
Posts (Atom)