Wednesday, September 9, 2009

Finger Pies, or as others know them, Hand Pies

A while ago, my brother-in-law mentioned in passing the finger pies his grandmother makes and that I should make some. My sister, remembering his comment, enlisted in my help in making some for him as a surprise. We got the recipe from his mom, who copied it down while his grandmother made some of the pies. So today I present some
good ol' Cajun finger pies.
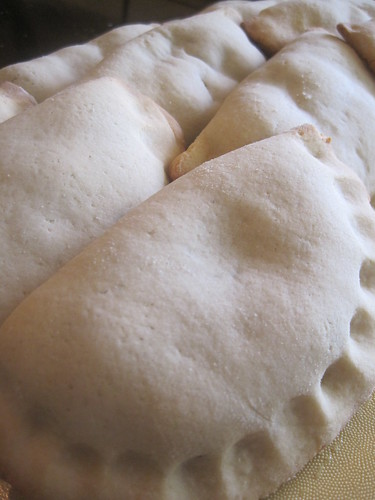

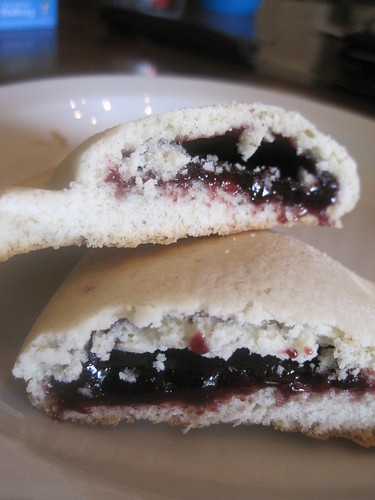
Now, if you're not familiar with these, let me explain. They aren't exactly pies; the dough is more fluffy, moist, and sweet than a standard pie crust. They can be filled with a variety of things: preserves, whole fruit, pudding, etc. We decided to use three different fillings: pumpkin, blackberry preserves, and fig preserves. I think peaches would be absolutely fabulous as a filling, as well as baked apples. Whatever floats your boat. Though, it shouldn't be too moist or you might end up with soggy pies. (After a couple days, our pumpkin pies became soggy in the center.)


Finger Pies
(recipe from Ethel Mire)
  • 2 cups sugar
  • 2 eggs
  • 1 cup shortening
  • 1 cup milk
  • 1 tsp vanilla extract
  • 1 tsp baking powder
  • 1 tsp baking soda
  • 1 tsp salt
  • 1 tbsp vinegar
  • 6 3/4 cups all purpose flour
  • approximately 2 cups of preferred filling

Preheat oven to 350F and line a baking sheet or two with parchment paper. (If you use two pans, the process goes by a little faster.)

Cream together the sugar, eggs, and shortening. Mix in milk, vinegar, and vanilla extract.

Whisk together the baking powder, baking soda, salt, and 1 cup of the flour. Mix into the wet ingredients. Add the remaining (5 3/4 cup) flour a half cup at a time, mixing thoroughly after each addition. Add additional flour if necessary to ensure the dough is not sticky.

Roll approximately 1/4 cup of the dough into a ball. On a lightly floured surface, flatten the ball into a 1/8 inch disc, approximately 6 inches in diameter. Drop a tablespoon of filling on the bottom half of the disc, spreading it out but leaving a 1/4 inch margin clear. Fold the other half of the disc over the filling. Using either your fingers or a fork, press the edges (that 1/4 inch margin) to seal.

Place 4 to a baking sheet and bake for approximately 15 minutes, until the edges are golden brown. Remove to a cooling rack to cool.

This makes approximately 28 finger pies.

Sunday, September 6, 2009

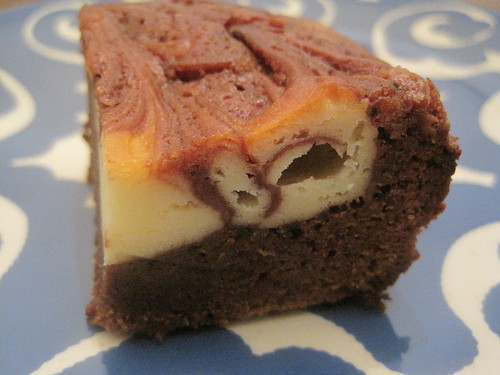
Cheesecake Brownies

It's always fun to make dessert for people, and so gratifying as well. My general plan when invited to someone's home for dinner is to bring dessert. I love the challenge of deciding what treats people will enjoy, what their tastes are. The past few times we've had dinner at hubby's mother's house, I've received mixed results. MiL usually enjoys it, while I don't think my sister-in-law does. Luckily, these cheesecake brownies went over well with everyone (even hubby). I had originally planned to make the Cinnamon Cheesecake Blondies I made oh so long ago, but when hubby plaintively requested them with no cinnamon, I decided to change direction a bit. A cheesecake blondie doesn't sound nearly as good as a cheesecake brownie. I've made Cookies & Cream Brownies before, which are nearly the same (plus the addition of smashed up oreos) but I thought I'd go for something simpler. And I didn't have any oreos. Being lazy, I found a recipe online that had ingredients in my pantry. It was a bit of a challenge as I'm out of bakers' chocolate, but I found this one that only calls for cocoa powder. Yay!


Cheesecake Brownies
(original recipe)
brownie
  • 1 cup butter
  • 2 cups sugar
  • 4 eggs
  • 2 tsp vanilla extract
  • 1 cup all purpose flour
  • ½ cup cocoa
  • ½ tsp salt
cheesecake
  • 8 oz (1 package) cream cheese, softened
  • between 1/4 and 1/3 cup sugar, depending on how sweet you'd like it
  • 1 egg

Preheat oven to 350F and grease an 8x8 baking pan.

In a small saucepan, melt the butter over low heat. Once the butter is fully melted, remove from the heat and add the sugar, vanilla, and eggs. It helps if you've combined these ingredients already and pour the butter into them. Blend together.

In a separate bowl, combine the flour, cocoa, and salt. Add the dry ingredients to the wet and mix well. Pour into the prepared pan.

Next, prepare the cheesecake layer. Beat the cream cheese and sugar together, then add the egg and beat until creamy. Drop dollops on top of the brownie batter, then swirl using a knife.

Bake 50-65 minutes or until toothpick inserted in the center comes out clean.

Garlic Cheddar Biscuits

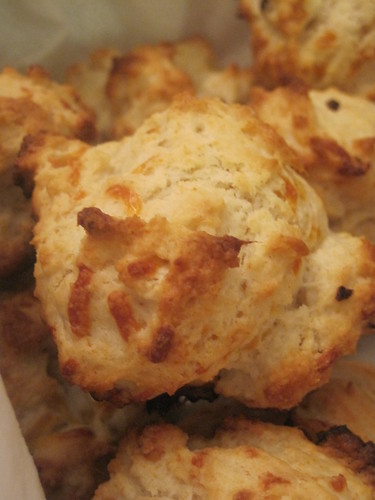
The other night, we had a *slight* cool front move in, so hubby's mom invited us over for chili. I usually bring a dessert when we go over for dinner, but I also had the idea to bring along some cheddar biscuits. Everyone seems to love them. When people talk about Red Lobster, they discuss how great the biscuits are (not the seafood). Biscuits, cheese, garlic.. how could anyone not like that? Who doesn't like biscuits?? I've never... oh wait, I've met one person who doesn't like biscuits: my sister-in-law. It's a shame. But anyhoo. There are recipes everywhere of all varieties for cheddar biscuits; I went with this one over at folkmann.ca. I was looking for something easy since I was also baking cheesecake brownies. This recipe fit the bill, and was delicious to boot.


Garlic Cheddar Biscuits
(adapted from Better Homes and Gardens at folkmann.ca)
[I halved the recipe as I was running low on flour, but I'll post the original)

  • 3 cups all-purpose flour
  • 1 tbsp baking powder
  • 1 tbsp sugar
  • 1 tsp salt
  • 3/4 tsp cream of tartar
  • 3/4 cup butter, cut into small squares
  • 1 1/4 cups milk
  • 1 clove garlic, diced
  • 1/2 cup shredded cheddar

Preheat the oven to 450F. In a large bowl, combine the flour, baking powder, sugar, salt and cream of tartar. Using a pastry cutter, cut in the butter until the mixture resembles coarse crumbs.

Make a well in the center of the flour mixture, and add the milk all at once. Using a fork, stir just until the mixture is moistened. Fold in the garlic and cheese, taking care not to work it too much or you'll make the biscuits less fluffy.

Using a large spoon, drop dough into 12 mounds on to a greased baking sheet.

Bake for 10-14 minutes or until golden. Remove biscuits from baking sheet and serve warm.

* Next time, I think I'll brush the tops of the biscuits with melted butter a few minutes before the baking time is.

Wednesday, September 2, 2009

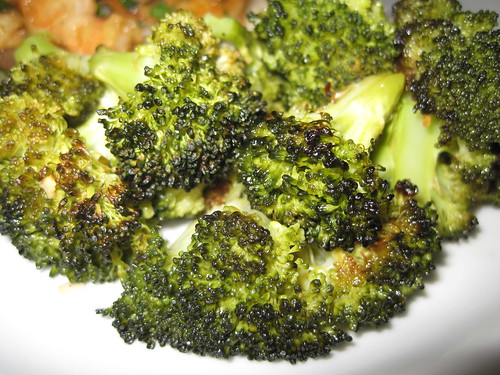
Blasted Broccoli

Who doesn't love broccoli? Ok. Lots of people don't, and I understand why to a certain degree. But I still love it, as does hubby.. and really most people I know. Sadly, I don't know many ways to prepare it, so any new recipe is great. Luckily, I found this recipe. Woohoo!


Generally, this dish is a great, flavorful side dish that gets you away from the usual steamed broccoli. Our only issue was that it was a bit dry; perhaps I didn't use enough olive oil.

Blasted Broccoli
(originally from Bon Appetit)
  • 1 1/4 lbs (approximately 8 cups) broccoli crowns, cut into florets
  • 3 1/2 tbsp olive oil, divided
  • 2 garlic cloves, minced
  • large pinch of dried crushed red pepper

Preheat the oven to 450F.

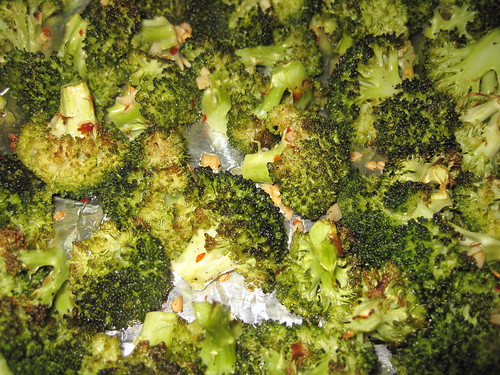
Toss broccoli and 3 tbsp olive oil in a large bowl to coat. Sprinkle with salt and pepper. Transfer to a rimmed baking dish. [I lined mine with foil.] Roast for 15 minutes.

In a small bowl, stir together remaining 1/2 tbsp oil, garlic, and red pepper. Drizzle over broccoli and toss to coat. Roast until broccoli is beginning to brown, approximately 8 minutes longer. Season to taste with salt and pepper, and serve immediately.

Mmm, tasty!

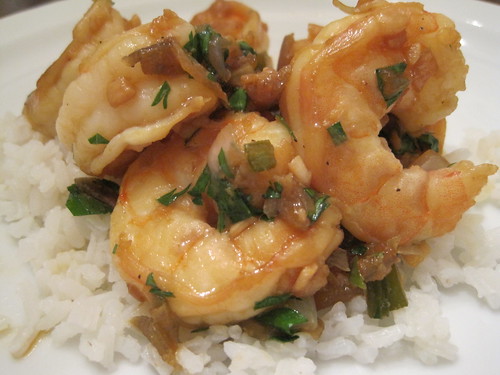
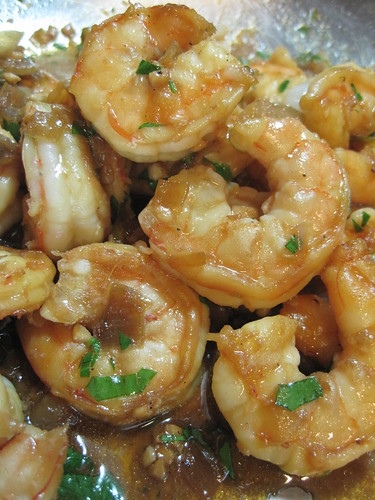
Vietnamese Caramel Shrimp

Oh, to be in Louisiana during shrimp season is one of my greatest joys in life. There are few things as satisfying as going to the store and picking up large, local gulf shrimp. Yum yum. Now I finally get to try out the shrimp recipes I accumulated while in Iowa, like the one I found years ago for Vietnamese Caramel Shrimp. This dish is a perfect marriage of sweet, savory, and heat. And while it's easy to make, this will most certainly impress anyone it's served to with its complexity.


Vietnamese Caramel Shrimp
  • 2 tbsp sugar
  • 1/2 cup water, divided in half
  • 1 tbsp olive oil
  • 1 shallot, chopped
  • 2 cloves garlic, chopped
  • 1 tsp ginger, grated
  • 1 small chili, seeded and chopped
  • 1 lb shrimp, peeled and deveined
  • 2 tbsp fish sauce
  • pepper to taste
  • 1 tsp sesame oil
  • 1 tbsp cilantro, chopped

In a small sauce pan, heat sugar and 1/4 cup water over medium high heat. Stir constantly until it caramelizes and turns dark brown. Add the other 1/4 cup water and heat until caramel dissolves. [Be careful as you pour the water in; otherwise, you will steam the bejeebs out of your hand.] Remove from heat and set aside.

In a large skillet, heat the olive oil. Add shallot, garlic, ginger, and chili; saute for 3-5 minutes. Add in the shrimp, 2 tbsps of the caramel sauce you made, fish sauce, and pepper. Simmer until the shrimp is pink all over, about 2-4 minutes. [I flipped the shrimp half-way through the cooking process so sauce would be on both sides. You know the shrimp are done when they are stiff.]

Remove from the heat and stir in sesame oil and cilantro.


Not surprisingly, I served this dish over rice, which was great as the rice mixed with the sauce made a tasty dish on its own.

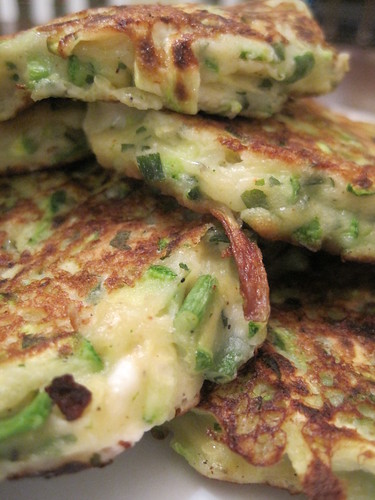
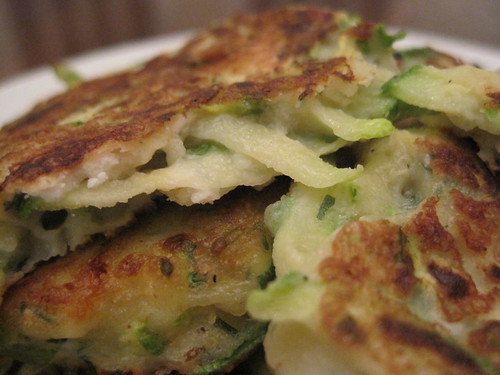
Zucchini Fritters

I'm a big fan of squash and zucchini. Sadly, hubby is not; he once told me disdainfully that he is not eat things from the gourd family. He makes a few exceptions (like my mom's very cheesy squash casserole) but we've rarely eaten any since moving in together. Now that we're living with my dad, the tables have turned. It's 2 to 1, so zucchini and squash are in.
Recipes for zucchini fritters seem to be popping up quite a bit right now, which makes sense with it being in season and so tasty. I've decided I need a better balance between recipes from the internet and my cookbook collection, so I used another recipe from Nigella Lawson's Forever Summer. I modified the recipe a bit by halving it, substituting chevre for feta, and cutting out some of the herbs.


Zucchini Fritters
(Nigella Lawson, Forever Summer, p 156)
[my adaptations in brackets]
  • 4 zucchini (approximately 1 1/2 lbs) [I used 3]
  • 5-6 scallions, finely chopped [I used 3]
  • 9 oz feta cheese [4 oz chevre]
  • small bunch fresh parsley, chopped [1 tbsp chopped frozen parsley]
  • small bunch of fresh mint, plus extra to sprinkle over [omitted]
  • 1 tbsp dried mint [omitted]
  • 1 tsp paprika [1/2 tsp paprika]
  • scant 1 cup all purpose flour [1/2 cup flour]
  • salt and pepper
  • 3 eggs, beaten [1 1/2 eggs beaten. I beat the first egg and added it in, then beat the second egg and added half of it]
  • olive oil for frying
  • 3-4 limes [omitted]

Coarsely grate the zucchini. Spread the little shards out on a tea towel and leave for about 20 minutes to remove excess moisture. [I laid paper towels atop the tea towel]

Put the chopped scallions in a bowl and crumble in the cheese. Stir in the parsley, mints, and paprika. Add the flour and season well with salt and pepper. [Please take into account the saltiness of the cheese.] Gradually add in the beaten egg and mix thoroughly before stirring in the drained, grated zucchini. It will be lumpy.

Heat the olive oil in a large frying pan and drop heaping tablespoons of zucchini mixture into the hot oil, flattening the fritters as you go. Cook approximately 2 minutes on each side until golden, then transfer to a plate lined with paper towels.

Serve on a dish with the chopped limes and mint. [I did not do this.]

I served mine with sour cream, which helped alleviate the fact that I over-salted.

Sunday, August 30, 2009

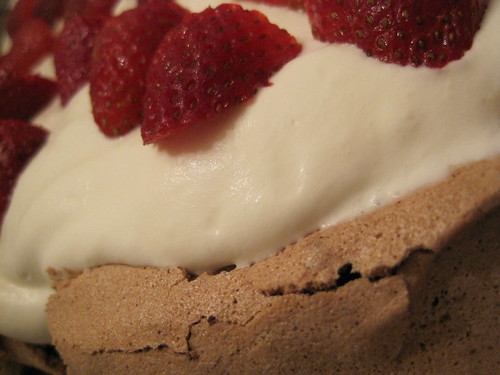
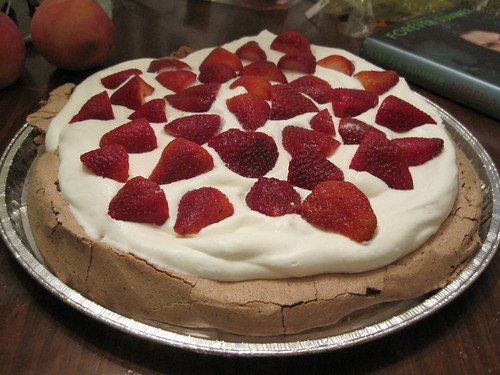
Chocolate Strawberry Pavlova

When making ice cream, I need 6 egg yolks, leaving 6 egg whites all alone. As luck would have it, many recipes call for 6 lonely egg whites. One such recipe is Nigella Lawson's Chocolate Raspberry Pavlova. I've come across pavlova recipes often and was always a tad intimidated by them. They're simple and delicious, both light and rich (at least this one was).

Now, the entire time this was baking (a full hour), I kept getting questions as to what exactly I was making. "A pav.. what?" .. "how about instead of telling me the name, you tell me what it is" .. and other such things. So my lovelies, this is what I learned on Wikipedia. The pavlova originated in either Australia or New Zealand in the 20s in honor of ballerina Anna Pavlova. It is a baked meringue, mainly served with a cream and fruit.


Chocolate Strawberry Pavlova
(Nigella Lawson, Forever Summer, "Chocolate Raspberry Pavlova", 189)
6 egg whites
1 cup granulated sugar
3 tbsp unsweetened cocoa powder, sifted
1 tsp balsamic or red wine vinegar
2 oz bittersweet chocolate, finely chopped
2 1/4 cup heavy cream
1 pint raspberries or cored and halved strawberries
2-3 tbsp coarsely grated bittersweet chocolate (I omitted this)

Preheat the oven to 350F and line a baking sheet with parchment paper.

Beat the egg whites until satiny (as opposed to foamy) peaks form. Gradually beat in the sugar 1 spoonful at a time until the meringue is stiff and shiny. Sprinkle the cocoa, vinegar, and chopped chocolate over the egg whites. Gently fold everything in until the cocoa is thoroughly distributed.

Mound the meringue onto the baking sheet, creating a fat circle approximately 9 inches wide. Smooth the sides and tops. Place in the oven and *immediately* reduce the oven temperature to 300F. Bake for 1 hour to 1 hour 15 minutes, until the edges and sides look crisp and the top is dry. Nigella notes that "when you prod the center you should feel the promise of squidginess beneath your fingers." Well, I must have prodded too forcefully because I just smashed a finger-sized hole in the top of mine.

Turn off the oven and leave the door ajar, letting the meringue cool completely in the oven.

When ready to serve it, invert it or slide it onto a nice big plate (or disposable pizza tin if you don't have a plate big enough...) Whisk the cream until it is thick and pile it atop the meringue. Scatter with raspberries or strawberries (though strawberries don't really scatter). Grate the chocolate atop the raspberries, if you so desire. I did not as strawberries don't usually have the tartness raspberries contain.

Smothered Sausage and Potatoes

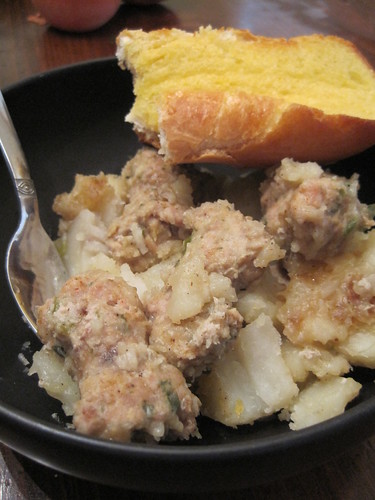
A couple weeks ago, hubby and I had dinner his mom's house. She smothered fresh chicken sausage and potatoes together, and it. was. delicious. If you want to know Cajun cooking beyond gumbo and jamabalya, this is it. It is the ultimate comfort food. The past week or so, I've found myself craving it. The light savoriness of the chicken sausage paired with the sweet earthiness of potatoes. So so good.


Now, I realize the picture isn't pretty. It couldn't be helped; the food wasn't pretty. Sometimes it won't be. Perhaps I could have spruced it up with some parsley or taken out the sausage then repositioned it atop a layer of potatoes, but that would have been dishonest. It's a delicious jumble; let's celebrate that fact.

Smothered Sausage and Potatoes
  • 1 lb fresh chicken sausage, cut into 2 inch pieces
  • 6-8 medium sized potatoes, sliced into 1/4 inch thick rounds then cut in half
  • 1 onion, chopped
  • 4 tbsp butter, divided
  • Chacheres or seasoned salt to taste

In a large skillet (one with a lid) over medium melt 2 tbsp butter, then brown the sausage in it. If there's enough room, place the onions around the edge of the pan so they can begin to cook. The sausage only needs a few minutes on each side. Most likely, the casing will shrink, causing the meat to mushroom out the ends; it's perfectly okay.

After the sausage has browned, pour the potato slices on top and gently fold them in. Cover the skillet and reduce the temperature to medium low. Over the next 30-40 minutes, try to lift the lid as little as possible, stirring very infrequently. You'll find the potatoes release a great deal of liquid and prevent things from sticking; if you remove the lid too much, you'll lose that liquid.

Once the potatoes have cooked through, remove the lid. Cut the remaining 2 tbsp of butter into chunks and scatter across the top of the dish. Season to taste with Chacheres. Cover and cook an additional 10-15 minutes, stirring more frequently. Your potatoes should lose definition and mash up a bit, though not much. You still want chunks of potatoes.

This goes great with garlic bread, and I bet it'd be grand with a salad.

Wednesday, August 26, 2009

Honey Ice Cream

Since making my first batch of homemade ice cream, I've kept an eye out for ice cream flavor ideas. I stumbled across a recipe for honey rosemary ice cream. The recipe itself didn't thrill me, but I fell in love with the idea of honey ice cream. I love honey! It's a perfect complement to so many things.


I decided to just alter the Nigella Lawson recipe I used the first time, because I love Nigella and I dorkishly love stirring the custard for 10 minutes, watching it thicken into something beautiful.

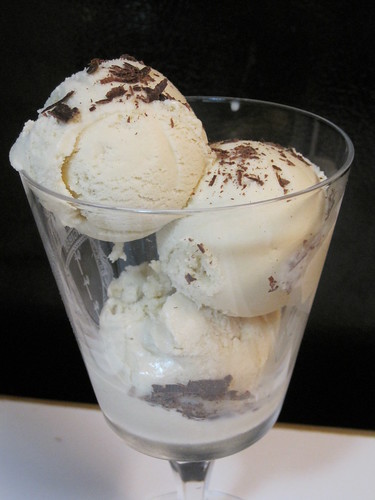
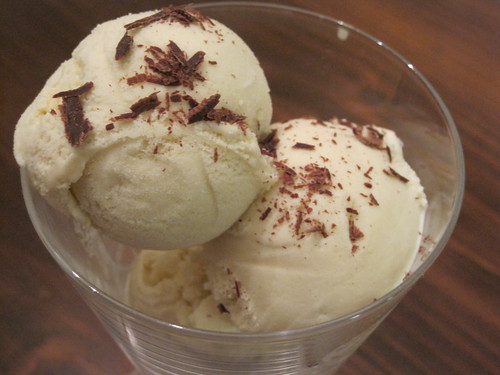
I like this ice cream, but I don't know if it can truthfully be called honey ice cream. Most likely if I were to give this to someone to eat, then ask them what flavor it was, they'd say vanilla or sweet cream or something else. The taste of the honey is too subtle. What's amusing is that I first thought, after sampling the warm custard, that the honey would be too intense and that I had ruined the ice cream. Silly me! The cream folded in right before freezing really mellowed out the honey. I think the ice cream tastes like marshmallows; hubby thinks it tastes like sugar cones. Dad's not sure, except he picks up a bit of a honey aftertaste. But Dad and I like the ice cream. Hubby doesn't, but then again, he doesn't like a lot of what I make.


If I were attempting to get a more truly honey flavored ice cream, I'd increase the amount of honey and decrease the amount of sugar. That's a big if. Honey can get so cloyingly overpowering so quickly that I'm still not sure how well a honey ice cream would work. As it is, this sweet stuff needs a counterbalance; I shaved bittersweet chocolate over it, which worked nicely. I think it's a fair dessert.

Honey Ice Cream
(adapted from Nigella Lawson, Forever Summer, egg-custard ice cream, pg 224)
  • 2 1/4 cups whole milk
  • 1/4 cup honey
  • 6 egg yolks
  • 7 tbsp granulated sugar
  • 1/2 cup + 2 tbsp heavy cream
In a large saucepan, heat milk and honey, making sure to stir well to incorporate the honey into the milk. Heat until scalded (just before it boils). Remove from heat, cover, and let sit 20 minutes. There really isn't any steeping going on, but I kept this step for a couple reasons: 1, I felt if the honey were heated up, it would mix into the milk better (it did); and 2, I wanted the milk to cool down to the same temperature as before and I wasn't sure what that was.

In a large bowl, beat together the eggs and sugar. Slowly whisk in the warm milk and honey mixture. Rinse the saucepan, then return the mixture to the pan. Fill the bottom few inches of the sink with cold water, in case the custard begins to separate while it cooks. If it beginss to look like it's separating, plunge the pan into the water and whisk like the devil.

Over medium heat and STIRRING CONSTANTLY, cook the mixture until it thickens into a velvety, delicious custard. This should take about 10 minutes. Remove from the heat and transfer to a bowl. Place the bowl in the water and let cool, stirring occasionally.
 
Cover the bowl with plastic wrap and chill in the fridge until chilled completely. Right before you're ready to freeze the ice cream in the ice cream machine, whip the cream until it is thick (but not stiff) and fold it into the custard. Then, follow your ice cream machine's instructions.

Blackberry Peach Crostata

Oh man. This recipe took me for a ride. This is actually my second time making it; the first was a disaster. See, I was baking in an attempt to alleviate a bad mood, but being in a bad mood, I wasn't paying as much attention as was necessary. I ended up doubling the amount of sugar required and the whole things just fell apart. The second time I made the recipe, I expected things to go perfectly, but again, they didn't! I'm having some difficulty with the dough, though I'm not exactly sure what. Possibly that I'm doing by hand what calls for a food processor.

This recipe comes from a great pastry cookbook called The Pastry Queen by a bakery owner in Texas. My aunt and uncle sent it to me as they've always encouraged my culinary interests (and really any other interest I've had). There are tons of recipes I hope to try soon, especially her blackberry pie bars.. mmmm. Hopefully, I'll have better luck than I had with these crostatas!


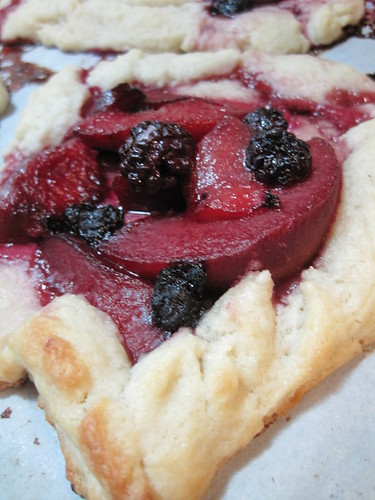
Those peaches look awfully like nectarines don't they, with this dark purplish-pink hue? Yet they are indeed peaches. After my first attempt at crostatas, I tossed all the leftover fruit into one container and the blackberries "dyed" the peaches. I think they're pretty.

Fruit Crostatas
(Rebecca Rather, The Pastry Queen, pg 61-62)
1/2 cup granulated sugar
2 cups all purpose flour
1/4 tsp salt
1 cup chilled butter, cut intot small pieces
4 tbsp ice water
1 cup fruit (do not use strawberries or bananas!)
1/2 cup granulated sugar, for sprinkling over fruit

(These instructions are what I did since I do not have a food processor)

In a large bowl, whisk together 1/2 cup sugar, flour, and salt. Using a pastry cutter, cut in the butter until the mixture is crumbly. Add water 1 tbsp at a time, using the pastry cutter to mix it in after each addition. The dough should being to hold together; at this point, it's ready. Shape the dough into a ball and wrap in palastic wrap. Refrigerate for 1 hour. (You can refrigerate for less time, but it makes the dough more difficult to handle.)

Preheat the oven to 450F. Line a baking sheet with parchment paper or butter it generously.

Divide the dough into 4 equal pieces and roll each into a ball. use your hands to press the dough into 1/4 inch thick rounds on the prepare baking sheet. Each round should be about 6 inches in diameter.

If you are using berries, leave the fruit whole. larger fruits can be left unpeeled, but most be sliced so they can fit neatly in the center of the crostata. Spoon 1/4 cup of the fruit into the center of each round, leaving a 1 1/2 inch border all around the edge. (If using larger fruits, place 3-4 slices of fruit in the center of each crostata.)

Sprinkle the remaining 1/2 cup sugar evenly over the fruit on each crostata. Fold the dough edges toward the center, making 3 separate flaps. With your thumb and forefinger, firmly pinch together the seams between the folds.

Bake the crostatas for 12-14 minutes, until brown around the edges. Cool the crostatas on the baking sheet for no more than 10 minutes or they will be difficult to remove whole. Serve warm or at room temperature.