Tuesday, May 27, 2008

Garlic Parmesean Turkey Burgers; Strawberry Rhubarb Crisp

Firstly, I've been having major headaches and migraines just about every day for the past week and a half, so my posts have been and might continue to be spotty.

Growing up, memorial day was never anything important to me. It was just another bank holiday that might parents might also have off. Perhaps we'd go out on the boat or have a barbeque. I never really thought about what memorial day meant or who it was for. I had no experience with war or veterans or their widows. I knew no people who had died or had loved ones die in wars. Vietnam and Korea were way before my time. And even after the craziness started and hubby earned his veteran's status, I still didn't think about memorial day. For some reason, that changed this year. And I didn't light a candle or say any prayers, but I did spend the day thinking about those of my generation who have died and will die so far from home. And it might seem silly, but in a way, I prepared this meal thinking of them, honoring them in my own little way. Doc Kent. Collinsworth. Myles Sebastien. These are the men that make memorial day mean something to me.

So. I try to keep this blog about cooking, but sometimes things will come through. But now on to the food..

When you think of memorial day, what comes to mind? You can say it.. barbeque.. burgers.. grilled meaty goodness. Well, I lack a grill, but I just wouldn't let that stop me. Mom used to cook burgers on the stove top in her big cast iron skillet (man I need one of those!!) so I used Cathie Cooks Food's recipe for Turkey and Parmesan Turkey Burgers. Sounds tasty, right?


They are super simple and moderately tasty - I usually find things could use a little more kick. Just mix:
1 pound ground turkey
1/4 cup seasoned breadcrumbs
1/4 cup grated Parmesan
1 egg
salt and pepper
2 cloves of garlic, minced
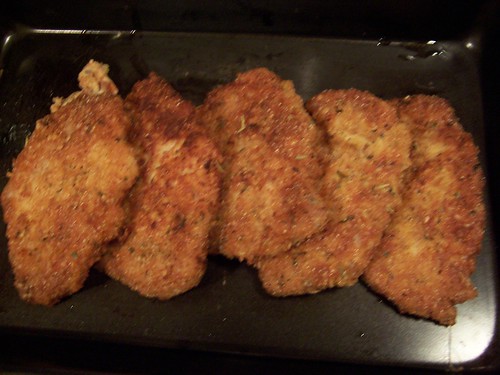
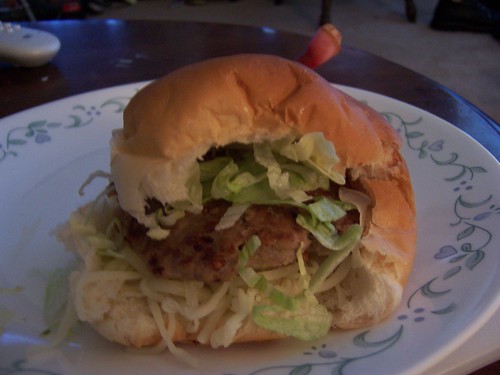
After mixing, form patties. I made 8 thin patties instead of the thicker ones Cathie made. Either grill the burgers for a few minutes each side or heat a very small amount of olive oil in a skillet over medium heat, then cook the burgers for about 4-5 minutes on each side. They should brown nicely.

I thought the burgers would be tasty served with mozzarella. It was. Lettuce was also a nice complement.

To accompany the burgers, I made potato salad (maybe a recipe for that later..I do it all by taste and look) and green beans. Yum.


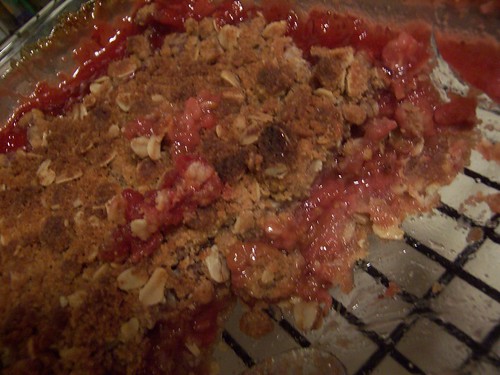
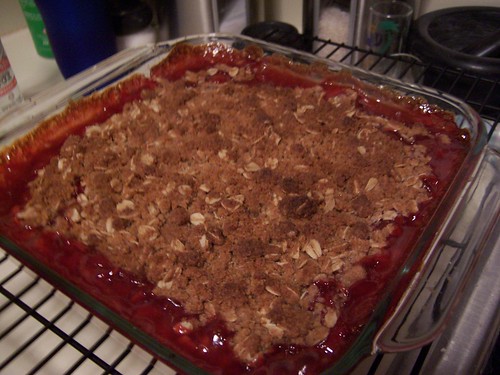
Now, I felt dessert was a must and I had made up my mind to make some strawberry rhubarb crisp. Rhubarb intrigues me and I really wanted to cook with it while I still have the opportunity - I could never find it back home. A TasteSpotting search brought up a recipe for Cardamom scented Rhubarb Strawberry Crisp from half baked. Tasty tasty. Did I mention I'd only had a crisp once before, and it was a bite of a rhubarb crisp that my friend's grandmother had sent her? So I had no experience. Luckily, crisps are easy-peasy.


Strawberry Rhubarb Crisp:
Crisp
1 cup all-purpose flour
1 cup brown sugar, packed
3/4 cup old-fashioned oats
1/4 teaspoon ground ginger
Pinch of salt
1/4 teaspoon ground cinnamon
Pinch of cardamom
1 stick unsalted butter, melted and cooled
Filling
1 pound (4-5 medium stalks) rhubarb, trimmed and peeled
3 tablespoons cornstarch
1/2 cup cold water
3 cups strawberries, hulled and sliced
1 cup sugar
1/4 teaspoon ground ginger

Preheat oven to 350F. Place a 9 inch (or 8 as that's what I have) glass baking dish on a baking sheet lined with parchment paper. This is just in case there are any spills. You wouldn't want delicious strawberry goo all over your oven, would you?

In a large bowl, mix flour, brown sugar, oats, ginger, salt, and cinnamon. Make sure you don't have any clumps of anything. Add melted butter, and stir ingredients until they are thoroughly moistened. Spoon half of the mixture into the pan and press it down to form a crusty base.

Slice the rhubarb into 1/2 inch wide pieces and scatter them across the crisp base. "Dissolve" the cornstarch in the cold water and set aside (note, the cornstarch will not actually dissolve). Combine the strawberries, sugar, and ginger in a medium-large saucepan and crush the berries. Place the pan over medium heat and bring the mixture to a full boil, stirring occasionally.
Give the cornstarch-water mixture a good stir to get it all combined again, then whisk that into the strawberry mixture. Bring back to a boil and boil for about 3 minutes, until it is thick and no longer cloudy. It should be a gorgeous shade of red.
Pour the strawberry mixture over the rhubarb. Sprinkle remaining crisp over the filling.
Bake for 60 minutes or until top is golden and the strawberriness bubbles up on the edges. Place on a rack to cool. Serve warm or at room temperature.

Sunday, May 25, 2008

Blueberry Muffins

Lately there seems to be a good deal of blueberry goodness on TasteSpotting, so when I spied some affordable blueberries at the grocery store, I decided to pick some up. Given a few options, hubby decided on muffins. My prior muffin experience consisted of opening a pouch, mixing in some milk, and baking. Homemade muffin? Heck yeah, I thought. So off I went to find a muffin recipe, having no idea as to what would make a good blueberry muffin. Now, I should let you know that a week or so ago, I had an AMAZING blueberry muffin from the coffee shop next door to my office. It was so light and fluffy and simple that I've craved one ever since. (Have yet to snag another one, though I did get a poppyseed muffin that had the same batter, just different mix-in. poppyseed was also amazing). I ended up using a Martha Stewart recipe from Confessions of the Cookie Jar. Now, I usually scorn Martha Stewart; she irks me in so many ways. But, I discovered the Asparagus Gruyere Tart was a recipe of hers, and so I thought I'd give Martha the benefit of the doubt. Maybe she is as great as people believe. Maybe she can win me over with her blueberry muffins. The tart was a good start. And so I made the Martha Stewart muffins.


Martha has not won me over. I'm writing the tart off as a freak incident, a rare moment when Martha and I align. These muffins were ... okay. Honestly, I prefer the ones from the pouch. My blueberries were a bit tart, but the muffin batter itself just wasn't enough of anything to be remarkable. It was like a muffin you might get in a big muffin pack from a mediocre store's bakery. It really doesn't help things that I still have a strong memory of that delicious, divine muffin of the blueberry gods. Perhaps I'm being too harsh. Are my muffin standards too high? Obviously not if I enjoy the ones from the pouch.

Here's the recipe anyway; maybe it'll rock your socks off.

Blueberry Muffins:
  • 1/2 cup butter, at room temperature
  • 2 cups flour
  • 1 1/2 tsp baking powder
  • 1/2 tsp salt
  • 2 cups fresh blueberries
  • 1 1/4 cup sugar
  • 2 large eggs
  • 2 tsp vanilla extract
  • 1/2 cup milk

Now, the website didn't have any instructions, so I just did the usual baking thing:
Preheat oven to 350F. Grease and lightly flour muffin tin.
Cream butter and sugar until light and fluffy. Beat in eggs and vanilla. Beat in milk.
In separate bowl, whisk together flour, baking powder, and salt.
Add flour mixture to wet mixture; stir until JUST combined.
Lightly coat the blueberries in flour (supposedly this helps them from sinking to the bottom of the muffin. I don't know.) Mix in blueberries. Be careful not to overmix!!
Spoon mixture into muffin tin; don't worry it won't rise too much.
Bake for approximately 20-25 minutes. I watched these babies quite closely. After about 20 minutes, I checked them every few minutes with a toothpick to see if it came out clean. I'd say mine took 25 minutes.

Wednesday, May 21, 2008

Smores Bars

I wasn't aware at the time, but S'mores day happened recently. Thus, there have been quite a few smores recipes on TasteSpotting. After having a dream about baking smores brownies, I decided I just had to make something. I choose this S'more Cookie Bars from Baking Bites. Honestly, I chose them because of the gooey quality of the marshmallow and chocolate, plus the ration of graham to marshmallow to chocolate seemed best.


S'more Cookie Bars
  • 1/2 cup butter, room temperature
  • 1/4 cup brown sugar
  • 1/2 cup sugar
  • 1 large egg
  • 1 tsp vanilla extract
  • 1 1/3 cup flour
  • 3/4 cup graham cracker crumbs
  • 1 tsp baking powder
  • 1/4 tsp salt
  • 2 king-sized chocolate bars - Hershey
  • 1 1/2 cup marshmallow fluff

Preheat oven to 350F. Grease an 8x8 baking dish.

In a large bowl, cream together the butter and sugars. Beat in the egg and vanilla.

In a small bowl, whisk together flour, crumbs, baking powder, and salt. Add to the butter mixture and mix on low speed until combined. It will be kind of clumpy.

Divide dough in two. Press one half into the bottom of the pan. Place the chocolate bars side by side on top of the dough. They should fit just about perfectly in the pan. Spread the marshmallow fluff across the top of the chocolate. This will be difficult. I didn't bother measuring out the fluff, I just used most of the jar. Really, can you have too much marshmallowy goodness?

Place the remaining dough over the top of the marshmallow. It works best if you flatten squares of the dough and lay it over the top, like tiles.

Bake for 30-35 minutes. Let it cool completely before cutting.


This is amazing. The chocolate stays gooey, so it's really like eating a smore. So goooood. And now the solution to smores cravings when there are no fires nearby!

Asparagus Gruyere Tart


Mmmm asparagus and cheese! I found this recipe a while ago and stashed it in my recipes folder for a warmer day. Well, warmer days have arrived finally and out came this tart. Easy, yet delicious. With more skill on my part, it could be quite gorgeous. I'm hoping to have a small dinner party in a few weeks, and this has a good chance of showing up on the menu.

Asparagus Gruyere Tart:
1 sheet frozen puff pastry
2 cups shredded Gruyere (this is about 5-7 oz)
1 to 1 1/2 pounds asparagus
olive oil
salt & pepper

Preheat the oven to 400.
Roll the pastry sheet into a 16X12 rectangle. I take a bit of issue with this exact measurement; roll it out to fit the pan you're using. I used a jelly-roll pan, because that's all I have. Continuing on, once you've got it rolled out to the proper side, trim the edges so they are nice and straight. With a sharp knife, score the dough an inch from the edges to create a rectangle. Use a fork to poke holes every 1/2 inch. Bake for 10-15 minutes. WATCH carefully. Mine baked for 15 minutes while I worked on something else and was so overdone that I had to throw it out and start over. Watch carefully. Cook only until it's lightly golden and slightly puffed.
Once the pastry has cooked a bit, remove it from the oven. Sprinkle the cheese within the scored rectangle. Trim the asparagus to fit the pastry, then lay it alternating tip to end. (See picture).
Brush with olive oil. Sprinkle with salt and ground pepper.
Bake for 20-25 minutes. Again, be careful. I watched mine, focusing on the color of the pastry. Once it was golden, I turned the temperature down to 200F. Once the pastry was dark golden, I removed it. I think I ended up cooking mine for 15 minutes; the asparagus was perfectly tender.

I gave hubby a piece of this to try and he ravaged it, then went back for seconds and took about half the tart. I would almost equate it to a comfort food, what with the pastry and copious cheese. The asparagus makes you think you're being healthy. It's delicious.

Tuesday, May 20, 2008

Spiced Chai Cake

Today, sitting in my little work cubicle, I decided to bake something tasty once I got home. I decided I wanted to work with spices I don't normally use to kind of break away from the same-old. I went a step further and decided to create something all by myself; just come up with it in my head (maybe check the standard measurements for whatever I decided to bake) and go. Jessica from Pictures of Cake and her Rainy Day Golden Apple Cake gave me courage.

I wanted to use cardamom and ginger and cinnamon...CHAI! I love spiced chai and have made some before. It's not an original idea; I've seen recipes for such a thing before. But this was Sarah-specific chai cake. (Can you tell I'm really proud of myself?) I worked out my starting measurements and gave it go.

It's delicious. I love it. I love myself for creating it. It doesn't look like much, but I love it.


Spiced Chai Cake:
  • 1 cup flour
  • 1/4 tsp baking powder
  • pinch salt
  • 1/4 cup butter
  • 1/2 cup granulated sugar
  • 1/2 cup brown sugar - this is NOT packed, just measured out like everything else
  • 2 eggs
  • 1/4 cup honey
  • 1/2 tsp vanilla extract
  • 1/2 heaping tsp cinnamon
  • 1/2 heaping tsp ground cardamom
  • 1/4 heaping tsp ground ginger
  • 1/4 heaping tsp ground cloves
  • 1/4 cup prepared black tea (I steeped a bag of Tazo's Awake for awhile to get a strong cup of tea)

Preheat oven to 350F. Grease a 9 inch cake pan (or any other smaller pan) very well.
Sift together flour, baking powder, salt, cinnamon, cardamom, gloves, and ginger. Mix well. Smell the mixture to get a sense for the balance of spices and to make sure there's enough.
Cream butter and sugars together. Beat in eggs. Add honey and vanilla and mix well.
Add 1/2 of the dry mix and mix well. Add 1/2 of the tea. Mix well. Add the rest of the flour. Mix well. Add the rest of the tea. Mix well. My tea measurement isn't exact; I added approximately 1/4-1/3 a cup. The mixture should have the consistency of .. a cake mixture.
Pour batter into pan. Again, I failed you. I forgot to check the clock when I put the cake in. I'm estimating the bake time at about 20 minutes. Watch it though. It's done when an inserted toothpick comes out clean.

The cake has a strong spiced flavor, which is what I wanted. I can't decide if I should ice it in any way. I can imagine possibly doing a light honey-flavored whipped icing or maybe a slight vanilla. It shouldn't be too sweet or strong or the whole thing will be too much..

I think this would make great cupcakes.

Monday, May 19, 2008

Loaded Potato Pizza


I love baked potatoes. I love pizza. It stands to reason that I would absolutely adore loaded potato pizza. I got the recipe from Vicarious Foodie.

Potato Pizza
Crust:
3 cup bread flour (I used all purpose flour because that's all I have)
1 tsp salt
1 package active dry yeast
1 tbsp vegetable oil
1 cup warm water
Toppings:
12 red potatoes (or the equivalent amount - not number - of other), peeled and chopped
7 cloves garlic, peeled and crushed
4 tbsp butter
3/4 cup heavy whipping cream
salt and pepper

6 strips of bacon
1 yellow onion, thinly sliced
1/4 cup shredded mozzarella cheese
1/4 cup shredded cheddar cheese
1/2 tsp onion salt

Prepare the dough first. Combine flour, salt, and yeast in a large bowl. Mix in water and oil until dough forms a ball. Cover and let rise, at least 30 minutes, while preparing the rest of the ingredients. Preheat oven to 450°F.

Boil the potatoes and garlic in a large pot. Don't put too much water and slightly salt the potatoes. Boil for about 20 minutes or until they potatoes are thoroughly cooked and easily mashable.

While the potatoes are cooking away, fry the bacon until just crisp. As the end result needs to be little pieces of bacon, you can cut the bacon before or after it's cooked. I think it's easier to cut the bacon before, and it cooks more evenly. To precut the bacon, keep the slices together like they are in the package, and just cut thin strips across the gathered bacon. After the bacon is cooked, place it on paper towels to let it drain. Cook the onions in the bacon fat for about 10 minutes or until they're slightly caramelized. Remove the onions from the pan and also let them drain.

Once your potatoes are well cooked, drain them, return them to the pot, and mash them. Add the butter, cream, salt, and pepper. The original recipe says to whip them with a hand-held mixer until they are smooth and creamy, but I didn't do that. Wholly creamy potatoes freak me out a bit.

Roll out the pizza dough. Work it to fit the shape of your pan. Original recipe uses a 12 inch round. I used a 9x11 rectangle. Fit the dough onto your pan. Sprinkle the dough with the onions and then spread the potatoes on top. I found it to work well if I put big dollops of potatoes over the pizza, then spread them out. Don't forget to leave a 1 inch border for your crust. Top with onion powder, cheeses, crumbled bacon. and chives. Salt and pepper to taste.

Bake in preheated over for about 15 minutes. Mine took a lot longer, which is weird.


So my main problem with this was that it didn't feel like a combined dish. I felt like I was eating mashed potatoes on top of bread; there wasn't any cohesion. I think some sort of sour cream "pizza" sauce would have helped to bring the two aspects together.

Portuguese Sweet Bread


I love fresh, slightly sweet bread, so this Portuguese Sweet Bread seemed like the perfect recipe to try. My bread didn't come out as pretty or fluffy but it was still a tasty sweet bread that hit the spot. It's a good, easy bread to have in your recipe collection.

Portuguese Sweet Bread:
  • (I halved the original recipe, so double this for 2 loaves)
  • 1 package yeast
  • 1/2 cup + 1/2 tsp sugar
  • 1/4 cup warm water
  • 1/4 cup butter, softened
  • 1/4 cup warm milk
  • 2 eggs
  • 1 1/2 tsp salt
  • 2 1/4 cup flour

Combine yeast, 1/2 tsp sugar, and water. Let proof. Now, if you don't know what that means (like I didn't) basically, your yeast is going to activate and get all poofy.
In a small bowl, mix butter, milk, and sugar. Add to yeast mixture and stir.
Okay. It's going to get a little weird here where I halved the recipe. In a small container, slightly beat the 2 eggs. Add 3/4 of the beaten-eggness to the mixture, reserving the final 1/4 for an egg wash. Add salt and mix well.
Add flour 1/2 cup at a time. Turn onto a well-floured surface and knead for about 10 minutes. Shape the dough into a ball and place in well buttered bowl. Cover and set in a warm place until doubled. This took quite awhile for me.. More than the usual time.
Once your dough has risen sufficiently, punch it down. Shape into a ball and place on a buttered sheet, or shape it into a roll and place in a buttered loaf pan. Cover and let rise until doubled again. Brush top with the remaining egg and bake at 350F for 30 minutes or until it sounds hollow when tapped.

Wednesday, May 7, 2008

Rainy Day Golden Apple Cake

By now I hope you assume most recipes I find are through TasteSpotting. This time it brought me to Pictures of Cake and her self-concocted Rainy Day Golden Apple Cake. I'm not cool, so I don't have 5 inch cake pans, but other than that I stuck with recipe. It was very simple.


  • 1 medium Golden Delicious apple
  • 1 tbsp diced unsalted butter
  • 1/2 tsp brown sugar
  • 2 tbsp softened unsalted butter
  • 1/4 cup + 1 tbsp packed brown sugar
  • 2 eggs
  • 1/8 cup heavy cream
  • 1/2 tsp vanilla
  • zest of 1 lemon
  • 1/2 cup + 1 tbsp flour
  • 1/4 tsp baking powder
  • pinch of salt

Preheat oven to 350F. Butter a 5 (or 9) inch cake pan. Line the bottom with parchment paper. Butter that as well.
Thinly slice the apple. I did so using the mandolin slicer. Line the pan with apples, overlapping slices. Make it pretty because this will be the top of your cake.
Spread the butter bits and 1/4 tsp brown sugar over the apples.
Cream the rest of the butter and brown sugar. In a separate bowl, whisk together the eggs, cream, and vanilla extract.
Stir egg mixture into butter/sugar mixture. Mix well.
In another bowl, sift together flour, baking powder, and salt. Mix into sugar mixture. Mix until no dry spots remain.
Pour batter on top of apples. Bake for 30 minutes. Let cool 5 minutes before running a knife along the edges and turning the cake out of the pan to cool completely.
It is advised to serve this with cream. Good either warm or cool.

This is a simple, pretty cake. If I made this again, I don't think I'd add the lemon zest, and I'd spice up the batter some more.

Also, the cake had a bunch of weird air pockets. Perhaps I did not mix well enough?

Easy Italian Mac


Sitting in the laundromat the other night waiting for a month's worth of laundry to dry, I was flipping through a Better Homes and Garden and found this recipe. Now, I'm usually a pretty straight-laced kid, but I - carefully - tore the recipe out of the magazine and slipped it into my purse. I'm not sure what's worse, that I'm a thief or that I'm stealing recipes.. It was worth the thievery though. Quite worth it. The peas really make the dish, which is surprising to me because I still seem to have a 5 year old's idea of peas. Love them though. Nice sweet vegetable goodies.

OH! Shopping for the groceries for dinner tonight, I discovered my local store does now carry mascarpone and gruyere and other tasty things I couldn't previously find. YAY!

Easy Italian Mac
:
8 oz bowtie pasta
1 fennel bulb, trimmed and chopped into 1 inch strips
8 oz asparagus spears, woody portions removed and cut into 1 inch strips
1 tbsp butter
1 tbsp olive oil
1 clove garlic, minced
1/2 cup mascarpone
1/2 cup shredded mozzarella
1/2 cup finely shredded Romano
1 cup frozen peas, thawed
Salt and pepper to taste
1 tbsp finely chopped fresh parsley (I omitted this)

Cook the pasta. Reserve 1/2 cup of the water, then drain. Set pasta aside.
In a large skillet, melt butter and olive oil. Add asparagus and fennel, stirring occasionally. Cook 5-7 minutes or until nearly tender. Add garlic and cook for an additional minute.


Add pasta, mascarpone, and reserved pasta water to skillet. Stir well. Add remaining cheese and peas. Season with salt and pepper. Stir well.


I initially planned to serve this with grilled chicken strips, but decided to surprise hubby and serve it with scallops. Living in the midwest, I had to use frozen ones, but oh well. I just pan seared them after lightly salting and peppering them. They were nice and sweet; hubby said they were cooked just right.

We have plenty of leftovers, which means I have tasty lunch for work tomorrow. This dish is nice because it has a very definite cheesy taste, but it isn't overwhelming. Nothing is coated in sauce, and the veggies give it a nice, crisp flavor. We both really enjoyed it.

Tuesday, May 6, 2008

Tomato Basil Pasta Salad

Do you ever have really vivid taste memories? For years, I'd have moments where I could taste a fruity candy I ate as a 4 year old..

A few marvelous summers in my childhood, I spent a week with my aunt and uncle in Austin, Texas. They are responsible for first widening my culinary scope; they fed me weird foods and let me play around in their kitchen. I cooked before then, but their kitchen seemed magical, probably because I saw them so little and it was just us (meaning I got all the attention). Looking back, they spoiled me. I loved it. They took my joy of kitchen and made it just a bit more.

But anyhoo... one time my aunt and I made this light pasta salad-ish dish. At the amazing Central Market, we had purchased some cute flower-shaped pasta. We basically cooked the pasta, drained it, then tossed it olive oil, tomatoes, and fresh basil. Salted to taste. (I believe. My memory is a little fuzzy, but that seems to be the correct taste combination).

After a few days of craving this, I decided it would go well with the pork milanese. I couldn't find the right pasta, so I just used orzo, which I couldn't drain well..


I ate this warm; Aunt Nan and I had it chilled. I loved it; it brought back such great memories.

By the way, I found the flower shaped pasta at a Mexican market I happened across after eating at the Indian place in town. We went in on a whim and I found not only the pasta, but fairly priced star anise AND a Mexican Coca Cola, made with actual sugar.

Pork Milanese


One day after class, I was watching Everyday Italian. Giada made breaded porkchops, which looked pretty darn tasty. I decided to give it a try. It is very simple.

You're going to need seasoned bread crumbs. Giada said ones from the store are fine, but why use something someone else has seasoned? They aren't you. They don't know your tastes. I say pshaw to preseasoned bread crumbs. I seasoned mine with: garlic and onion powders, salt, pepper, parsley flakes, oregano, and a bit of dried rosemary. Again, you know what spices you like, so do whatever floats your boat.

You'll also need thin cut pork chops. I got a breakfast cut because they were the thinnest I could find. I felt it was a poor cut of meat as I had to cut out the bone and get rid of a good portion of fat. The thinness was great; the rest was not.

Now, in separate bowls have 3/4 cup flour (seasoned with salt and pepper) and then 2 beaten eggs.

Heat some vegetable oil - Giada said olive oil was too strongly flavored for this dish - in a large skillet.

Now it's time to start the "assembly line". First, coat the porkchop in flour, then dip it in the eggs. Coat the chop in breadcrumbs, then place in the skillet. Repeat. Cook, about 5 minutes for each side. Remove from pan once cooked through.

Giada had a lemon-caper cream sauce to go along with these, but hubby is not a fan of capers. I instead served them with a dill sauce I picked up the store.

This recipe would only work with thinly cut pork chops, and man did it work. A lot of that has to do with the seasonings, but the seasoning to meat ration worked really nicely.

Mama Sarah's Spaghetti

Mmm spaghetti.. Who doesn't love it? Growing up, we never had spaghetti sauce from a jar; it wasn't even a consideration. If I hadn't seen commercials for Ragu, I might not have even been aware there was such a thing as store bought spaghetti sauce. My mom's spaghetti sauce was also so wonderful; complex, with both a spicy kick and mellow sweetness. As I began to cook more and more, I started to tweak the recipe. I LOVE basil and have a spice-sensitive palate, so you can imagine the direction I took. So, tonight we have:

Not Quite Mama's, Not Quite Mama Sarah's Spaghetti Sauce
1 lb ground beef 93% lean. You can also use turkey. Or pork. .. 1 lb ground meat
1 can tomato sauce
1 can tomato paste
1 can stewed tomatoes OR a few coarsely chopped fresh tomatoes
1 medium onion, chopped; I like big onion chunks
2-3 cloves garlic, minced
2 tbsp sugar
2-3 tbsp dried basil or a handful of fresh basil, chopped
salt and pepper to taste
*Mom adds a tsp of chili powder and uses rotel instead of stewed potatoes. She only uses 1 tsp each of basil and sugar.

Brown your ground meat in a pot. Add onions and garlic and cook for a moment or two.
Add tomato sauce, paste, and stewed tomatoes. Add all the seasonings. Bring to a boil.
You can eat the sauce immediately, but it's much better if it simmers for awhile. If you simmer it, make sure to cover it. Sometimes, I'd set the sauce to simmer around 4:30 or 5 to eat at 6-7. Sneak frequent tastes if you simmer it for awhile.... just to make sure the flavor is right .. yeah ..

Honestly, I'll eat this sauce plain; noodles are not necessary.

Brownie Disappointment

So yesterday was iffy and I really wanted to bake something. Something chocolatey. My first choice - a marbled pound cake - required more time than I had before I had to return to work, so I decided on brownies. Yes, I made brownies a few days ago for Amanda's birthday. And at that point, I wasn't fully satisfied with them. I wanted a brownier brownie. And so I attempted the Katherine Hepburn Brownies.


I'm not posting the recipe myself. You can follow the link. They are waaaay too sweet and chocolatey. I know, I know. Brownies are meant to be sweet and chocolatey, but not this much. They caused my face to scrunch. I like the idea; the chocolate chunks melted into gooey bits of wonderful (see above picture), but the entire thing just was too much. Sad times, right?

In other news, I've finally gotten up-to-date on TasteSpotting. YAY!

Saturday, May 3, 2008

Belgian Raspberry Brownies with Truffle Ganache


I love this picture. It's pretty. ... Moving on. Amanda sent me this recipe a week or so again, and I decided to make these brownies for her birthday. Sadly, a car snafu has prevented her from picking up her delicious birthday present, but that's okay; her birthday isn't for another 45 minutes. As a responsible chef, I have tasted the end product, and I can verify that they are pretty tasty. Hubby and I each have our own issues with them: I feel the brownies are a bit too dry, and hubby feels they are a bit too bitter, at least the chocolate aftertaste is. That's not to say we didn't both heartily enjoy our little brownies. We did. Hopefully, Amanda does too.

Belgian Truffle Brownies with Truffle Ganache
1/2 cup unsalted butter
1/2 cup raspberry beer - I couldn't find any, so I used Leinenliugel's Berry Weiss.
1/4 cup seedless raspberry preserves - again, I could not find this so I used seedless raspberry jam. I felt the seedlessness was important
5 oz coarsely chopped bittersweet chocolate
1 cup flour
1/3 cup Hershey Special Dark Cocoa Powder
1/4 tsp salt
2/3 cup granulated sugar
1/3 cup packed brown sugar
2 large eggs
1 tsp vanilla extract
Ganache:
1 tbsp unsalted butter
2 tbsp heavy cream
5 oz coarsely chopped dark chocolate truffles - Lindt

Preheat the oven to 375F. Line an 8x11 baking dish with foil and coat with cooking spray.
Melt 1/2 cup butter in a small saucepan over medium heat; stir in beer and preserves. When the mixture starts to boil, turn off the heat and stir in the bittersweet chocolate until it is melted and well combined. Set aside.
In a medium bowl, sift the flour, cocoa powder, and salt.
In a large bowl, beat the sugars, eggs, and vanilla extract on high for 3 minutes. Reduce the speed to low and beat in the warm chocolate mixture until they are well combined. Stir in the flour mixture until just combined.
Pour batter into a pan; spread even. Bake at 375F for 20-25 minutes or until set (toothpick comes out clean). Gently place the baking dish into a larger dish filled with ice water. Let sit until the brownies are cool. (I thought this was odd, but whatever. It did quickly cool the brownies).
On medium heat, melt 1 tbsp butter. Stir in the cream. When the mixture starts to bubble, reduce the heat to low. Stir in the truffles until they are melted and smooth. Pour over brownies; smooth evenly across. Place brownies in the freezer for 15 minutes, or until the ganache is set.
Lift out the foil (and brownies). Slice into bars; they will slice very easily.
I topped each brownie with a raspberry.

So here we are. Tasty brownies. OH! During the baking of these brownies, I discovered the first beer I can tolerate drinking! The Berry Weiss was pretty tasty as far as beer goes.

"Black Lacquer" Chicken


So my chicken didn't really turn out black and lacquered, but it was still pretty damn delicious. The sauce is sweet with a hint of savory. The meat itself was so tender, it was falling apart. To boot, this dish was quite easy to make.

Black Lacquer Chicken
4 lbs chicken thighs and drumsticks (4 pounds seems like a lot, but don't forget the weight of the bones. I probably ended up with 3.5 lbs. I just got a standard pack each of thighs and drumsticks)
5 large cloves garlic, minced
1 cup teriyaki sauce
1/2 cup honey
1/2 cup sake
1/2 cup orange juice
1/4 cup finely minced ginger, either fresh or candied (I used fresh)

Preheat oven to 400F. Line a roasting pan (or glass baking dish) with foil and arrange chicken in a single layer.
Mix the ingredients, other than the chicken obviously, until they are well combined.
Pour the mixture over the chicken and bake for one hour. I had a little sauce left over; it's okay.
After an hour, raise the heat to 450F. Turn the pieces over and baste with the sauce. Bake for an additional 30 minutes. Caution, check your meat during this final stage to make sure it doesn't burn.

Voila! You have delicious, sweet, (american) asian chicken. I served it with plain rice and steamed broccoli and onions since I expected the sauce to be really strong. It wasn't so much, but it was still good to eat the rice with a bit of sauce and chicken. And who doesn't like steamed veggies?